
Advanced Scan Settings
Advanced Scan Settings are optional. After filling in all the desired information, select Next. You can also choose to skip the step by selecting the Skip link.
Scan Scope
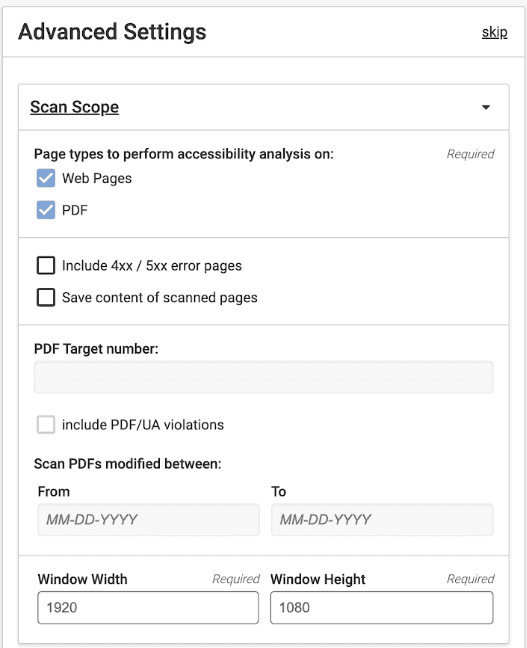
You can scan either webpages, PDFs, or both.
- Select the desired option(s).
- Select Include error pages option to test for accessibility issues on 400 and 500 error pages.
- Select Save content of scanned pages option to display the full rendered HTML in all page results.
- Set PDF options when scanning for PDFs.
- PDF target number: Enter a number to limit the PDFs returned in your results. Leaving this blank will return PDFs and web pages according to the scan size in Basic Settings. Specifying a PDF target number may be the scan duration.
- Include PDF/UA violations: PDF/UA standards are used when following ISO procedures, providing aditional checks for PDF accessibility and usability.
- Scan PDFs modified between: Specify a date range in MM-DD-YYYY format to scan only PDFs that were last modified according to the range. This allows you to control whether outdated PDFs are included in your testing results.
- Define viewport settings to scan for desktop, tablet, and mobile-responsive sites.
Note: It is mandatory to fill in all the fields.
- Enter Window width in px (default set to 1920).
- Enter Window height in px (default set to 1080).
Starting a Session
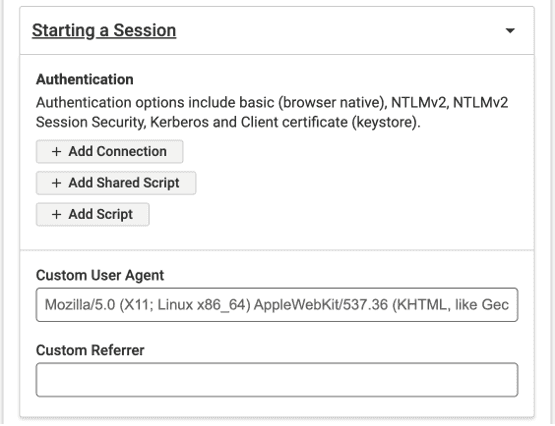
Authentication options include Basic, NTLM, Kerberos, and Client Certificates. Other authentication types are also supported with scripting.
Basic, NTLM, Kerberos, or Client Certificates
- Select Add Connection.
- Select your authentication type from the Select authentication type. The available options are:
-
Basic
-
NTLM
-
Kerberos
-
Client Certificates
- If you select Client Certificates option, then from the Keystore type drop-down, select either Java (JKS) or PKCS12.
- Click Upload Keystore file to upload the keystore file. This should include the public and private certificate, and be in either JKS or PKCS12 format.
- Enter your username and password in the Keystore Password field and click Save.
- Click Next to save or Cancel to return to Advanced Settings.
Custom User Agent and Referrer
Enter a Custom User Agent if you need a user agent string sent in the request headers during the scan. In some cases, developers may release different versions of the site based on the custom user agent type. This setting allows you to specify which site to scan. This capability is useful for testing a mobile or tablet version of your site.
Enter a Custom Referrer if your site requires a redirect to be scanned. Sometimes, specifying a referrer is required for security purposes, and the scanning tool will need to include referrer information in the URLs it scans. Other times, the page content that displays may depend on the referrer page. Use this field to change the default referrer set in the request headers.
URL Scope

-
Limit scanning to specific domains: (Mandatory) This restricts the scan to the domain and any subdirectories under it. Entering the domain name restricts the spidering further than just the domain(s). For example, if you enter a domain like deque.com, the scan will be restricted to the domain and will not follow links to any parts of the domain. This ensures that only trusted domains can be granted permissions.
-
Create separate results for pages with these URL parameters: Enter URL parameters to include while scanning the website to generate distinct results for the pages. These parameters, also known as query strings or URL query parameters, help filter and organize content or implement tracking and identify unique pages.
-
Consolidate results for pages with these URL parameters: Enter URL parameters to exclude during the website scan.
-
Consolidate page results for all URL fragment identifiers: Select this checkbox to exclude all URL parameters during the website scan. Doing so will disables the previous two fields. URL fragments are used to identify specific portions of a page.
-
Restrict to folder of scan URL: Select this checkbox to limit the scan to the folder. By default, this optoin is not selected.
-
Skip Specific URLs: Select this checkbox to skip pages with any URL fragment. The URL fragment identifier helps you identify a portion of the page. By default, this option is not selected.
-
Enable inclusion/exclusion rules: Select this checkbox to add rules that let axe Monitor include or exclude file extensions and URLs from your scan. Enter one keyword, phrase, or extension per line in the fields that appear. Use quotes around phrases or keywords if you want them to be identified from page content instead of the URL. We recommend you choose only one type of inclusion/exclusion rule.
Optimization

Add wait time before scanning each page: Select this checkbox to extend the amount of time that axe Monitor should wait before scanning each page. This setting is useful if you have pages that take a long time to load.
Pre-scan wait time (in milliseconds): The default value is 0 milliseconds. Enter a numeric value (in milliseconds) to convey axe Monitor application to wait before it starts the webpage scan.
Scan pages while dynamic content is active: Select this checkbox for the scan engine to consider the page loaded when the ready state of the document is set to interactive (as opposed to complete, which is the system's default behavior).
WARNING: This option is experimental and should be used only when it is necessary.
Priority: Select the desired option from the Priority drop-down to prioritize specific scans to complete sooner or later. The available options are High, Medium, and Low.
A high-priority scan will be allocated twice the available resources of a medium-priority scan. A medium-priority scan will be allocated twice the available resources of a low-priority scan.