
Axe Assistant on Slack
Axe Assistant on Slack
Your 24/7 Accessibility Expert in Slack
Unlike ordinary AI tools, Axe Assistant is refined through Deque University's world-class curriculum and an unparalleled accessibility knowledge base – offering guidance grounded in true expertise. Each insight, suggestion, and line of guidance is rooted in decades of accessibility leadership and a deep understanding of WCAG compliance. Gain instant, expert guidance on WCAG compliance, accessible code, and industry best practices within your everyday workspace. Trusted by teams building accessible experiences:
- Developers
- Designers
- QA teams
- Program Managers
- Any digital content creators
Learn how Axe Assistant simplifies accessibility compliance:
What You Can Do with Axe Assistant
Get Expert Answers Instantly: Ask questions about WCAG compliance, accessible code patterns, or implementation guidance and get accurate responses based on Deque's training materials.
Learn Best Practices: Get the up-to-date guidance on building accessible experiences from using semantic HTML and ARIA effectively to testing with screen readers.
Code Implementation Guidance: Get ready-to-use code examples for building accessible components in your preferred frameworks and technologies.
Round-the-Clock Support: Forget office hours and endless documentation searches. Get instant accessibility help, 24/7.
Navigate the Deque Product Ecosystem: Get guidance on choosing, installing, and configuring Deque products for your organization. Troubleshoot technical issues, understand product capabilities, and learn how different tools work together to support your accessibility testing workflow.
Purchase
You can customize and purchase plans based on your enterprise needs. Please contact the Help Desk for purchase inquiries.
Managing Users (if using user based licensing)
If your subscription uses user based licensing, instructions on how to add users can be found at the Axe Account Portal User Management Documentation.
Before You Install
- You must have an active, paid Axe Assistant subscription. Contact the Help Desk for purchase inquiries.
- Slack administrator privileges to install the app.
- A Slack workspace where you want to install Axe Assistant.
Installing Axe Assistant
This section allows you to install Axe Assistant in the Slack application.
To install Axe Assistant
-
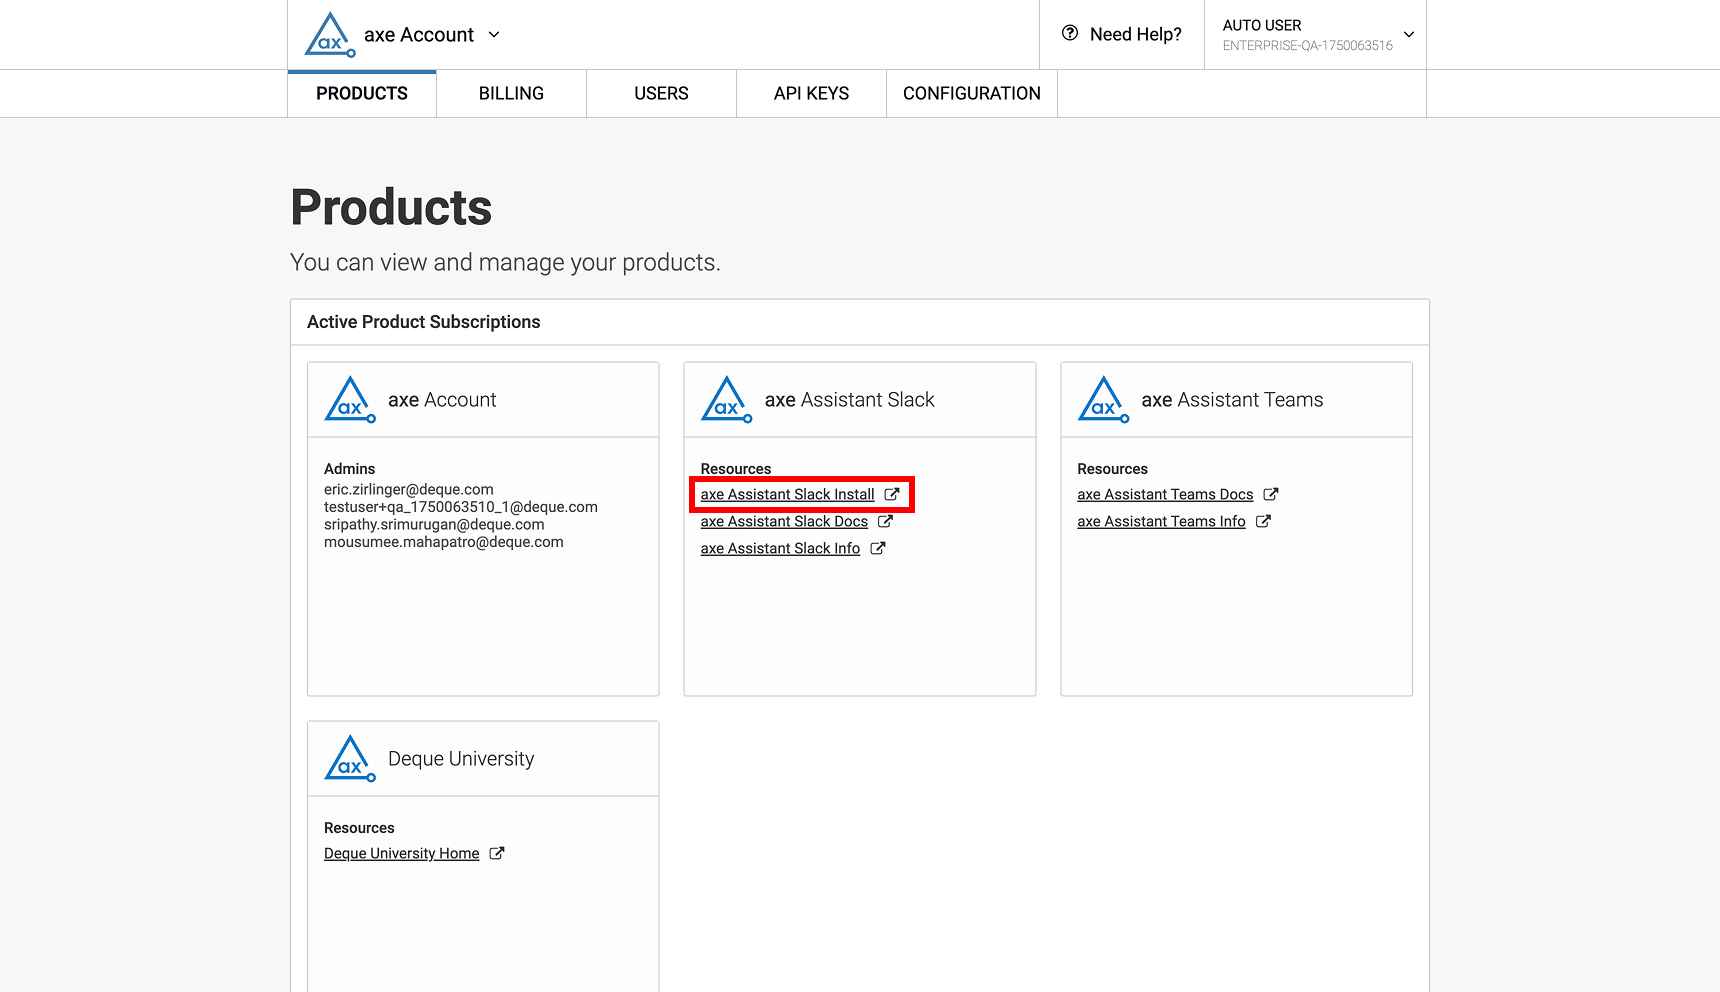
Open a new browser window and then type the URL https://axe.deque.com of the application in the address bar and click Enter. The Axe Account home page is displayed.
-
Click the Axe Assistant Slack Install link under the Axe Assistant Slack product card. The Slack home page is displayed.
-
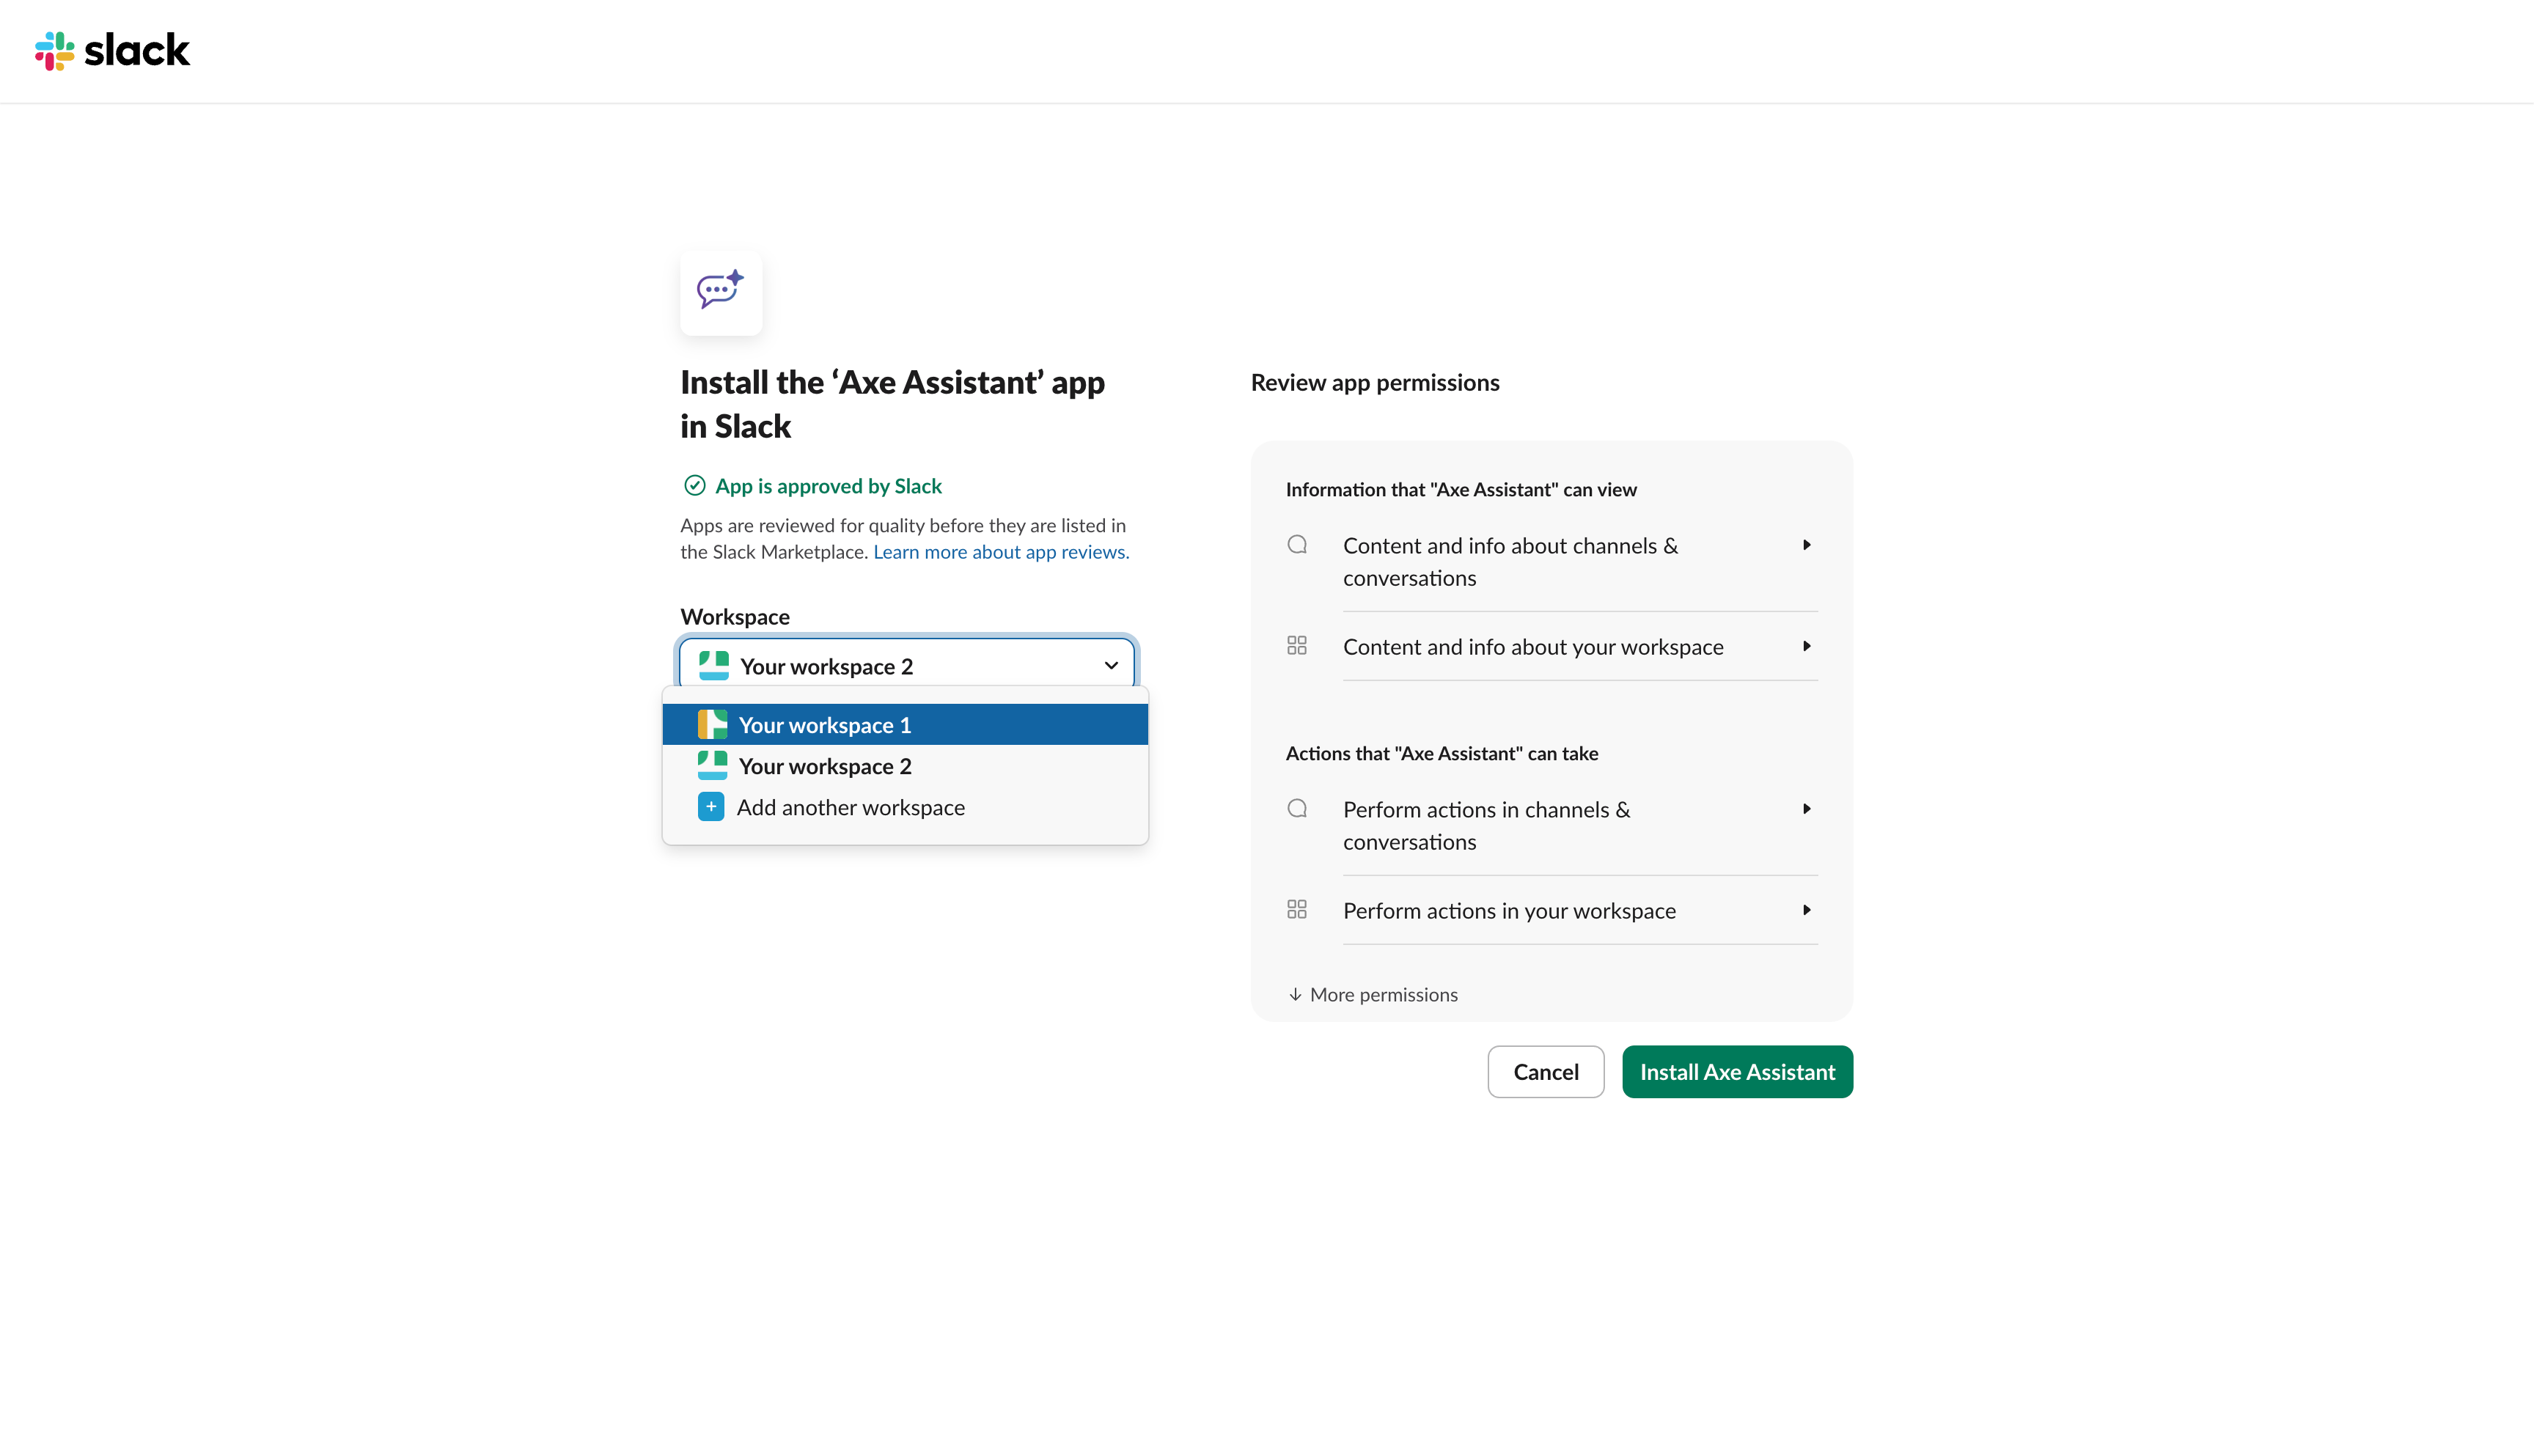
Slack administrators can install the Axe Assistant app without submitting the installation request.
-
On the left side below the App reviews link there is a drop-down to select your organisation's Slack workspace. By default, a workspace is pre-selected. Ensure that you are a member of the selected workspace, or select the specific workspace where you wish to add the app.
-
Note: Axe Assistant can be installed only in a workspace at a time. To install in multiple workspaces, follow the installation process for each workspace.
-
-
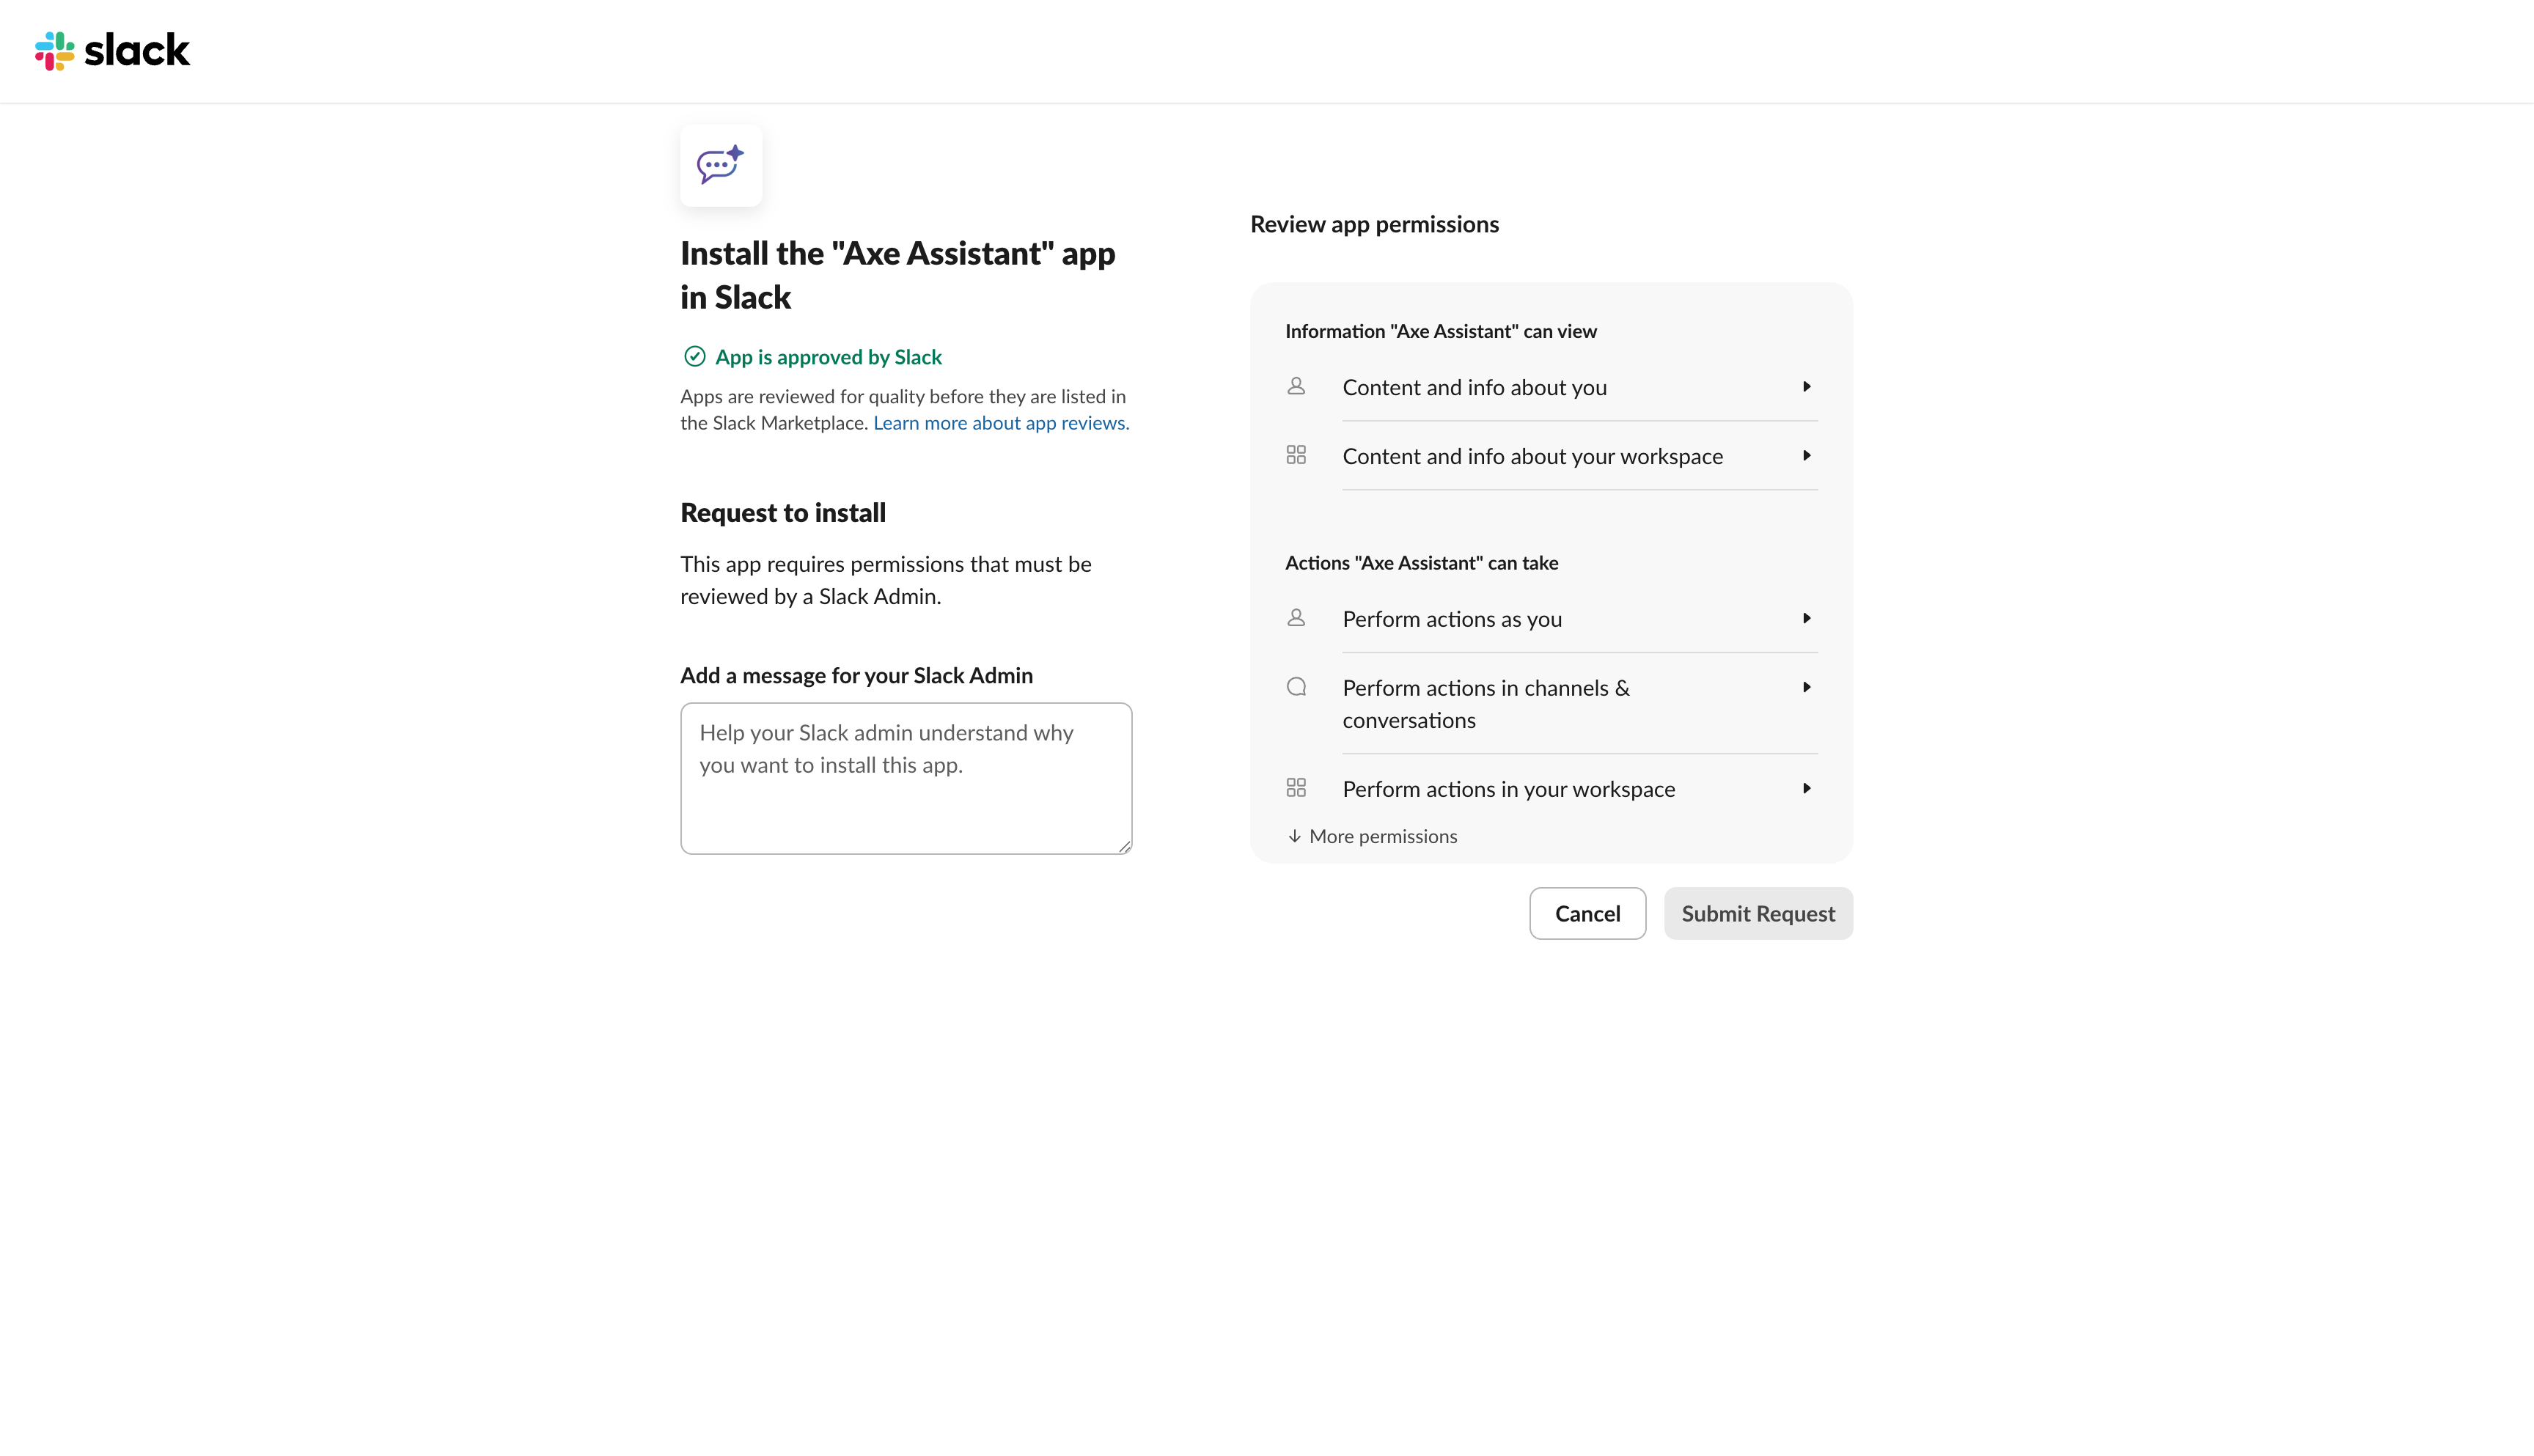
Users without admin privileges must submit an installation request, which will then be approved by administrators.
-
Review Permissions: For both users there will be a section called "Review app permissions", you can view the permissions granted in your workspace.
-
Read the terms and conditions and then click Allow. You will be redirected to your team's Slack workspace, where Slackbot displays the newly added Axe Assistant app.
Enterprise grid users (who access its network of shared computing resources) should ensure to select the correct workspace in the Slackbot. If an incorrect workspace is selected, then they will receive an error message about the subscription status.
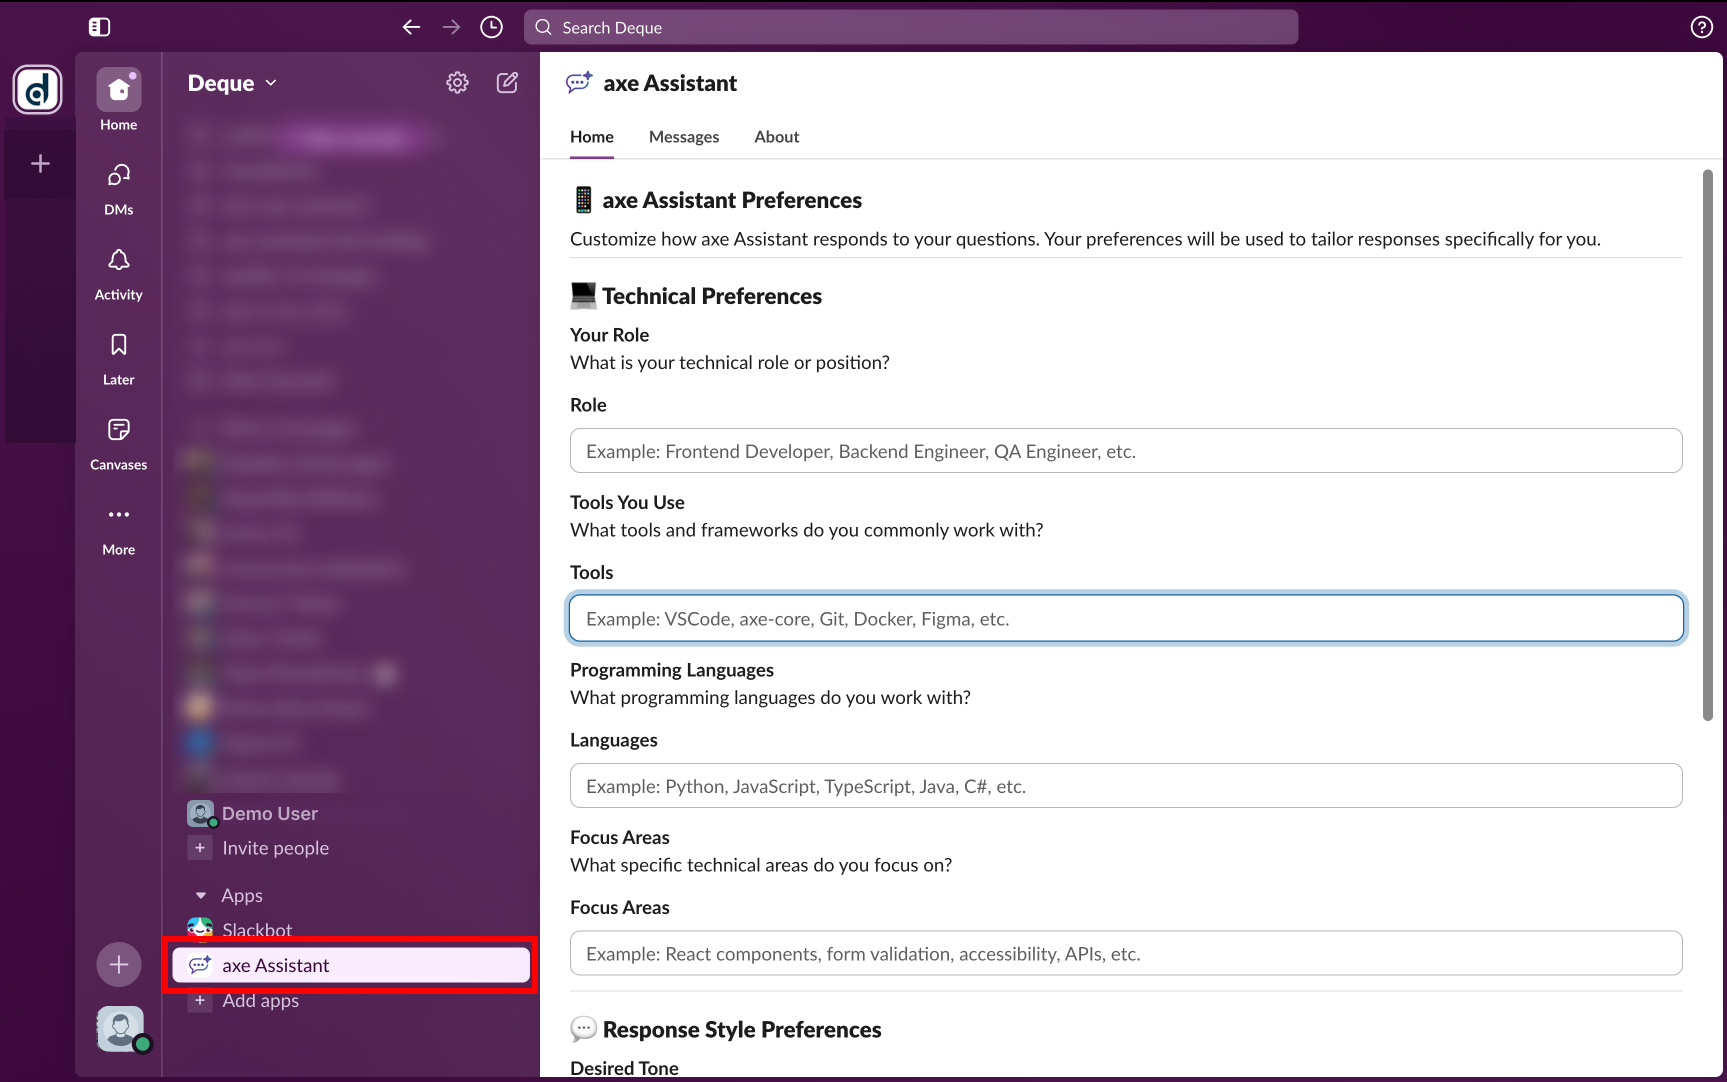
You’re all set! Axe Assistant will greet you with a welcome message to help you begin your accessibility journey.
Getting Started with Axe Assistant
Once installed, you can interact with Axe Assistant in three ways:
- Direct Message: Start a private conversation with Axe Assistant for one-on-one accessibility guidance.
- Group Direct Message: Add Axe Assistant when creating a group direct message to share accessibility guidance with multiple team members at once. Note: You cannot add Axe Assistant to existing private conversations.
- Channels: Mention @axe Assistant in any Slack channel. Slackbot will prompt you to add Axe Assistant to that channel, making accessibility expertise available to everyone in the channel.
Notes:
- You cannot use @yourself in the chat.
- You cannot add @axe Assistant to existing private DMs (it cannot be added to conversations that already exist).
Ask Your Accessibility Questions
Ask your accessibility questions in plain language and get expert guidance immediately.
Example questions:
- What's the correct ARIA role for a modal dialog?
- How do I make a custom dropdown accessible?
- What are the WCAG requirements for form labels?
Your Privacy Matters
Axe Assistant does not collect, store, or share personal data, nor does it use the service in any way that collects, stores, or shares such data.