
Android Accessibility Testing in Android Studio
Axe DevTools Mobile Analyzer enables accessibility testing on any Android application built with any technology.
Requires:
- Android Studio
- App to test running API 26 or higher
- App to test installed on a physical device or emulator
- Axe DevTools Mobile API key
- Axe Developer Hub Project ID
The instructions below assume your Android Studio environment is already set up. If you are new to Android Studio, check out this introductory guide to get set up for app development.
Get Started
Let's walk through the first-time setup for accessibility testing using Axe DevTools Mobile Analyzer Project in Android Studio.
1. Create an Axe Developer Hub Project for Your Results
-
Visit Axe Developer Hub
-
Click the + Add new project button to create a new Axe Developer Hub project.
-
After adding a new project, you will pick an integration method for gathering accessibility data. Select the Axe DevTools Mobile Analyzer integration.
-
The next step is to name your project. We recommend including your repository or test suite name for easy reference. After entering a Project Name, select Next.
-
Once your project is successfully created, you'll see installation instructions. Copy the Project ID for installation. The Project ID will also be available from the main Projects page in Axe Developer Hub, if you need to access it later.
2. Download the Axe DevTools Mobile Analyzer Project from Deque's Artifactory
-
Log in to Deque's Artifactory: agora.dequecloud.com
Note: When the page loads, do not search for a package. Return to this page and move on to the next step. -
Click this link to download the Axe DevTools Mobile Analyzer project: axe-devtools-android-uiautomator-v0.10.0.zip
If the file doesn't automatically start downloading, click the download button next to "URL to file" from the Agora site.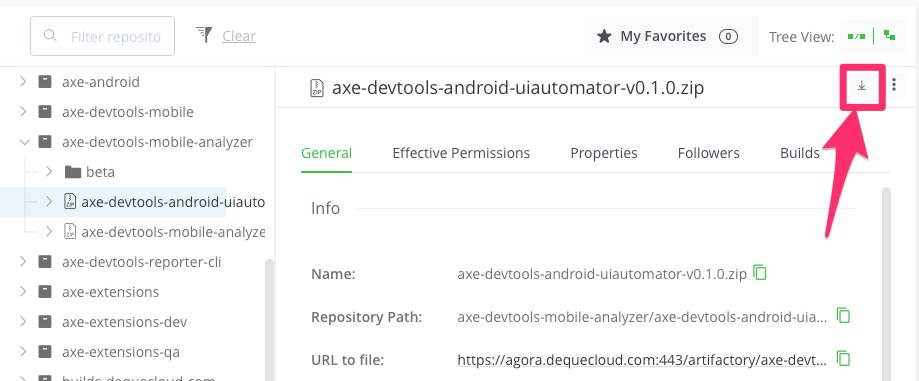
-
Once the zip file is finished downloading, extract the files to the desired location on your computer.
-
Open the root folder in Android Studio by selecting
File→Openand selecting the project's folder.
3. Set Up the Project
-
From Android Studio, in the project navigator pane, expand
app/src/androidTest/java/com/deque/mobile/axedevtoolsandroiduiautomator. -
Double-click the file
RunScanto open it. -
Replace the text "YOUR_API_KEY_HERE" with your Axe DevTools Mobile API key.
-
Replace the text "YOUR_PROJECT_ID_HERE" with your Axe Developer Hub Project ID
4. Prepare Your Device / Emulator
- To run a scan, your Device or Emulator should be connected to Android Studio. If running a device, you'll need to enable Developer settings.
- Next, the app you'd like to test must be installed on the emulator/device and running at the time of the scan. If you have access to the source code, you can run the app on an Android Emulator, or a physical device directly.
5. Run an Accessibility Scan
-
With the app running, select the green double-arrow icon next to
RunScan. This will kick off the accessibility scan against the app that is running. -
You can find your scan in Axe Developer Hub.
Repeat this for each screen you want to test.
We are transitioning to Axe Developer Hub as the central location for viewing and managing accessibility issues. Starting in Analyzer Project v0.6.0, results only go to Axe Developer Hub. Legacy results may be posted both to the Mobile Dashboard and Axe Developer Hub.
You're Done!
Congratulations, you've successfully set up Axe DevTools Mobile Analyzer. Visit Axe Developer Hub to see your scans.
Questions? Visit Frequently Asked Questions