
Presets
Presets allow axe Monitor admins to create a settings template, and apply that single template to several scans or scan groups.
- There are no limits to the number of presets you can create.
- You can apply a preset to any number of scan or scan groups.
- A scan can only have one preset.
- When a preset option is left blank, that setting will be editable on scans with the preset.
Create a Preset
- On the Admin page, under Admin Options, select “Presets.”
- Select the “+ New Preset” button.

The Preset form has 4 steps: General, Common Components, Advanced Settings, and Review.
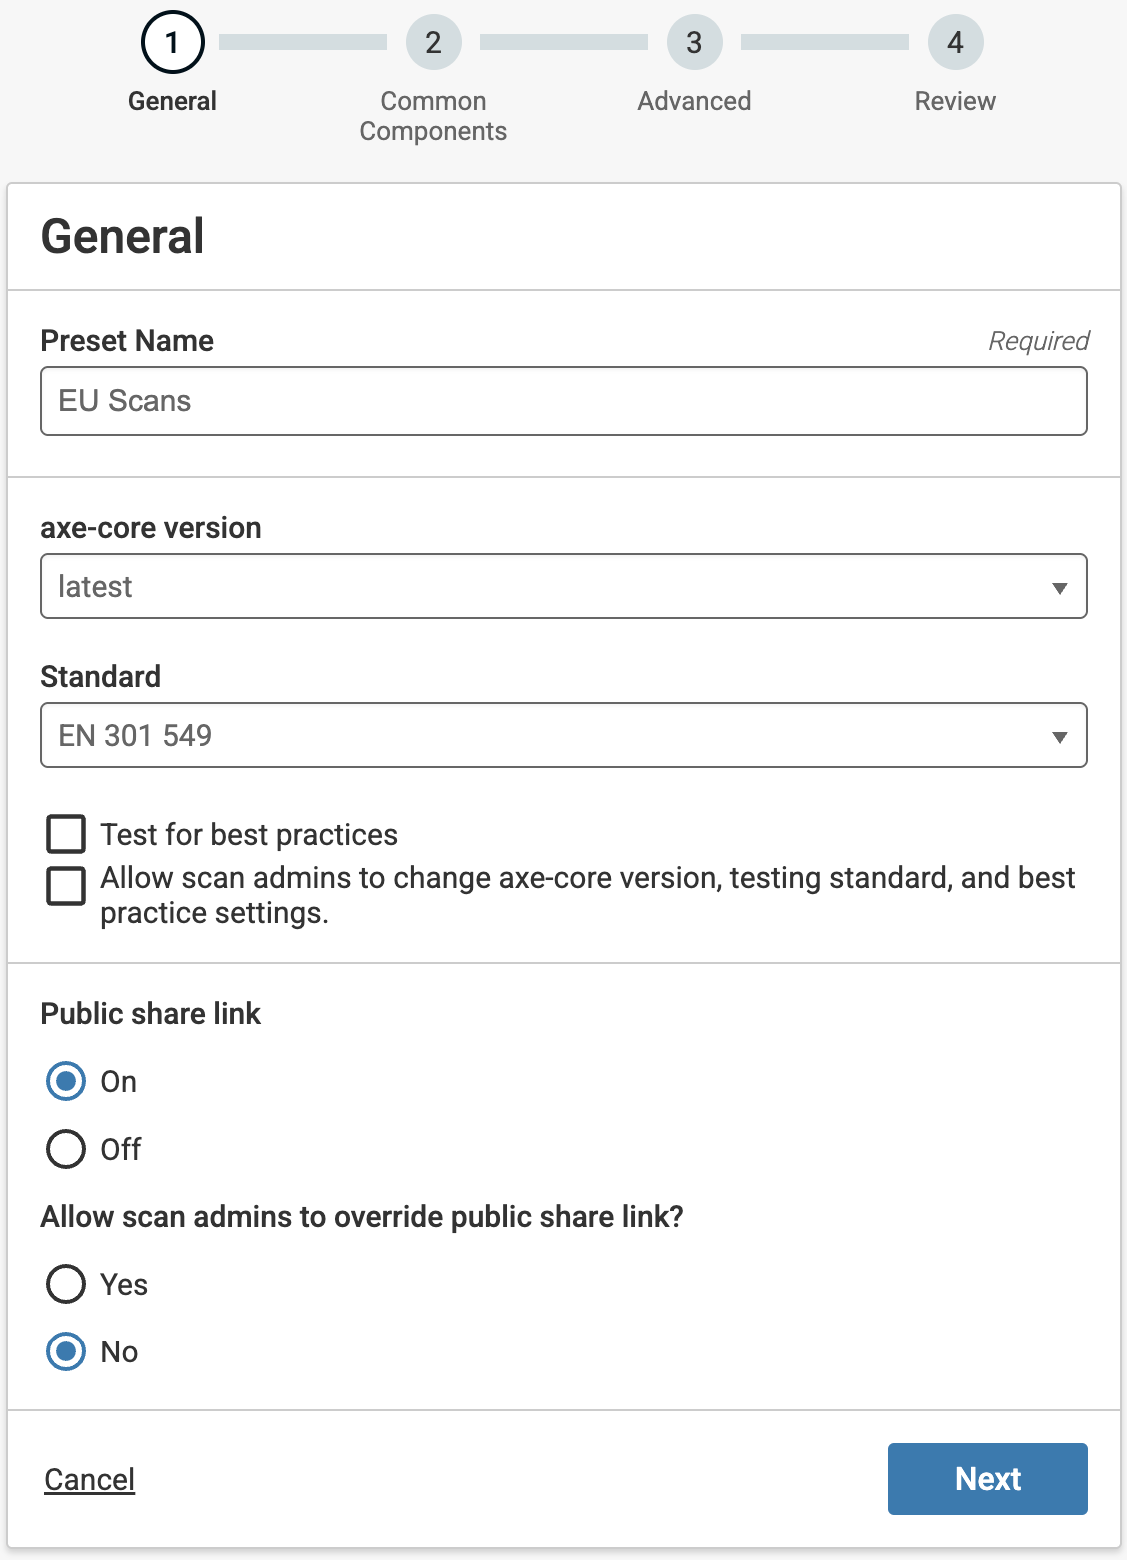
General Settings
- Name the preset in 500 characters or less.
- Select an axe-core version. “Latest” will update your scans to automatically run on the most recent version of axe-core when a new version becomes available.
- Select a Testing Standard.
- Check the box if you want to test for additional best practices
- Check the box if you want to allow scan admins to modify the axe-core version, testing standard, and whether best practices are tested.
- Choose whether you want to show public share links, so that guest users can access single scan results with a link. If you turn public share links on, choose whether you want scan admins to control this setting for individual scans.
- Choose whether you want to send scan run data to axe Reports. This setting is optional, but recommended.
- Click "Next" to proceed, or "Cancel" to exit.
Common Components
Common Components allow you to segment portions of pages that are common across multiple pages, such as the header, footer and navigation areas. When scanning, issues found on Template Pages will be grouped as Common Issues instead of appearing as duplicated issues within each page. Common Components are optional.
To complete the Common Components section:
- Enter the template URL(s) where you want to identify common issues (like "https://website.com")
- Click the + button to add additional template URLs if needed
- Click "Add Common Component" if you need to define a new common component
- Click "Next" to proceed to the Advanced Settings section, "Back" to return to General, or "Cancel" to exit
Advanced Settings
Advanced Scan Settings are optional. After filling in all the desired information, select Next. You can also choose to skip the step by selecting the Skip link.
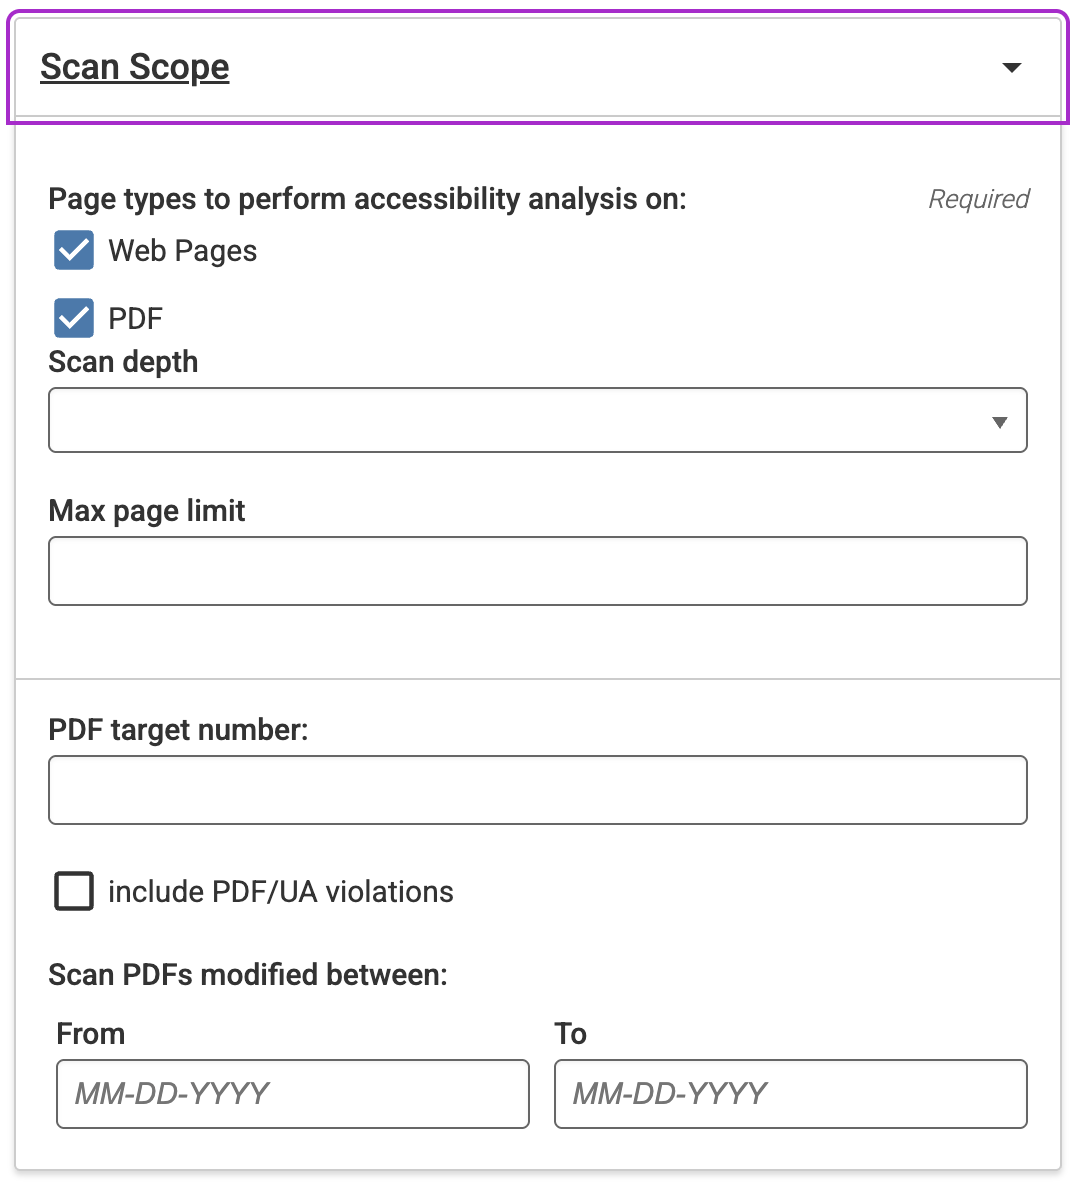
Scan Scope
-
Scan for web pages, PDFs, or both. Select the corresponding checkbox(es). You must check at least one option.
-
Set PDF Options if you are scanning for PDFs.
-
PDF target number: Enter a number to limit the number of PDFs returned in your results. Leaving this blank will return PDFs and web pages according to the Scan Depth and Max Page Limit. Specifying a PDF target number may cause your scan to run longer.
-
Include PDF/UA violations: PDF/UA standards are sometimes used when following ISO procedures. This provides additional checks for PDF accessibility and usability
-
Scan PDFs modified between: specify a date range in MM-DD-YYYY format to scan only PDFs that were last modified according to the range. This allows you to control whether outdated PDFs are included in your testing results.
-
Starting a Session
Enter a Custom User Agent if you need a user agent string sent in the request headers during the scan. In some cases, developers may release different versions of the site based on the custom user agent type. This setting allows you to specify which site to scan. This capability is useful for testing a mobile or tablet version of your site.
Enter a Custom Referrer if your site requires a redirect to be scanned. Sometimes, specifying a referrer is required for security purposes, and the scanning tool will need to include referrer information in the URLs it scans. Other times, the page content that displays may depend on the referrer page. Use this field to change the default referrer set in the request headers.
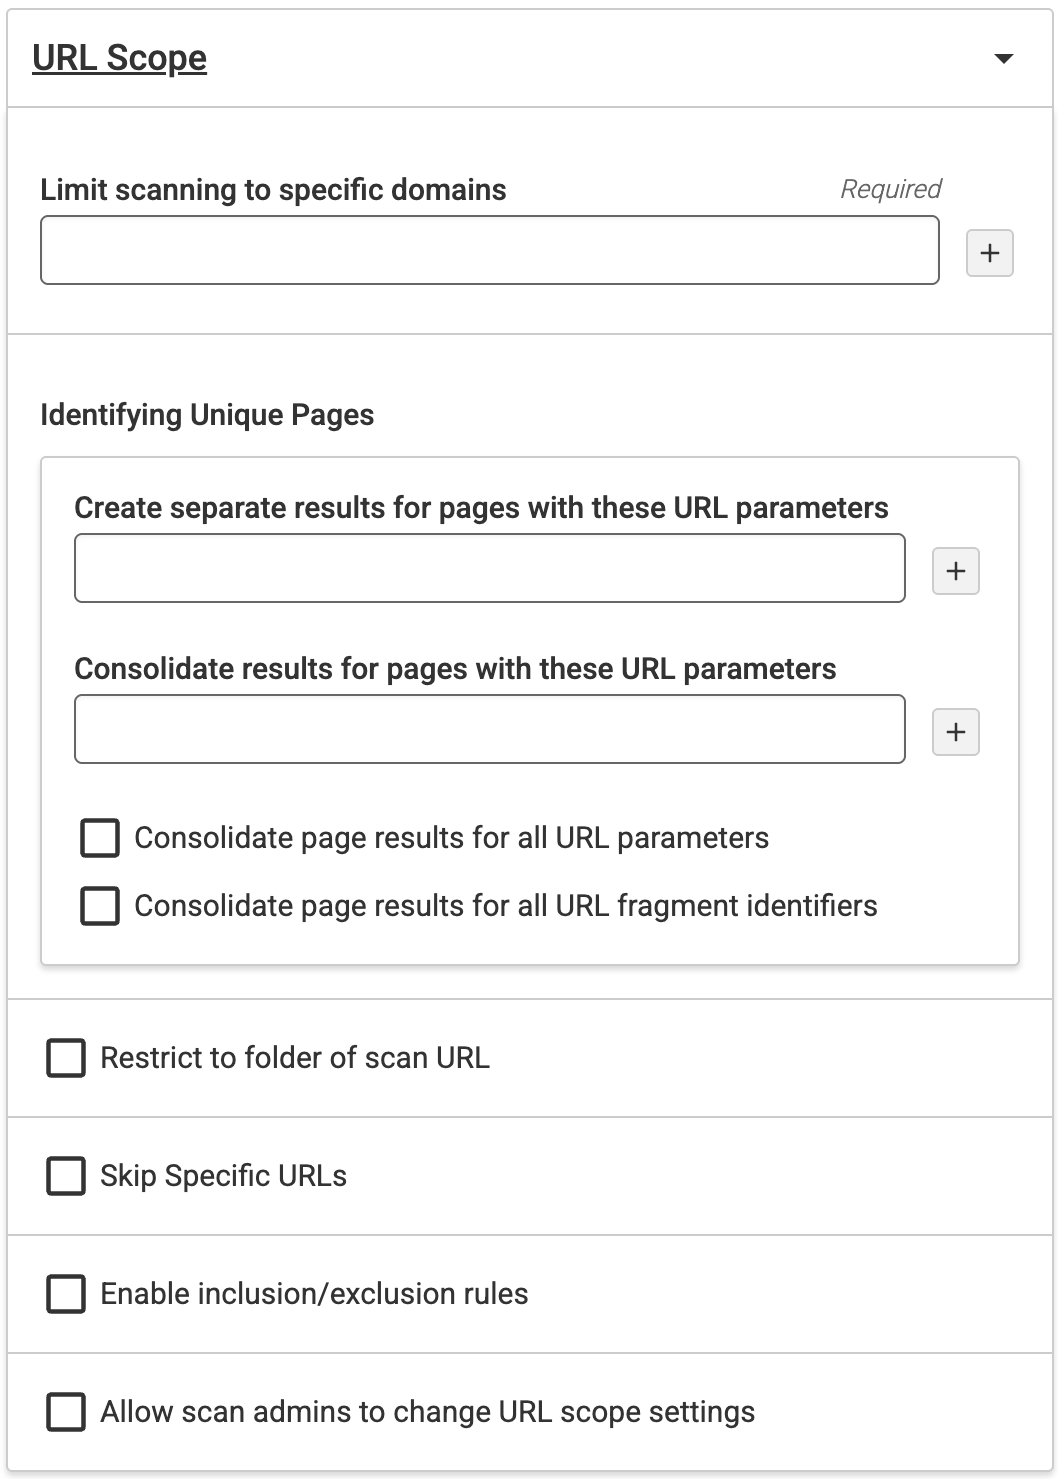
URL Scope
-
Limit scanning to specific domains: Restricts the scan to the domain and any subdirectories under it. Entering the domain name restricts the spidering further than just the domain(s). For instance, if you enter a domain as "deque.com", the scan will be restricted to the domain and will not follow links to any parts of the domain. This allows you to ensure that only trusted domains can be granted permissions.
-
Create separate results for pages with these URL parameters: Enter URL parameters to include while scanning the website and create separate results for the pages. URL parameters (also known as query strings or URL query parameters) are elements inserted in your URLs to help you filter and organize content. Or implement tracking on your website. The parameters help identify unique pages.
-
Consolidate results for pages with these URL parameters: Enter URL parameters to exclude while scanning the website.
-
Consolidate page results for all URL parameters: Select this checkbox to exclude all URL parameters while scanning the website. Selecting this checkbox disables the previous two fields.
-
Consolidate page results for all URL fragment identifiers: Select this checkbox to exclude all URL fragment identifiers while scanning the website. URL fragment identifiers are used to identify a portion of the page.
-
Restrict to folder of scan URL: Select this checkbox to restrict the scanning to the folder. This is by default not selected.
-
Skip Specific URLs: To skip pages with any URL fragment identifiers, use this checkbox. The URL fragment identifier helps you identify a portion of that page. This is by default not selected.
-
Enable inclusion/exclusion rules: To add inclusion/exclusion rules that let you use axe Monitor to include or exclude things like file extensions and URLs from your scan, select the Enable inclusion/exclusion rules checkbox. Enter one line per keyword, phrase, or extension in the fields that appear. Use quotes around phrases or keywords if you want them to be identified from page content instead of the URL. We recommend you choose only one type of inclusion/exclusion rule.
-
Allow scan admins to change URL scope settings: Use this checkbox to allow URL scope settings to be editable on scans with this preset.
Review
Review all settings applied to the preset.
To modify any settings, select the “Back to…” links in each section. When your settings are entered as desired, click “Submit” to create the preset.
If you’ve changed your mind, click “Cancel.” Any contents you entered into the preset will not be saved.
Apply Presets
When creating or editing a new scan, presets can be applied in the second step.
Learn more: Create and Edit Scans
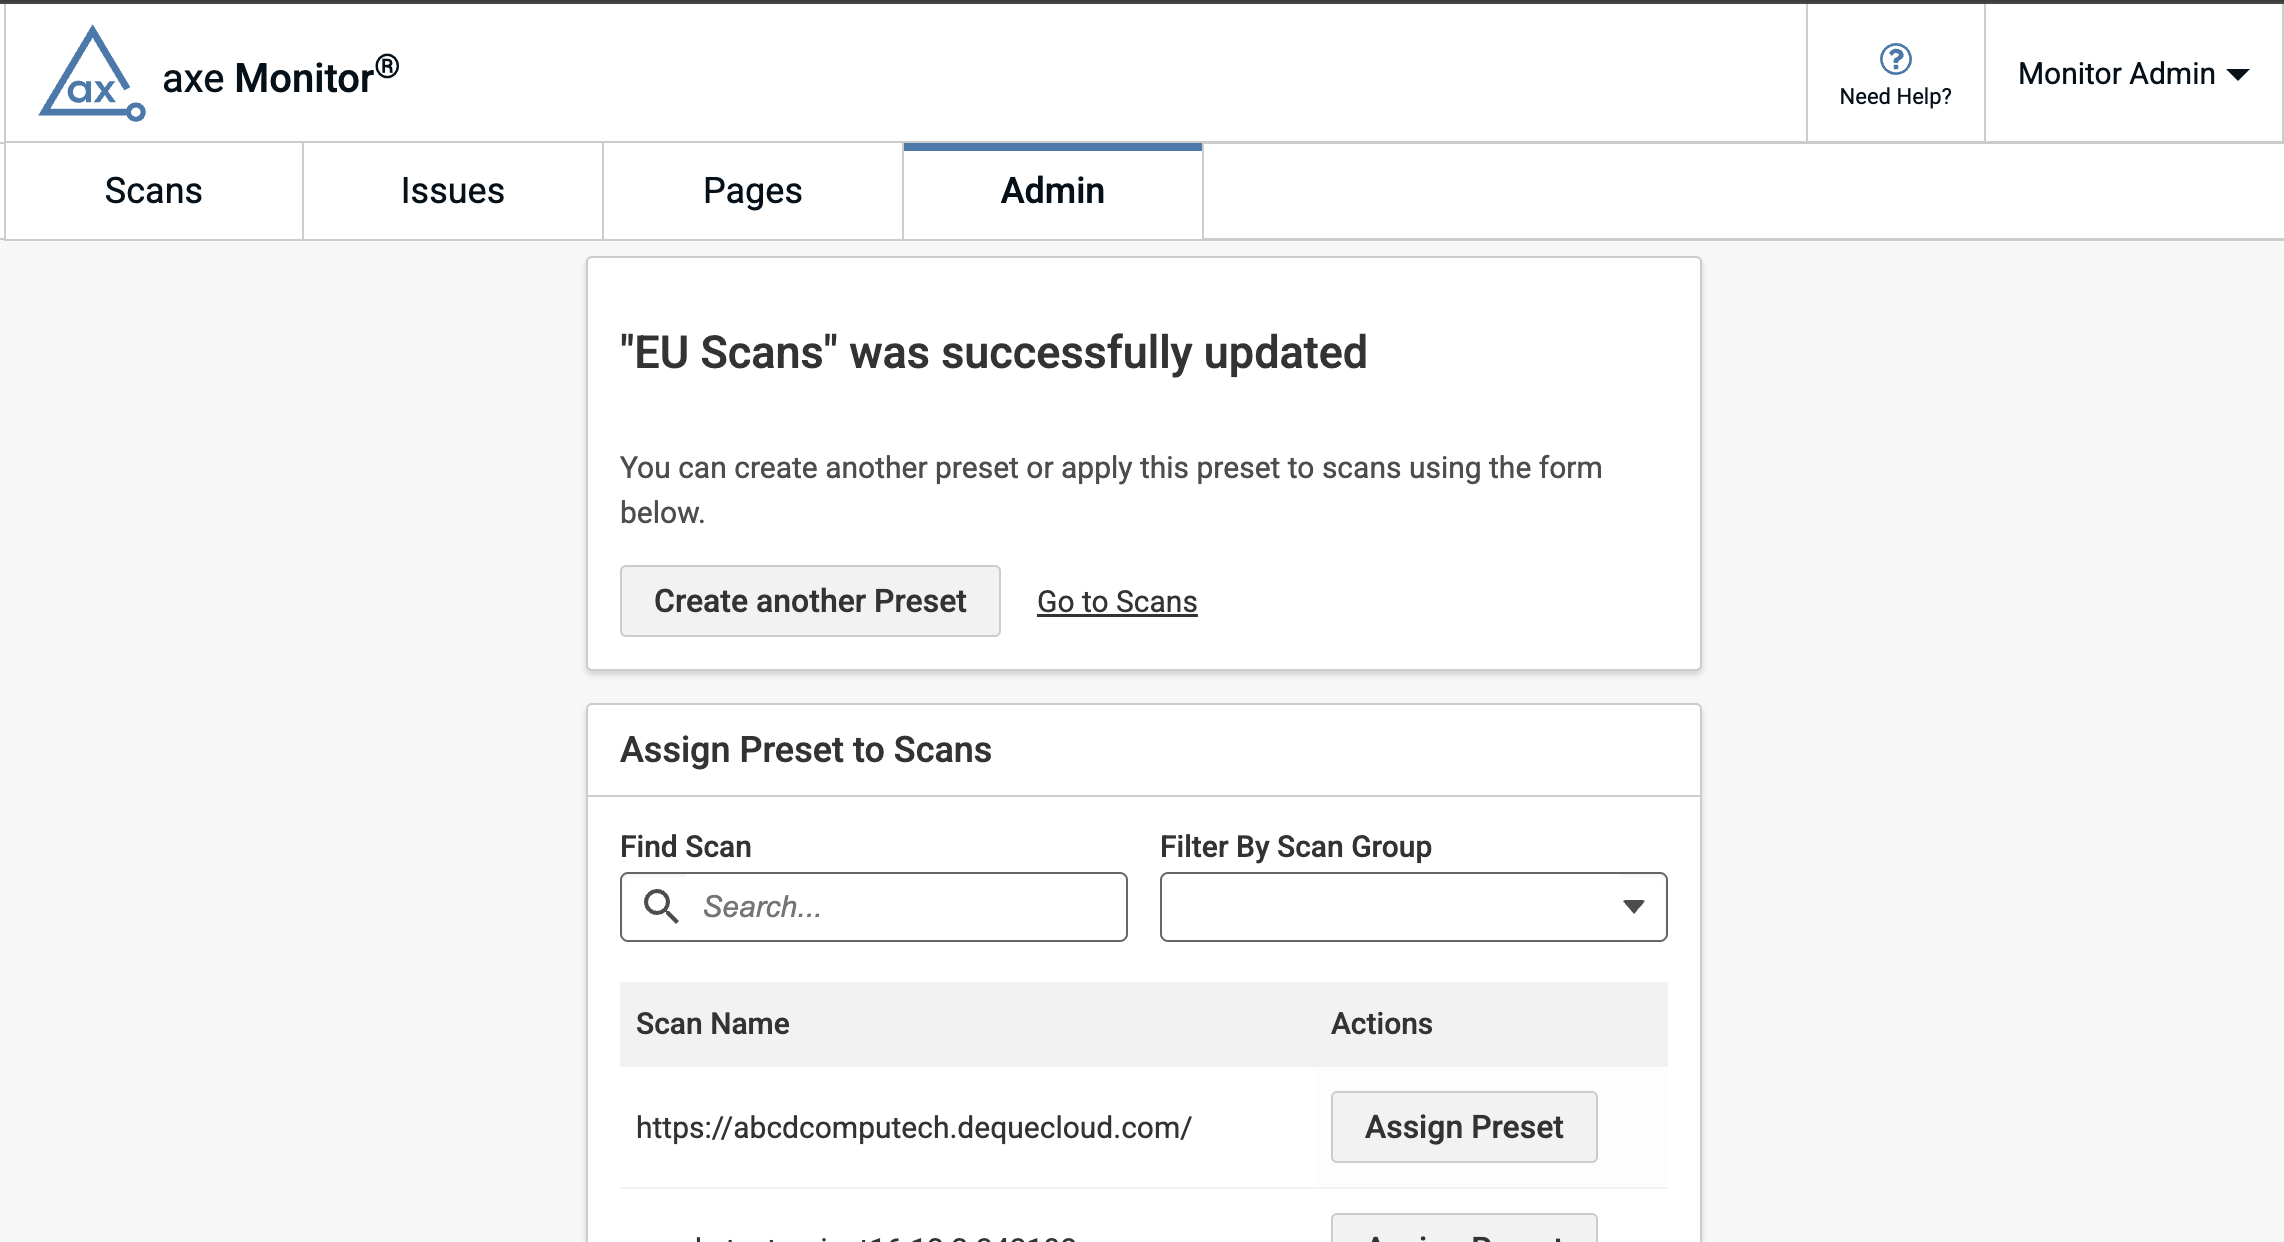
After Creating a Preset
After saving a preset, a confirmation page appears, showing that the preset is created. Following the success message, use the search bar to find scans or scan groups. Select the “Apply Preset” button for desired scans.
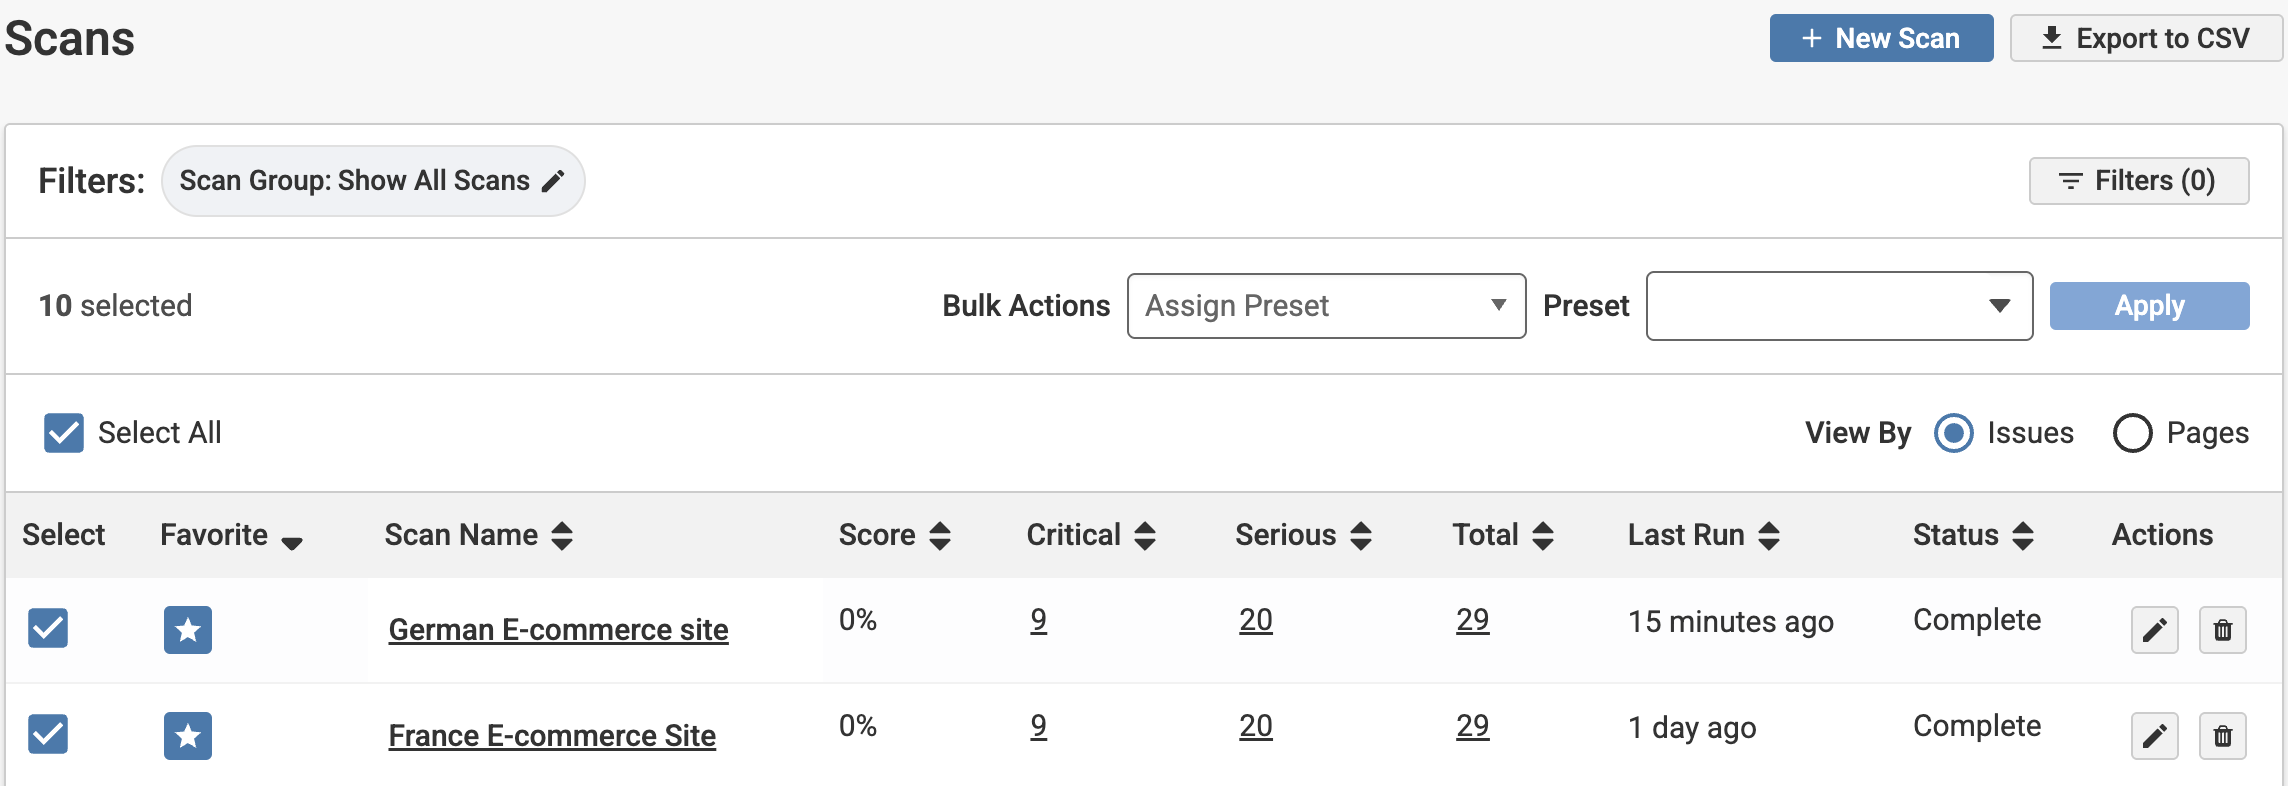
Bulk Apply Presets
- On the Scan List, use the “Select all” checkbox, or at least one scan’s checkbox to generate bulk actions.
- Scan admins can select “Assign preset” to modify the settings for several scans at once.
- In the dropdown that appears, select your desired preset.
- Click “Apply.”
- Review the scans in the modal that appears. Click “Apply” to add the preset to the scans, or “Cancel” to return to the Scan List.
To apply a preset to one or more scan groups:
-
Select the Filters button.
-
In the Scan Groups field, find your desired scan group.
-
Select the + button to filter to a scan group.
-
Select additional scan groups if desired.
-
Click the “Apply” button to set your filter.
-
On the Scan List, use the “Select all” checkbox, or at least one scan’s checkbox to generate bulk actions.
-
Select “Assign preset” to modify the settings for several scans at once.
-
In the dropdown that appears, select your desired preset.
-
Click “Save” to apply the preset.
Edit or Delete a Preset
On the Presets panel in the Admin section, axe Monitor admins may select the pencil icon under actions to edit, or the trash can icon to delete a preset.