
Editing Dimensions in Test Cases
Test Case Dimensions are editable, administrators can update defined Dimensions as needed due to changes in organizational structure. This feature is also useful to track accessibility issues reported by various teams that fall under different accountability structures.
To edit Test Case Dimensions:
-
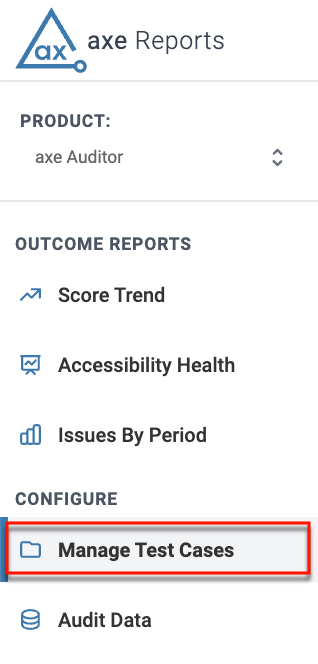
Select the Manage Test Cases option under the Configure section on the left-hand corner of the screen.
-
Use the available filters to locate the target test cases you want to edit.
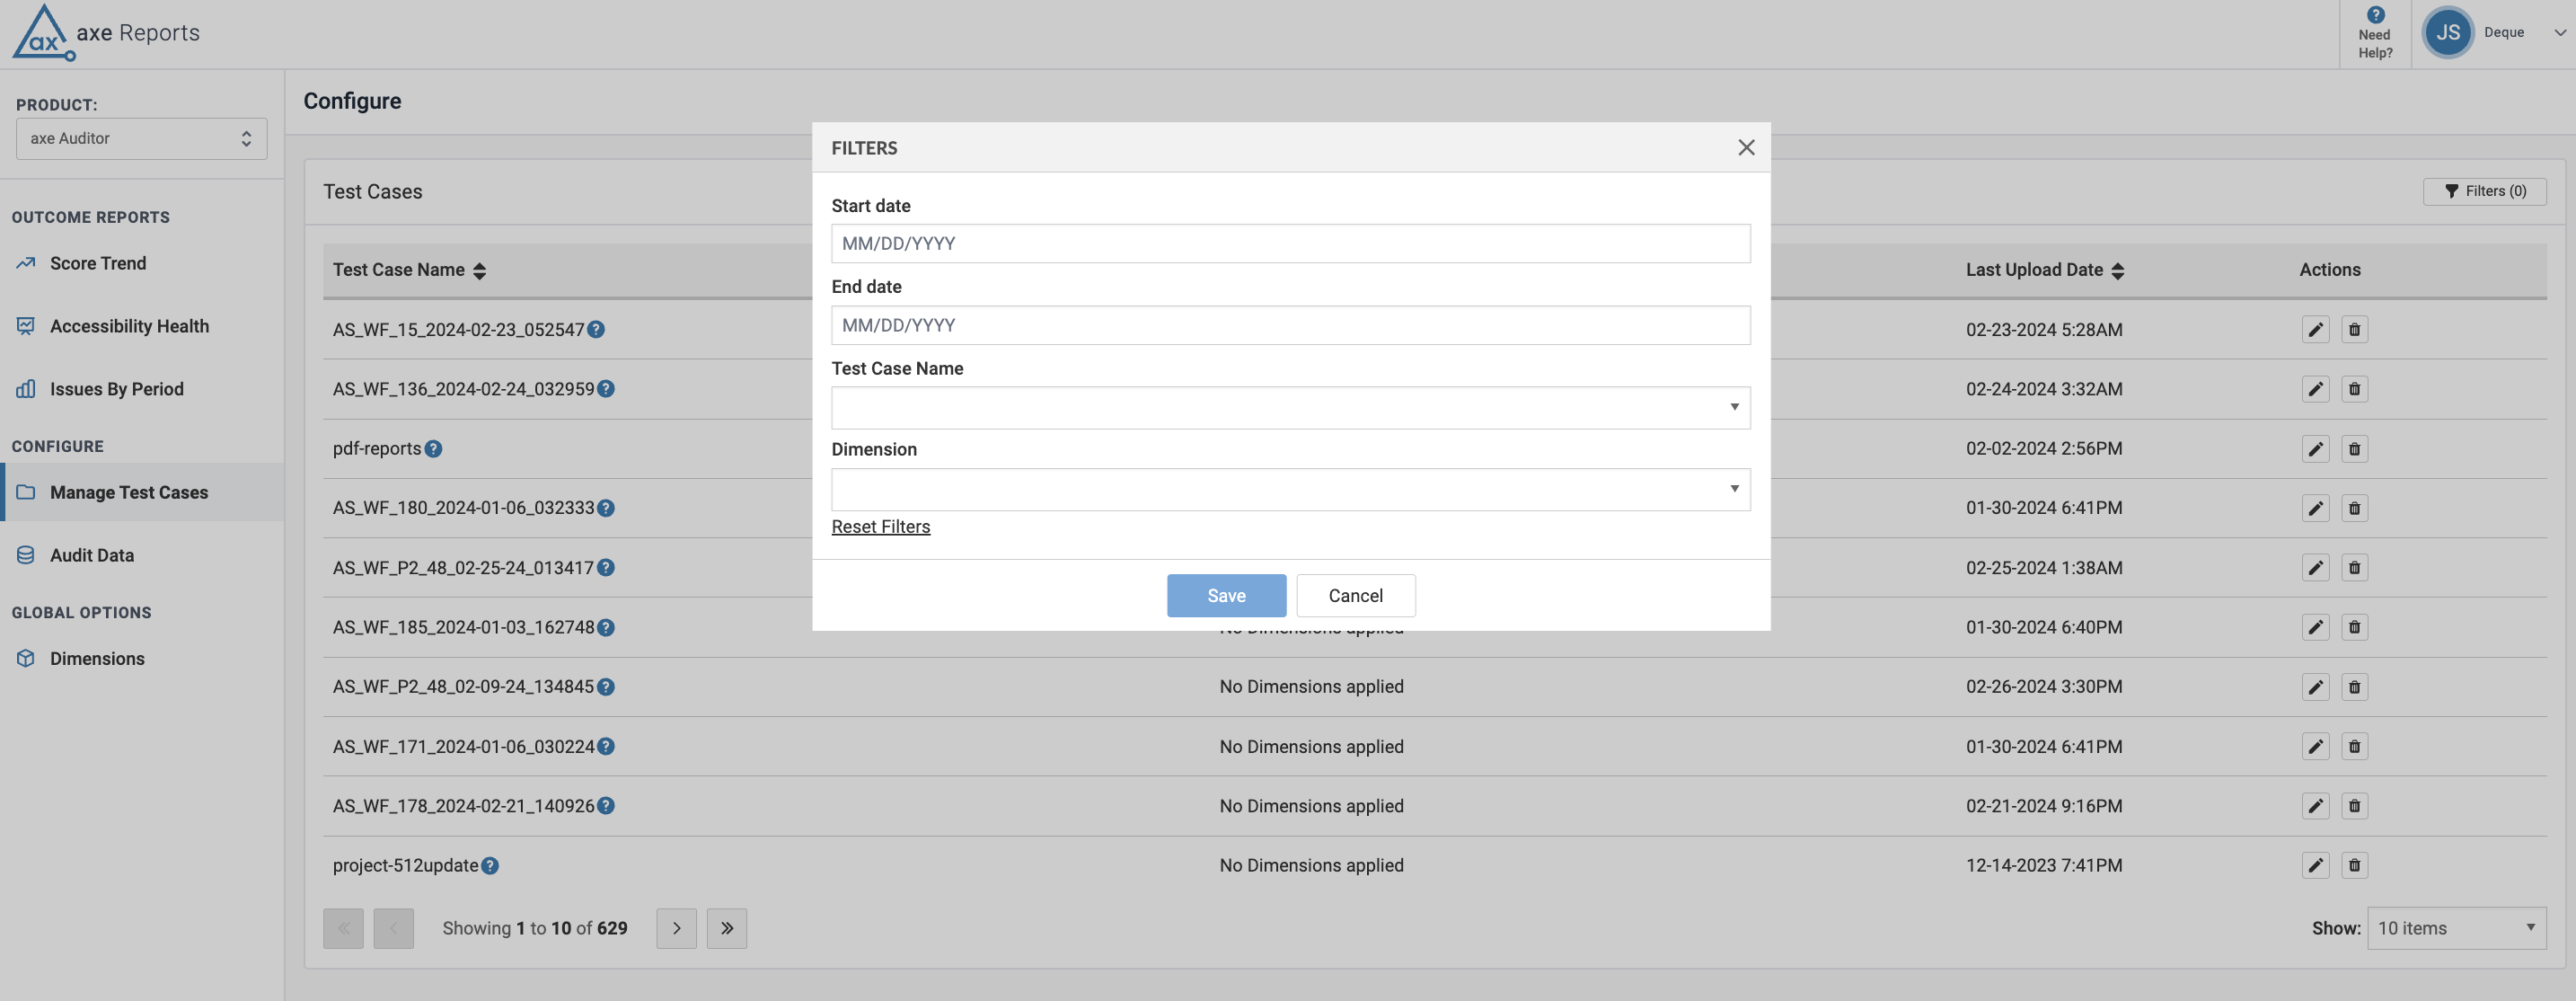
- Start Date
- When provided, filters audits that were imported on or after the chosen date.
- End Date
- When provided, filters audits that were imported on or before the chosen date.
- Test Case name
- When provided, filters the list of audits for the chosen test case.
- Dimension
- Select from the available Dimensions for the chosen test case.
- Reset Filters
- Use the Reset filters option to clear the filters at one go, instead of manually clearing the selected options to see the default view of the table.
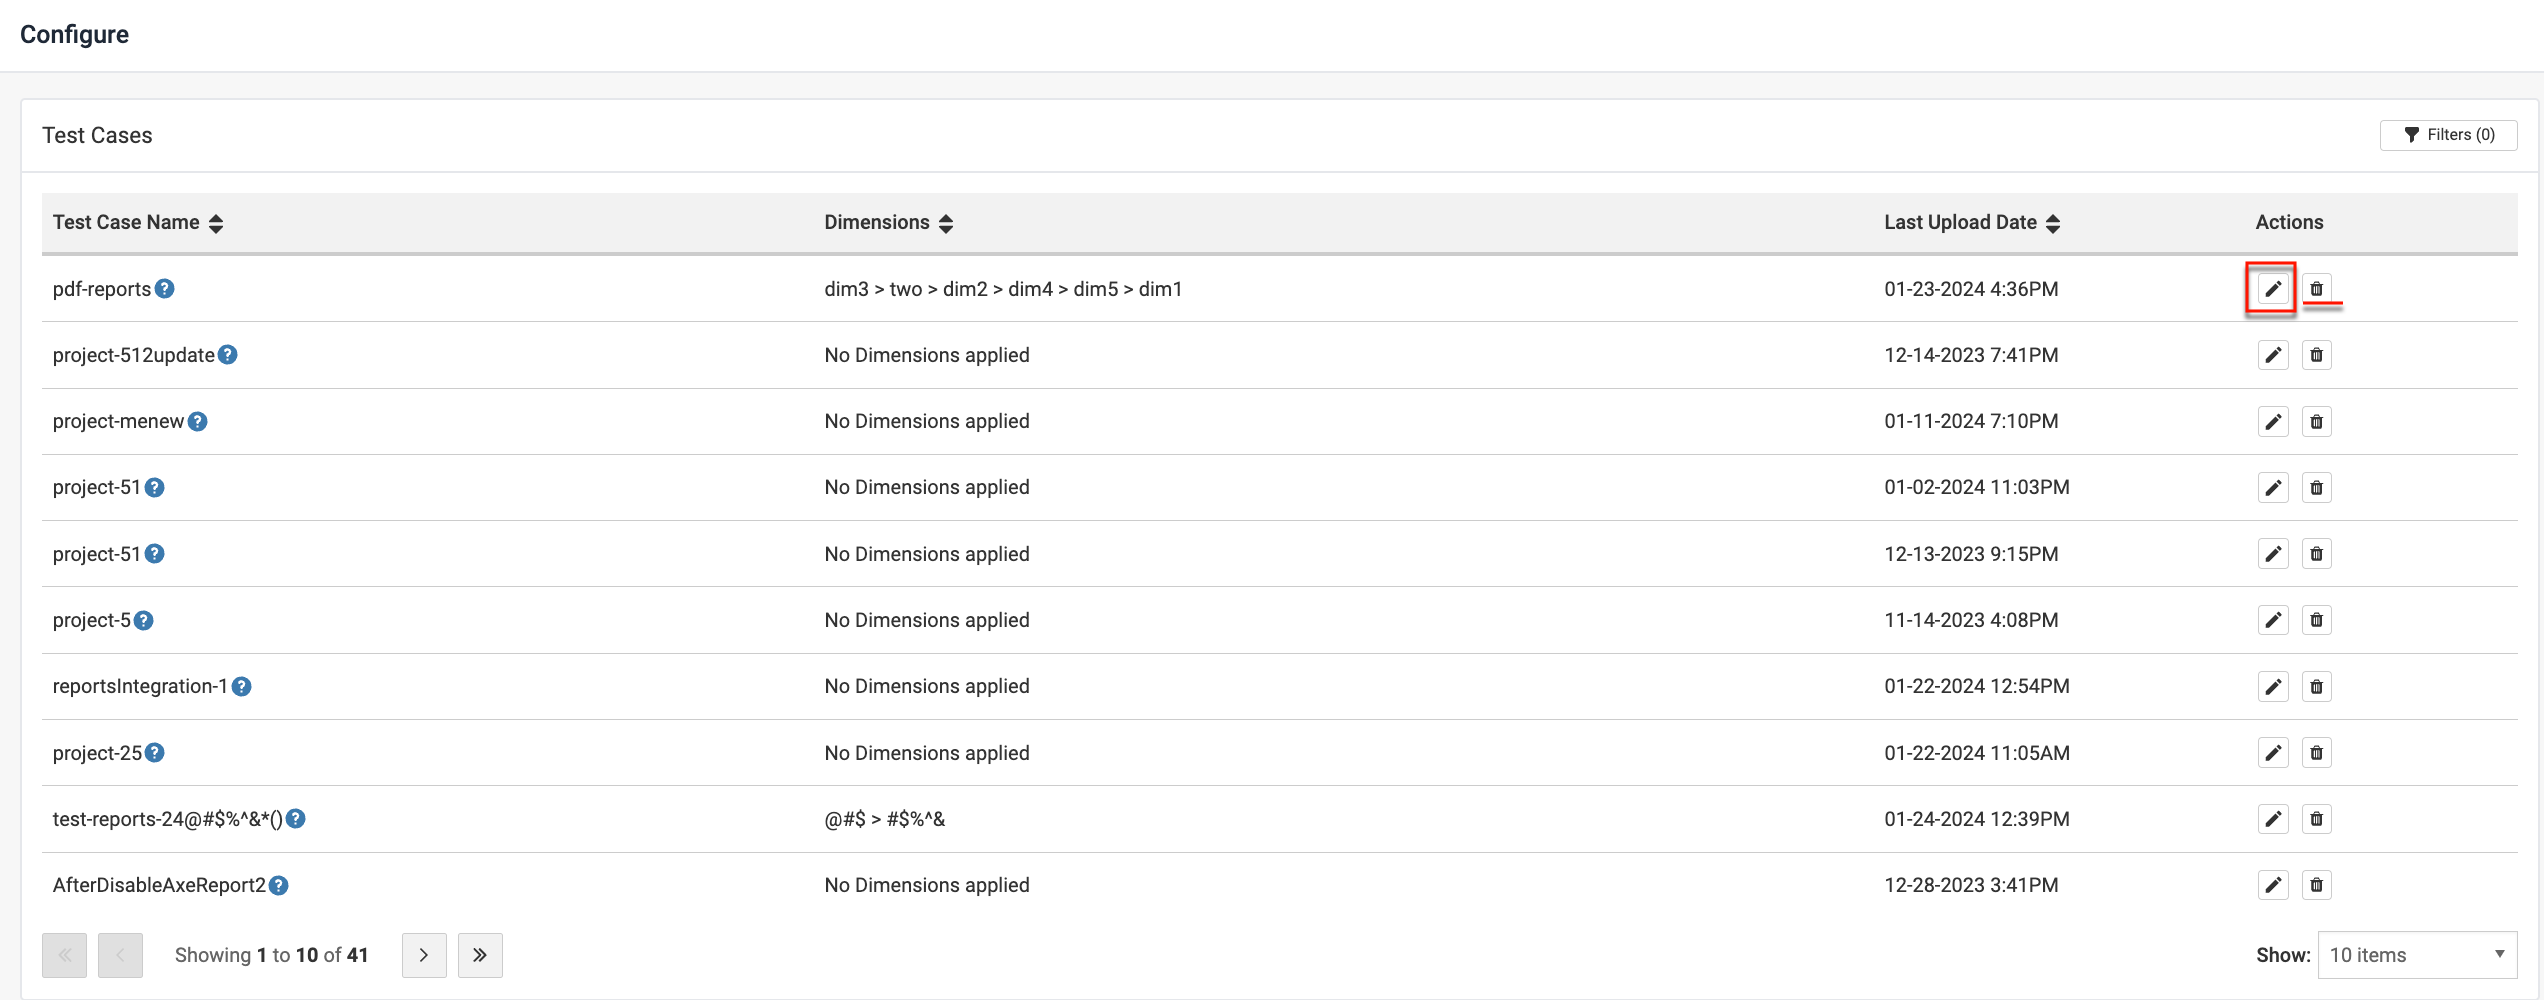
The applicable test cases are now visible on the screen. The active filters are displayed, and you can remove the filters using the close button. To clear all applicable filters at one go, use the Clear filters link.
-
In the Configure screen that appears, click the 'Edit' button (Pencil icon) under Actions column on the table for the test case you want to enable the Dimensions for.
-
On the resulting wizard that displays,
-
Edit the display name of the test case to your preferred name. This name then appears on the Test Cases screen under the Test Case Name column once you have edited the test case details.
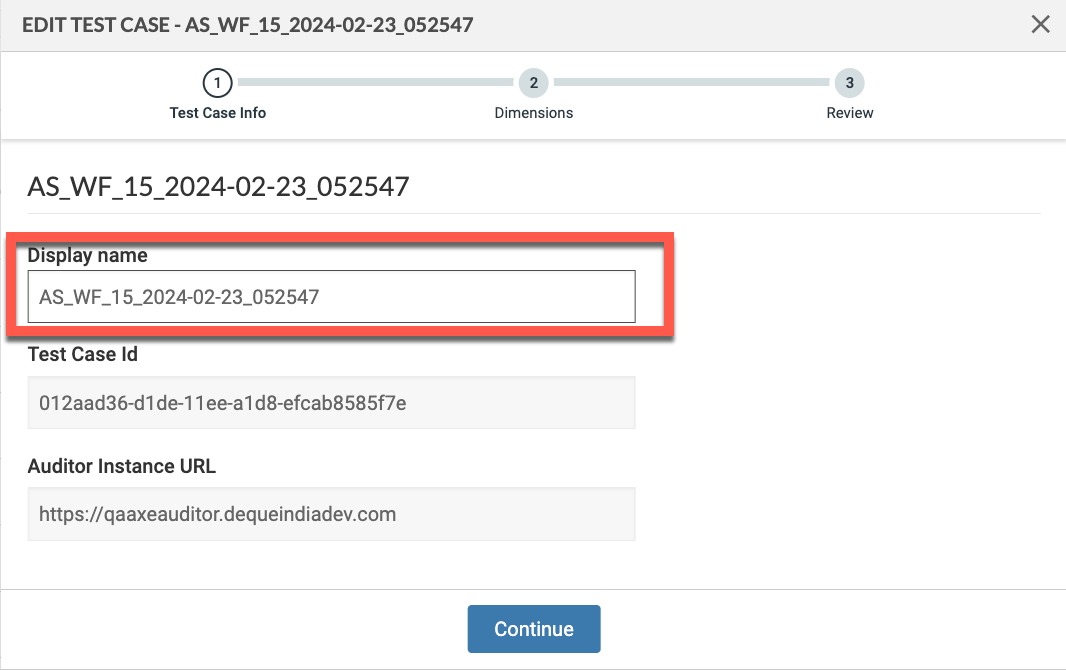
Note: The axe Auditor name is not editable. Hovering over the Help icon next to the Test Case Name in the Manage Test Cases screen displays the axe Auditor name of the test case. The help icon does not appear on the screen if the display name and test case name are the same.
- Click Continue.
-
Enable the Dimensions checkbox. Search and make changes to the Dimensions, as needed. Dimensions can be reordered or removed.
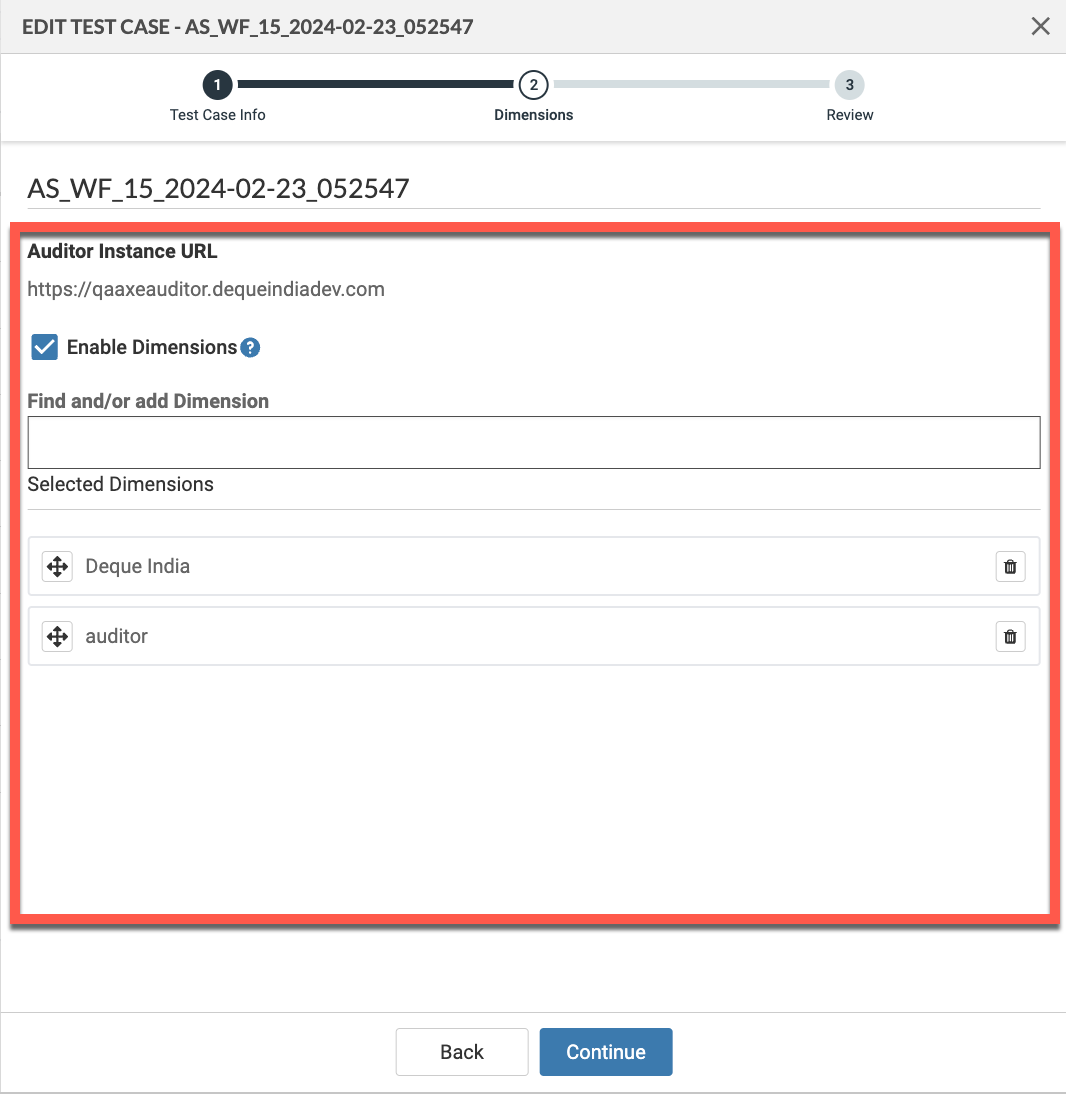
Note: You can create a maximum of six Dimensions per test case. The Dimension name can only be up to forty characters long.
-
Edit the display name of the test case to your preferred name. This name then appears on the Test Cases screen under the Test Case Name column once you have edited the test case details.
-
Review change summary:
- Review the summary of changes.
-
Select the Apply changes to past audit data for the Test Case checkbox to update existing audit data with the updated Dimensions. By default, this option is unchecked. If unchecked, prior data remains with old Dimensions.
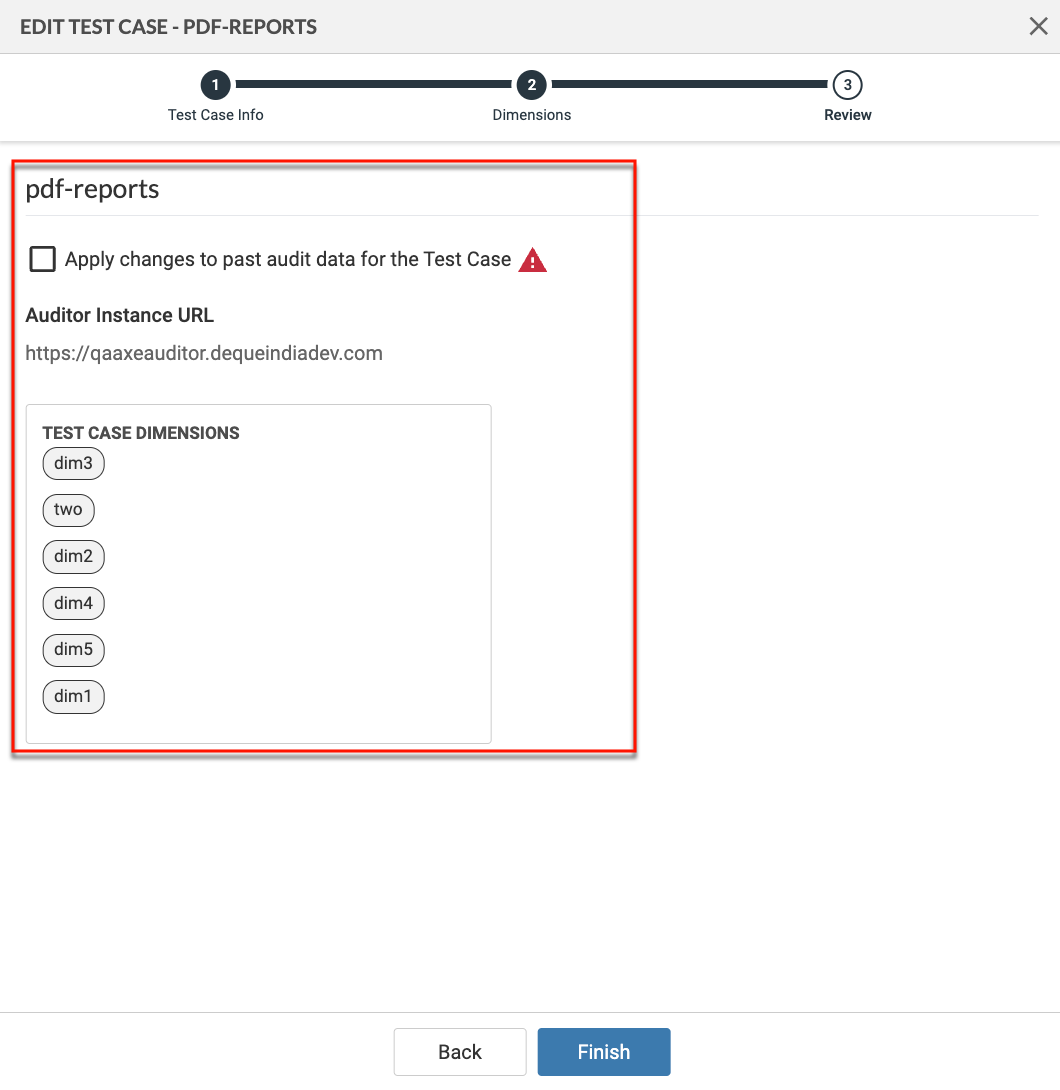
- Click Finish to save your changes. The Test Cases screen will reappear with the updated display name under the Test Case Name column. Hover over the help icon to view the axe Auditor test case name.