Manage Projects
Manage Projects allows you to edit and delete your projects in Axe Reports.
Note: For successful data import, ensure that your Axe Monitor project is configured to send scan information to Axe Reports.
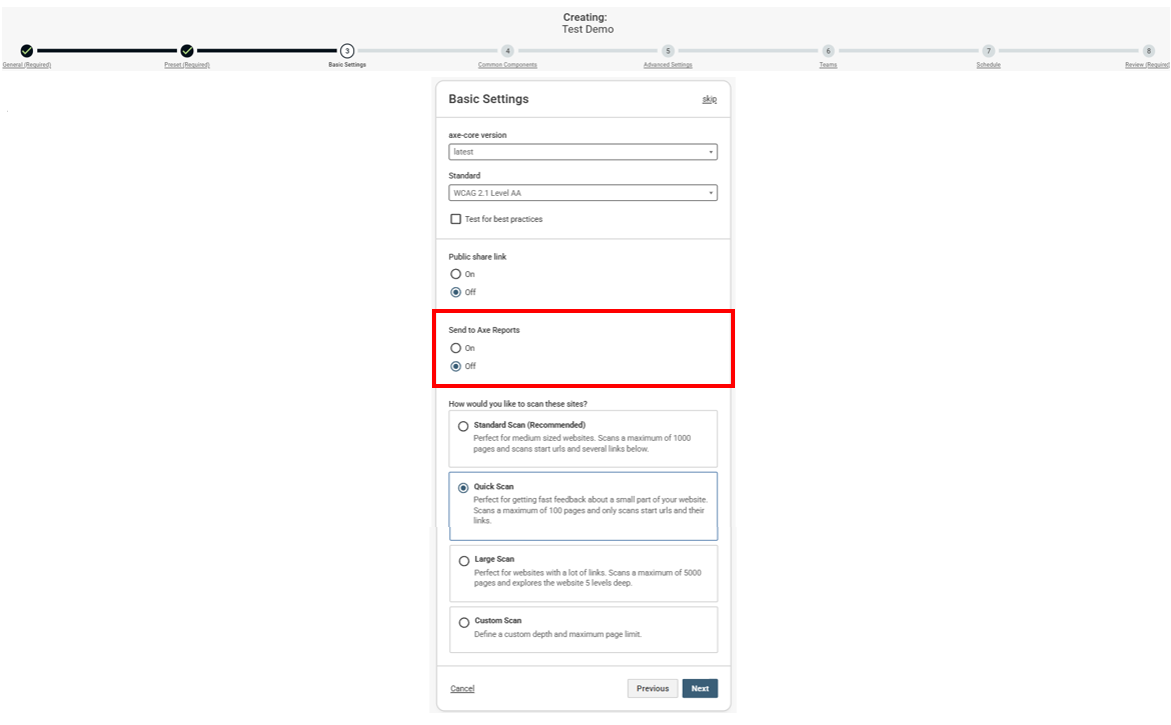
Access Axe Reports Settings
To manage your projects:
-
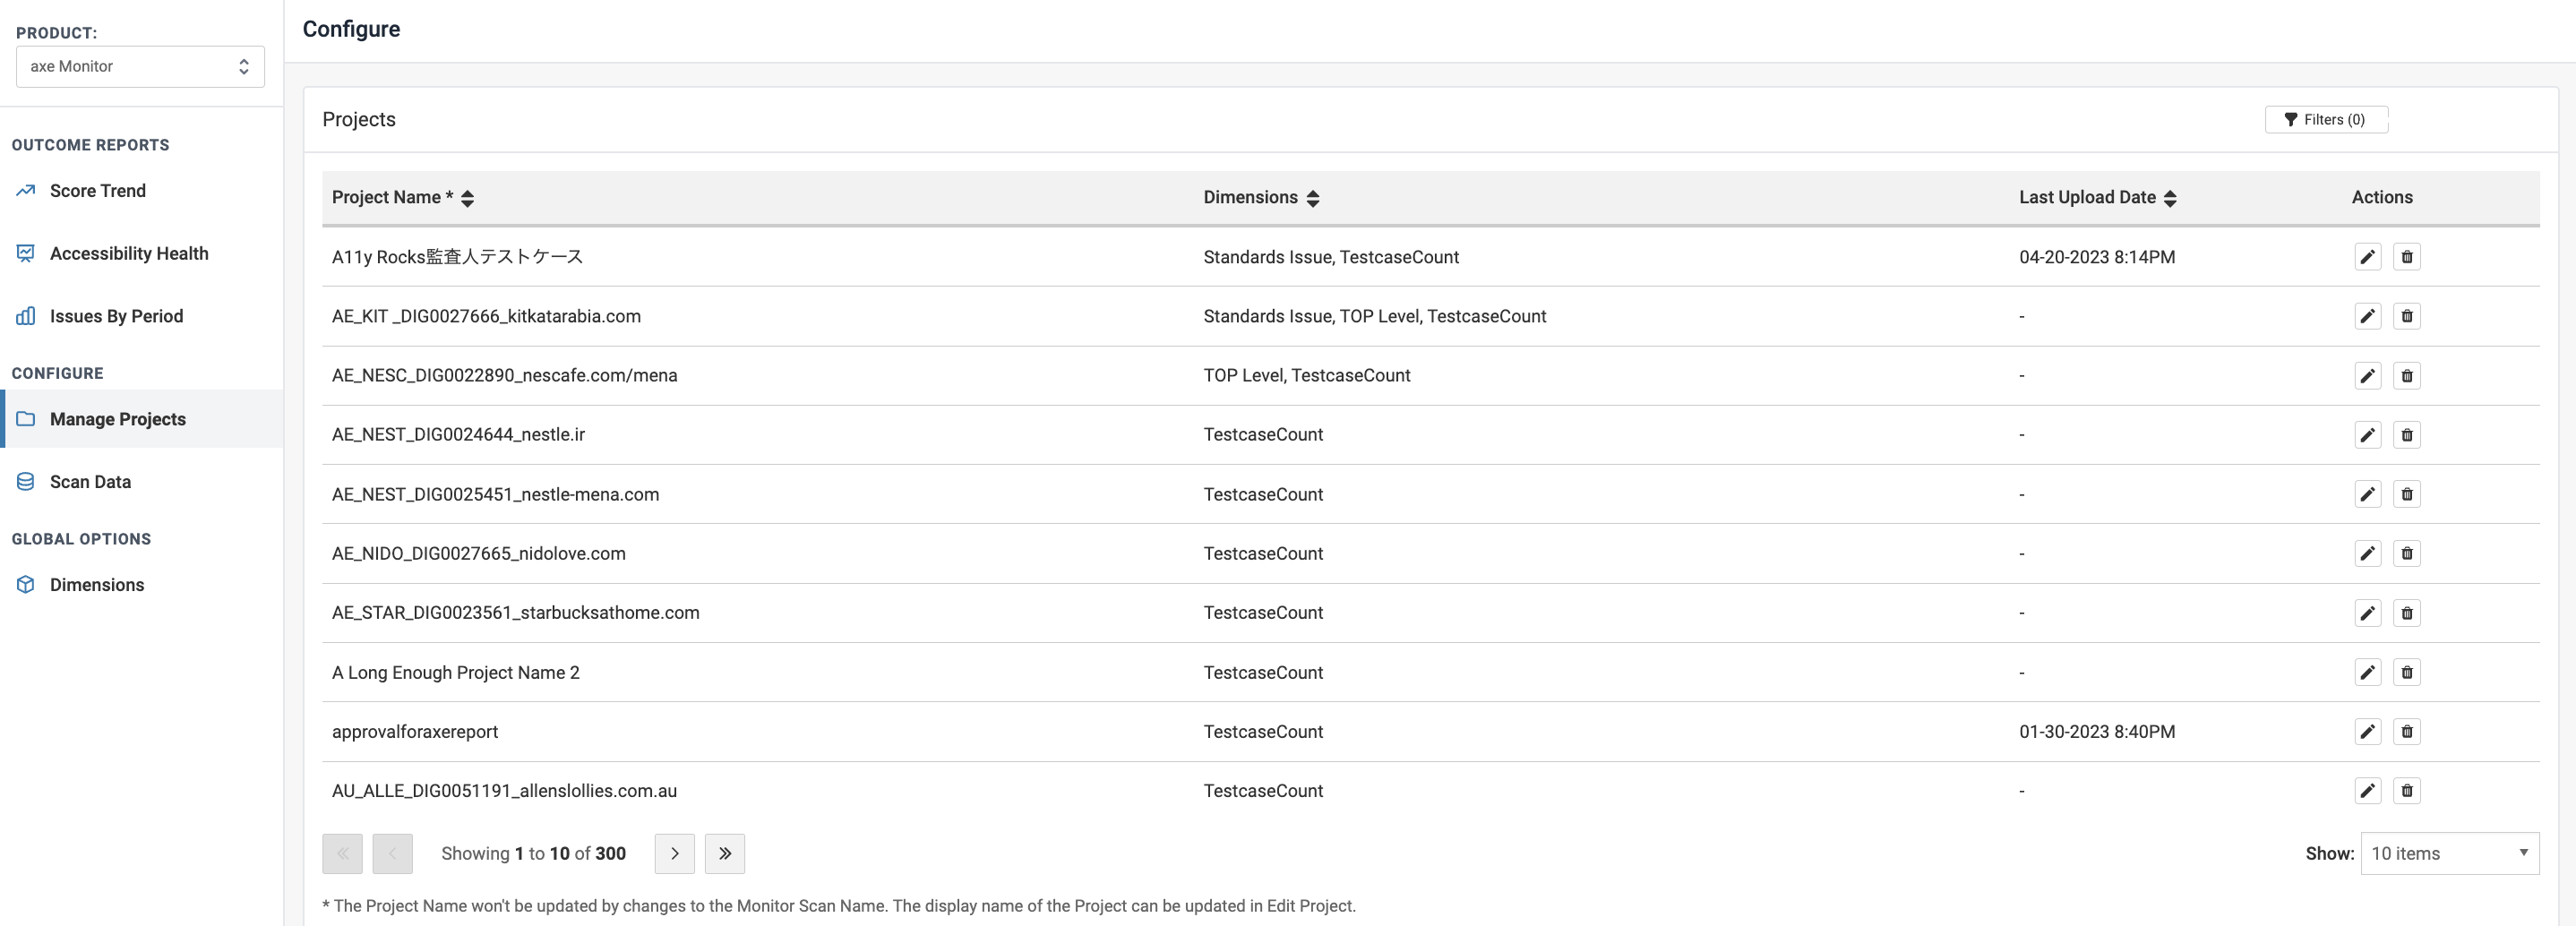
Go to the Configure section on the left-hand corner of the screen and select Manage Projects.
For Axe Monitor Versions Earlier than 8.0:
- Select the Add New Projects button.
- In the modal that appears, select the project you want to include. The list will display all Axe Monitor projects that you have access to.
- Once you've added the projects, data will become available in Axe Reports after the scan is completed in Axe Monitor.
-
Once you see the data in the Manage Projects tab, you can now edit and delete projects.
Edit and Delete Projects
-
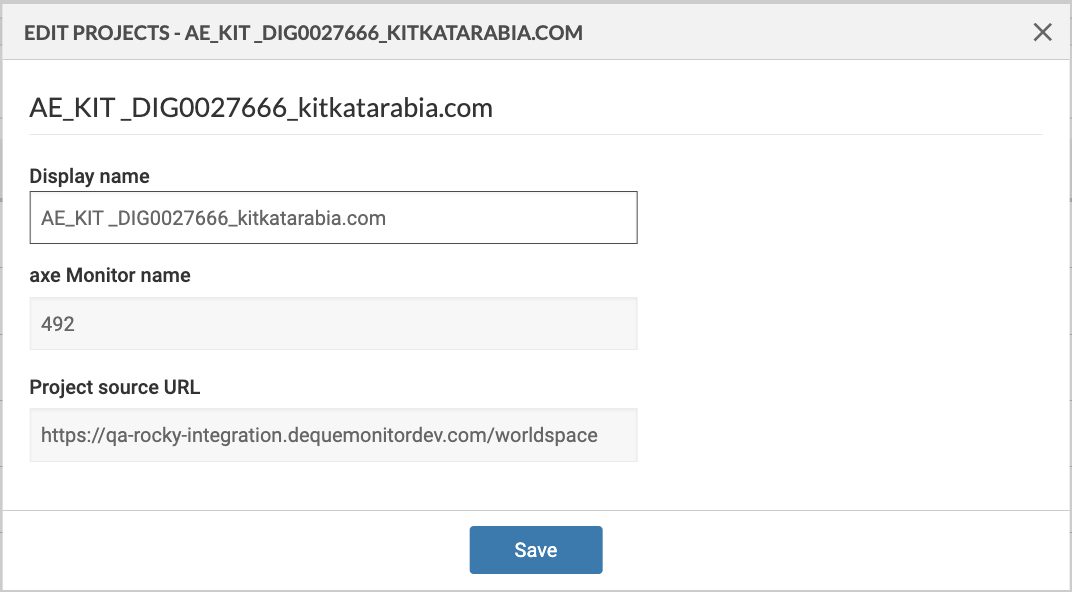
Edit Projects: Click the Edit Projects icon to open the Edit Projects modal. You can update the project's display name and save your changes.
-
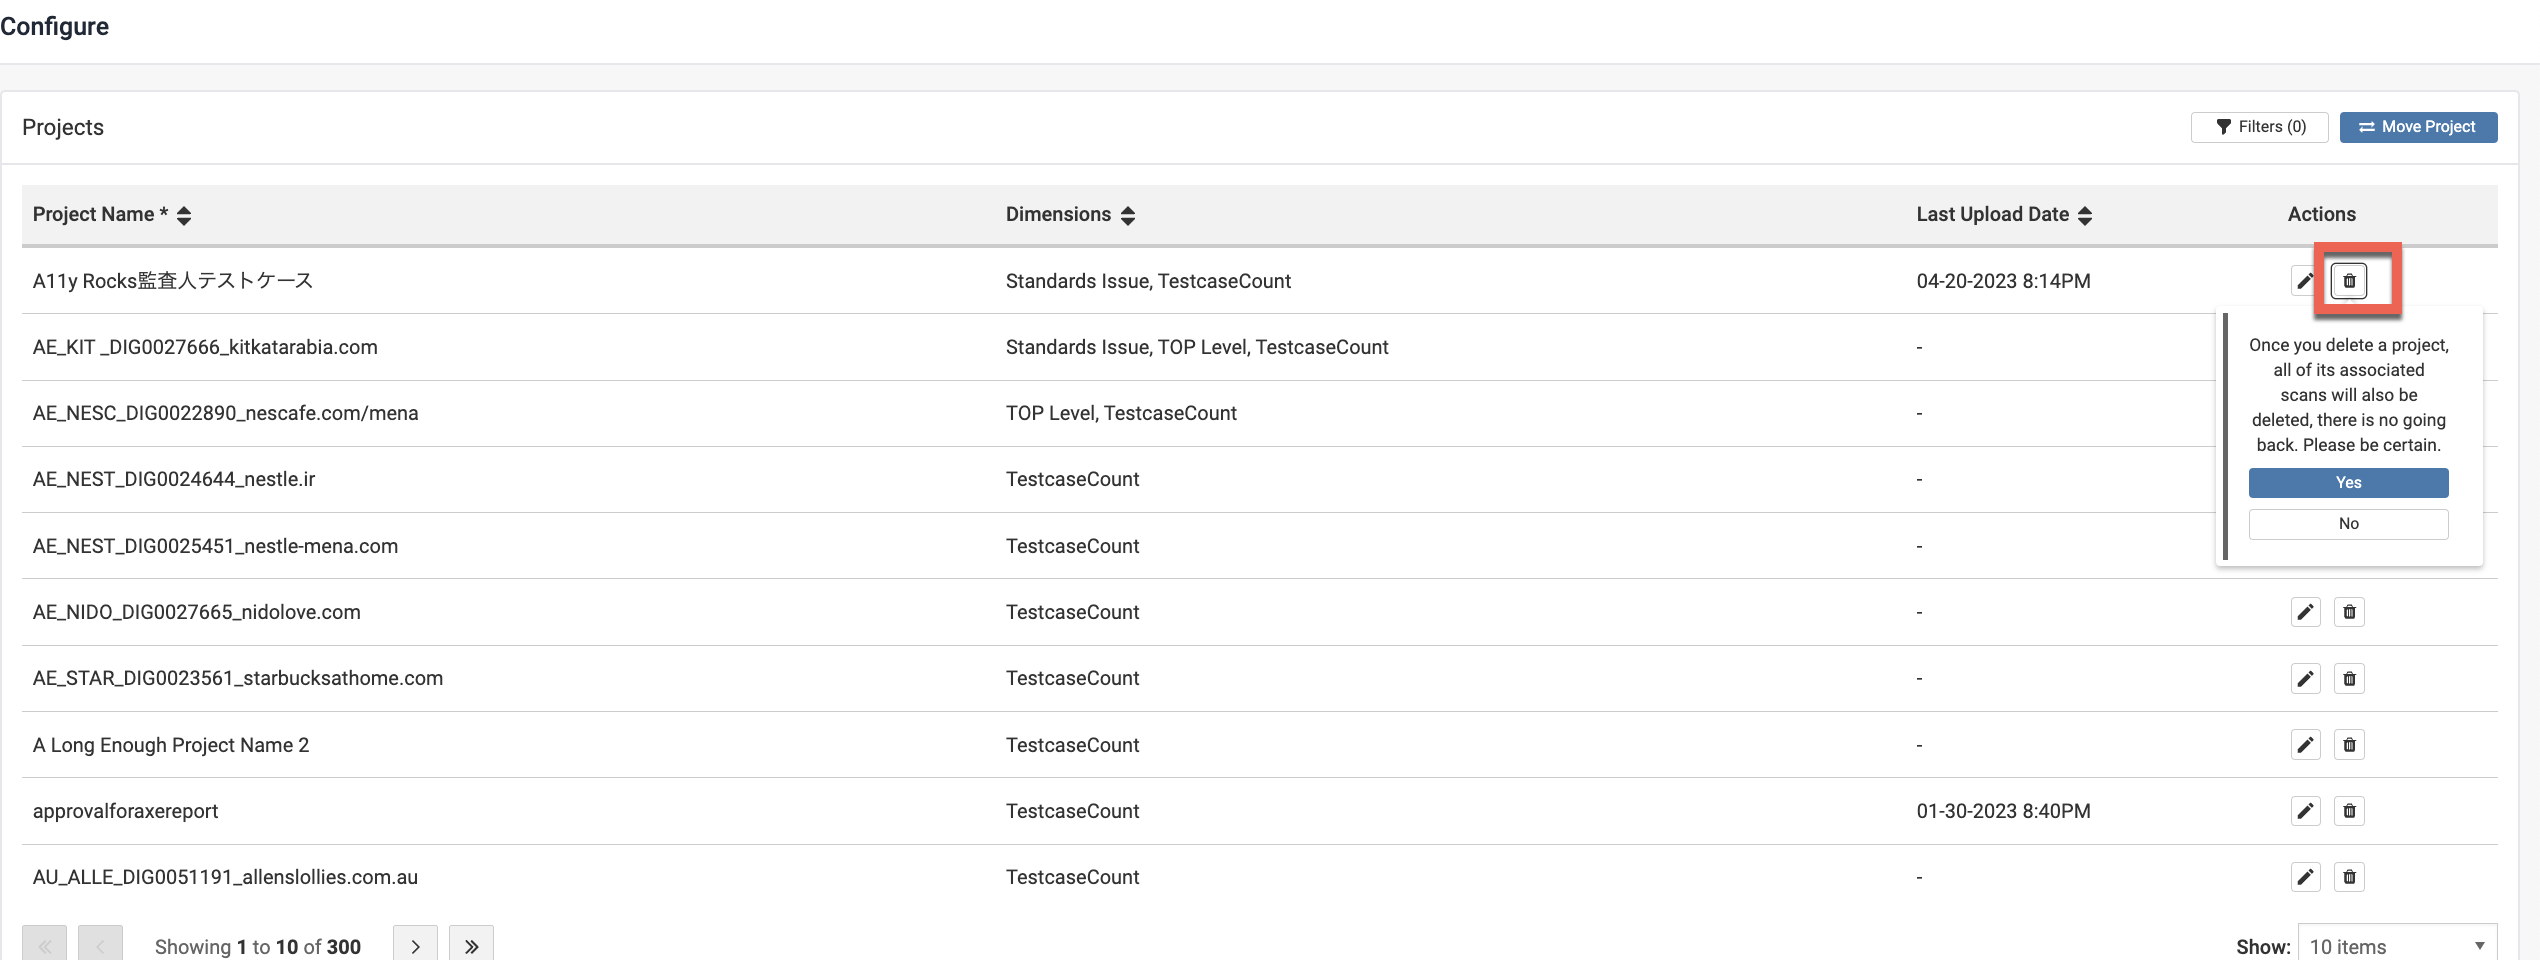
Delete Projects: Click the Delete icon to remove a project. Be aware that deleting a project will also permanently delete all associated scan data. This action cannot be undone, so proceed with caution.