
Manage Team Access in Bulk
To implement team permissions across your organization at once, Axe Reports provides bulk capabilities. You can export a complete snapshot of your organization's Axe Reports access. Then, use the export to review existing permissions, make changes, and upload new permissions assignments. The upload then replaces current permissions at once.
Note: Exercise caution when updating permissions in bulk. Modify the exported file carefully and check for mistakes before uploading new permissions. When team names and subdimensions are typed incorrectly, the import upload will fail.
Team Access export
This export contains everything you need to review your organization's current team access configuration and prepare a bulk import to update it.
Export the file
-
In Axe Reports, navigate to Team Access.
-
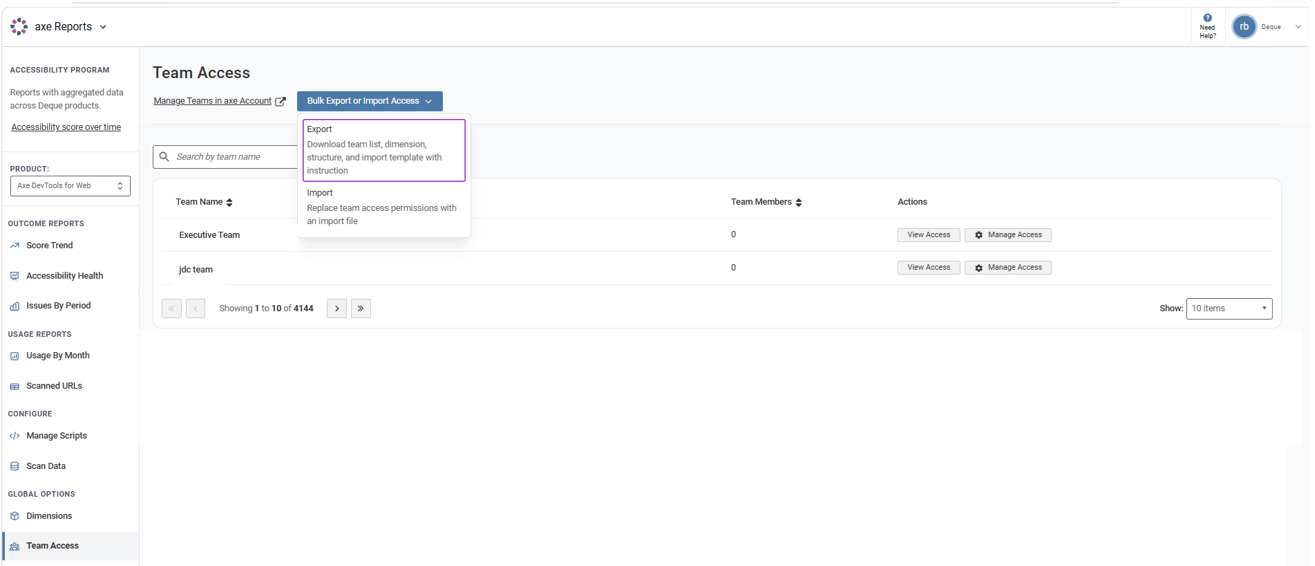
Open the Bulk Export or Import drop-down.
-
Click Export. The selected file downloads to your system.
What's in this export
| File | Description |
|---|---|
| instructions.md | Read the instructions in this file before editing the spreadsheet. |
| rgname_dimensions-list_mon-dd-yy.md | A reference list of all dimensions and subdimensions in your organization. |
| orgname_team-access_mon-dd-yy.xlsx | Your current team access configuration, ready to edit and re-import. |
How to use this export
Step 1: Review your Dimensions list
-
Open orgname_dimensions-list_mon-dd-yy.md to see all dimensions and subdimensions available in your organization. Use this as a reference when editing team access in the spreadsheet.
-
Dimensions and subdimensions are listed in hierarchical order:
        - Dimension 1
           - Subdimension Level 1
              - Subdimension Level 2
Step 2: Edit Team Access in the spreadsheet
Open orgname_team-access_mon-dd-yy.xlsx. It contains two tabs:
Current Dimension Access tab
Lists each team's subdimension assignments, one row per team/subdimension pair, in alphabetical order by team name.
- Team Name — The name of the team (repeated across multiple rows if the team has access to more than one subdimension)
- Subdimension — The subdimension the team has access to. If a team has access to all dimensions and subdimensions, this column will read Access to All Dimensions.
To update a team's dimension access:
- Locate the rows for the team you want to update. The team name will be repeated across multiple rows if the team has access to more than one subdimension.
- To grant access to a subdimension, add a new row with the team name in Column A and the subdimension name in Column B. Subdimension names must be spelled exactly as they appear in orgname_dimensions-list_mon-dd-yy.md.
- To remove access to a subdimension, delete the row for that team/subdimension pair.
- To remove a team entirely from dimension access, delete all rows for that team.
Note: If you remove all rows for a team, you will be prompted during import to confirm that you want to remove that team's access. If you proceed, the team will have no dimension access after import. If you did not intend to remove the team, cancel the import, re-add the team's rows, and re-upload. 5. To grant a team access to all dimensions and subdimensions, ensure there is a single row for that team with Access to All Dimensions in Column B.
Current Product Access tab
Lists each team's product chart access.
- Team Name — The name of the team.
- Product Chart Access — A comma-separated list of products the team has access to (e.g., Axe Monitor, Axe DevTools for Web, Axe DevTools Mobile, Axe Auditor).
To update a team's product access:
- On the "Current Product Access" tab, locate the row for the team you want to update.
- To grant access to a product, add its name to the Product Chart Access column for all of that team's rows. Multiple products should be comma-separated (e.g., Axe Monitor, Axe DevTools for Web, Axe DevTools Mobile, Axe Auditor). Product names must be spelled exactly as shown.
- To remove access to a product, delete its name from the Product Chart Access column. Leave other product names in place if the team should retain access to them.
- To remove all product access for a team, delete the row for that team.
Step 3: Import the updated file
What to expect during import:
- Teams included in the import file will have their access replaced.
- Teams not included in the import file will no longer have access to Axe Reports.
- If the import fails, no changes will be made.
If you signed up for email notifications, you will receive an email when the import is complete or if it fails.
File requirements:
- File type: .xlsx
- File size: 10 MB max
- Required columns: Team Name, Subdimension (Current Dimension Access tab); Team Name, Product Chart Access (Current Product Access tab)
- Team names must match existing teams in your organization exactly.
- Subdimension names must match the values in your dimensions list exactly.
When you are ready to apply your changes:
-
In Axe Reports, navigate to Team Access.
-
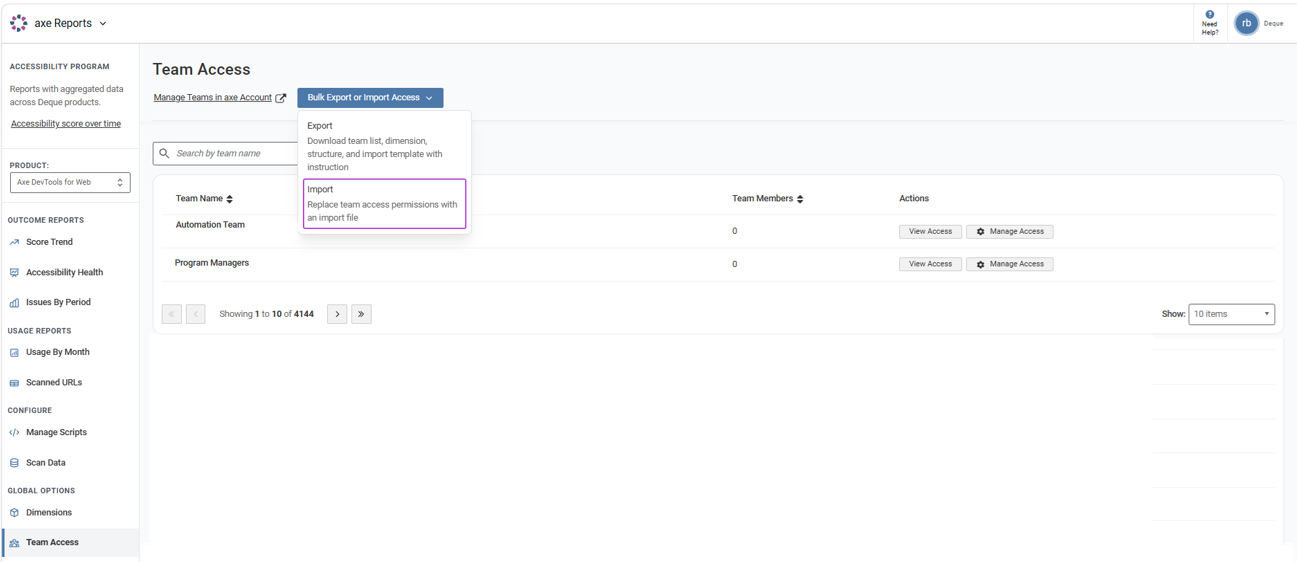
Open the Bulk Export or Import drop-down.
-
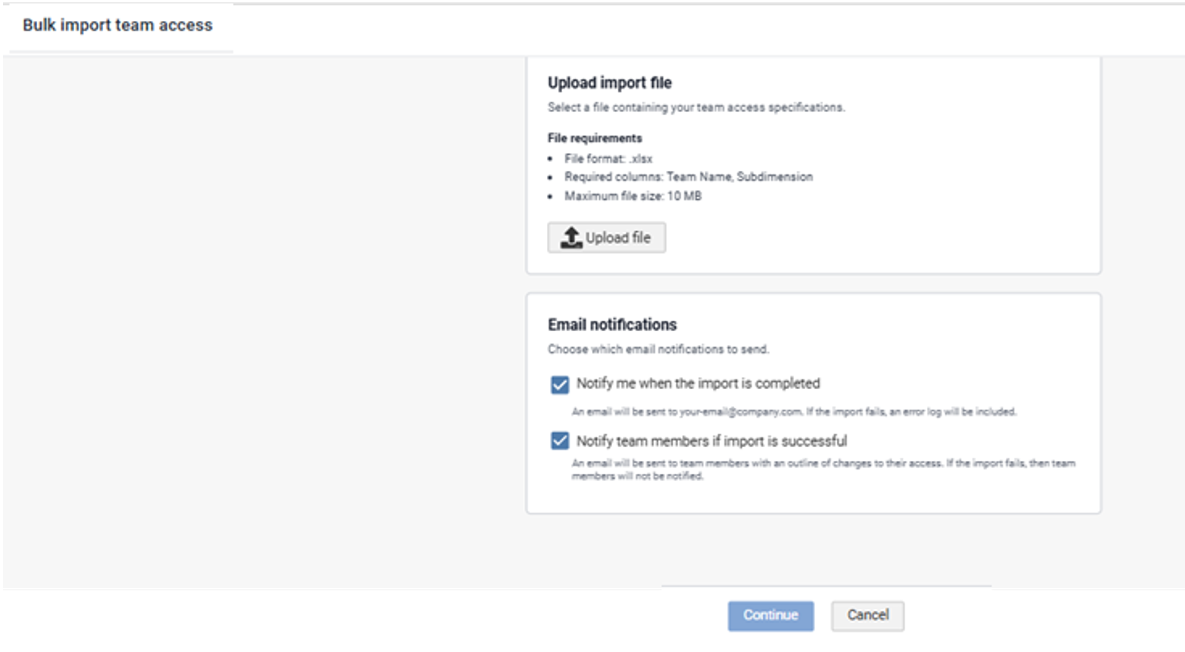
Click Import. The Bulk import team access page is displayed.
-
Upload your edited orgname_team-access_mon-dd-yy.xlsx file.
-
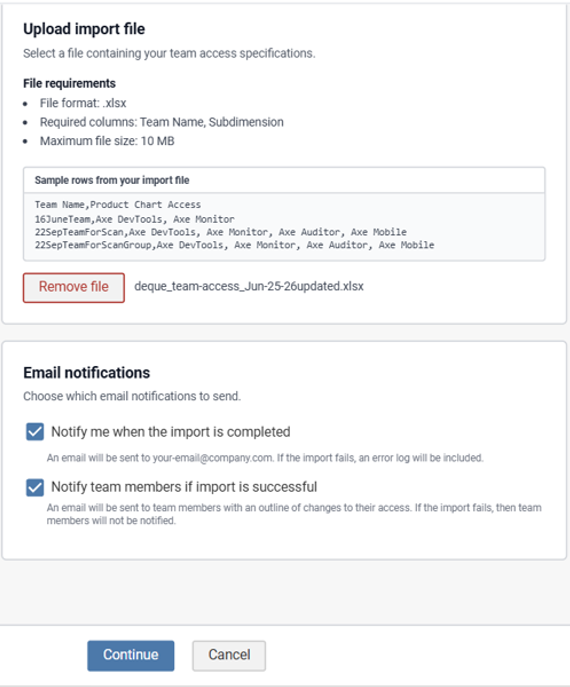
Review the confirmation screen and click Continue. The Upload import file page is displayed.
Note:
- Remove file removes the currently uploaded file from the Upload import file section and allows a new file to be selected. The file must meet the file requirements (.xlsx format, required columns Team Name and Subdimension, maximum size 10 MB) before the import can proceed.
- Optional email notifications can be enabled for yourself, and all team members who are getting their access updated.
-
Click Continue. The Start import confirmation dialog is displayed.
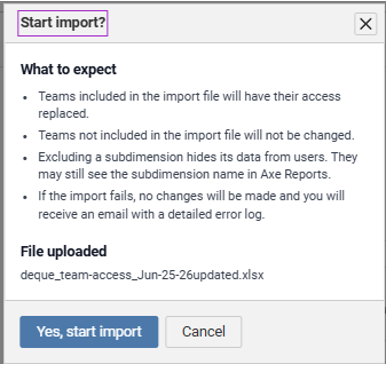
-
Click Yes, start import. The import processing dialog is displayed.
You can cancel the upload import file, by clicking Cancel upload.
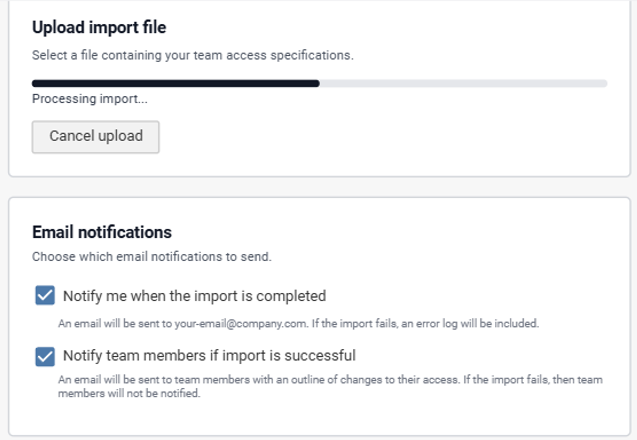
Once the upload process is complete, the Import completed dialog is displayed.
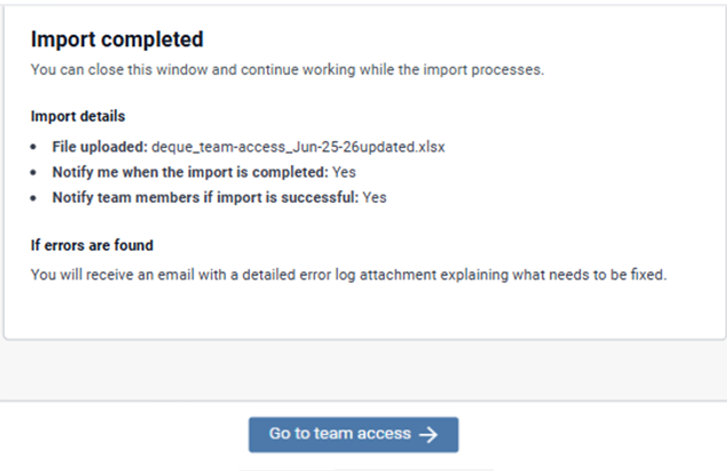
-
Click Go to team access to go back to the Team Access page.
Troubleshooting errors during import
The system checks the file against the File requirements:
- File format: .xlsx
- Required columns: Team Name, Subdimension
- Maximum file size: 10 MB
If the file does not meet the above mentioned file requirement, the following page is displayed.
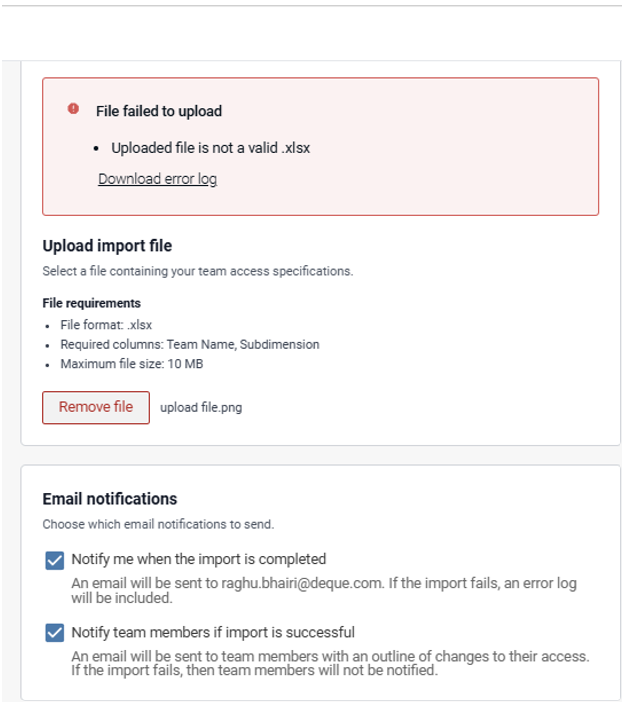
- A Download error log link is provided so the user can download the error details.
- The rejected file remains listed next to the Remove file button.
- To correct the failure, click Remove file, then select and upload a file in the correct .xlsx format.
Need help?
Contact your Deque account representative or email helpdesk@deque.com