Adding a Screenshot to an Issue
Adding a screenshot to an issue leverages a simple "browse for / upload" process that should be familiar to you. You can upload a maximum of 10 screenshots per issue.
To add a screenshot:
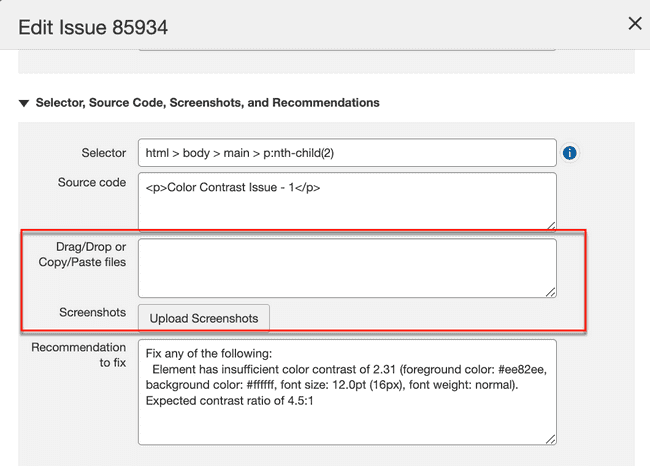
You can add screenshots using either the drag/drop or copy/paste feature, or the upload screenshots feature from your system to the issue for a checkpoint.
-
Drag/Drop or Copy/Paste files: You can copy and paste the screenshots from the clipboard memory, or drag and drop the screenshots from your system to the issue here.
-
Upload Screenshots: To the right of the Screenshot field on the Edit Issue dialog box, activate the Upload Screenshots button.
-
The Open dialog box pops up with file management tools for finding and choosing the screen shot image for uploading from a local or network drive.
-
Locate and select the desired image file from your computer (for example, using Chrome, browse for, then highlight to populate the File name field, then activate the Open button).
A thumbnail of the image is displayed under the Screenshot field (with an X at the top, right corner for removing), and the Name field is automatically populated with the name of the image file.
-
-
Activate the Save button.
The Edit Issue popup window closes, and you are returned to the Issues for
screen. The screen shot remains a part of the issue record (and will be visible upon editing the same issue again).

