Organizing Scans
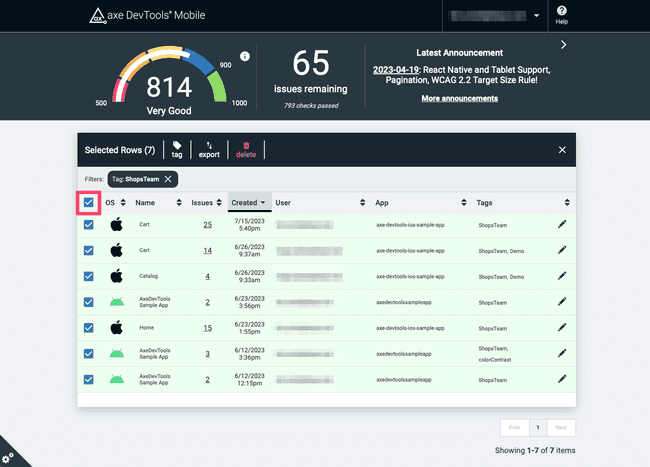
With the dashboard, you can view and organize iOS and Android scans in one place. You can easily find what you need with the features highlighted below, such as tagging, sorting, etc.
Tagging
Over time scans can become challenging to find. We recommend using the tag feature to help you locate and group essential scans. Tagged scans are available to other team members. Be intentional about tagging scan results to minimize clutter across your team and maximize productivity.
Some of our customers enjoy using this feature to:
- Tag by team name to show their accessibility progress as issues are identified and fixed.
- Tag by build to quickly identify which version has which issues.
- Tag by release to share results within your organization.
In addition, you are able to send tags with your accessibility results directly from the frameworks to the dashboard, which makes them immediately available for sharing. See examples for Android and iOS.
Privacy
You can only view scans you own and scans that others have tagged.
Sorting
Create a customized dashboard by sorting scans according to different fields. By default, the most recent scans will appear first. Scans can be sorted by application or by the number of issues found in order to quickly identify the most pressing issues. For further refinement, you can also sort by operating system (OS), scan name, and tag.
Filtering
As scans accumulate, it will become harder to find specific information. With the addition of a few well-placed tags and a filter, you will be able to identify and open your scans more easily.
To filter your scans:
- Click the funnel button in the table's heading. A dialog will appear with input fields for each filter.
- Add the criteria you wish to filter by. For tags, click the 'Add Tag' button between additions.
- Click "Apply" to add the filter(s) and refine the number of scans displayed.
Each filter is exclusive, meaning that more filters applied will result in fewer scans displayed.
The summary banner is updated when filters are applied.
Batch Operations
By selecting multiple scans in the table, you'll see bulk operations appear. Select one to apply that operation to the group of selected scans.
For example, as a QA Engineer, Rachael can select the scans they made for a specific Android team. They can then tag the scans with 'team:tabby' and share links with the team or ticketing system.


