Issues
Although axe Auditor is not intended to be a long term issue management repository, it offers the ability to:
- Log issues both automatically and manually
- Record details via convenient entry and selection, include source code, and attach screenshots
- Export to a single file suitable for importing into an issue tracking system
Issues are always associated with specific Test Runs, Pages, and Checkpoints in axe Auditor. When detected as a result of automated testing, they are logged against individual checkpoints. Issues are made up of several fields of information. They require an entry of both a textual Summary and Description, as well as the selection of a Checkpoint, Issue Type, Description Type, Impact and Priority.
Optionally, you may paste in Source Code, upload a Screenshot, Flag for Review, and enter additional Notes. When issues are added from a Checkpoint screen, that Checkpoint is automatically selected. The Page is automatically selected by default.
Adding Issues
New issues are added from either the Checkpoint Tests for Page screen, or from any Checkpoint screen via the Add Issue button, which displays a popup window form with several required and optional selection and entry fields.
Editing Issues
Editing issues is done by clicking the Summary column link on the 'Issues for' screen, which causes the Edit Issue dialog box form to pop up in a new foreground window that displays existing issue field values in fields that are editable, which allows you to then modify entries and/or make different selections and save them.
For complete instructions, see Editing an Issue. See also Adding a Screenshot to an Issue.
Copying Issues
Copying issues is done by clicking the Summary column link on the 'Issues for' screen, which causes the Copy Issue dialog box form to pop up in a new foreground window where you can copy existing issues from one test run to another, or within test runs.
For complete instructions, see Copying an Issue.
Viewing Existing Issues
Issues can be accessed from either the Issues column links on the Test Runs screen, the # issues logged link from the Test Run Overview screen (either for the entire test run or for each individual page within the test run), the # issues logged links on the Checkpoint Tests for Page screen (either in the Automated or Manual testing fields), or from each Checkpoint screen. These links all display the 'Issues for' screen, on which you can review key information about the issues that have been added to the test run, and filter the display based on several criteria.
For complete instructions, see Viewing Issues.
'Issues for' screen Overview
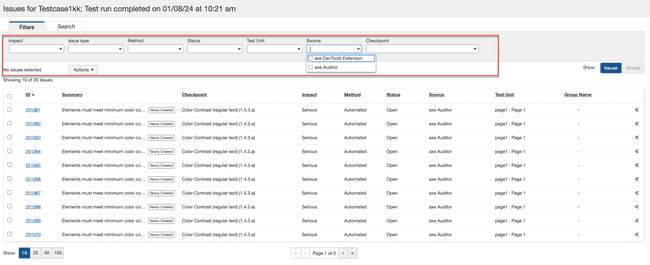
The 'Issues for' screen is simply a table displaying multiple columns of information about each issue row (#, Summary, Checkpoint, Impact, Method, test Unit, Group Name, and Preview button), with filter controls at the top and page display controls at the bottom.
For complete instructions, see Viewing Issues.
Display Controls Overview
The Issues for screen displays a table with columns of pertinent information about issues logged for a particular test run to give you a quick summarized view of the results. After accessing any Issues for screen, there are several methods of controlling the information displayed using tools available in the user interface.
Filters
The top section of the Issues for screen provides 5 filter menus (Impact, Issue type, Method, Page, and Checkpoint), each of which functions as a drop-down list of checkboxes you can use to select various criteria to refine the information displayed in the table section below.
Note - Initial (Default) Filters Applied: By default, 'All' is selected for each of the 5 filters upon arrival at the Issues for screen, and each filter menu is collapsed. If you use the filter to select one or more (but less than all) option from a filter, then later want to return the setting to all, a Clear selection link appears at the top of the list to return to the default setting. When no issues match one or more selected filters, a notification appears to indicate this.
For more information, see Filtering Issues.
Sortable Table Columns
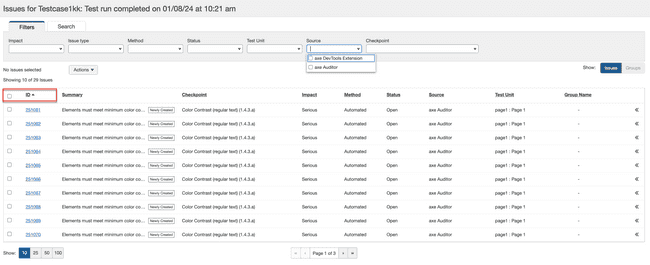
The column headings are clickable toggles for sorting the table rows by that column of information in alphanumeric order. Clicking the column heading link once displays a down arrow icon to the right of the label text that represents descending order. Clicking it a second time displays an up arrow (^) and reverses the sort order to ascending.
Note - Initial (Default) Display Order: By default, the table rows are sorted by Issue ID in vertically ascending numeric order (the lowest # appearing in the top row).


