Create VPATs
You can create VPATs using the following methods:
- Create a VPAT from the Manage VPATs dashboard
- Create a VPAT from a Test Case
- Create a VPAT from the Test Run Overview Page
Create a VPAT from the Manage VPATs Dashboard
To create VPATs from the Manage VPATs dashboard, perform the following steps:
-
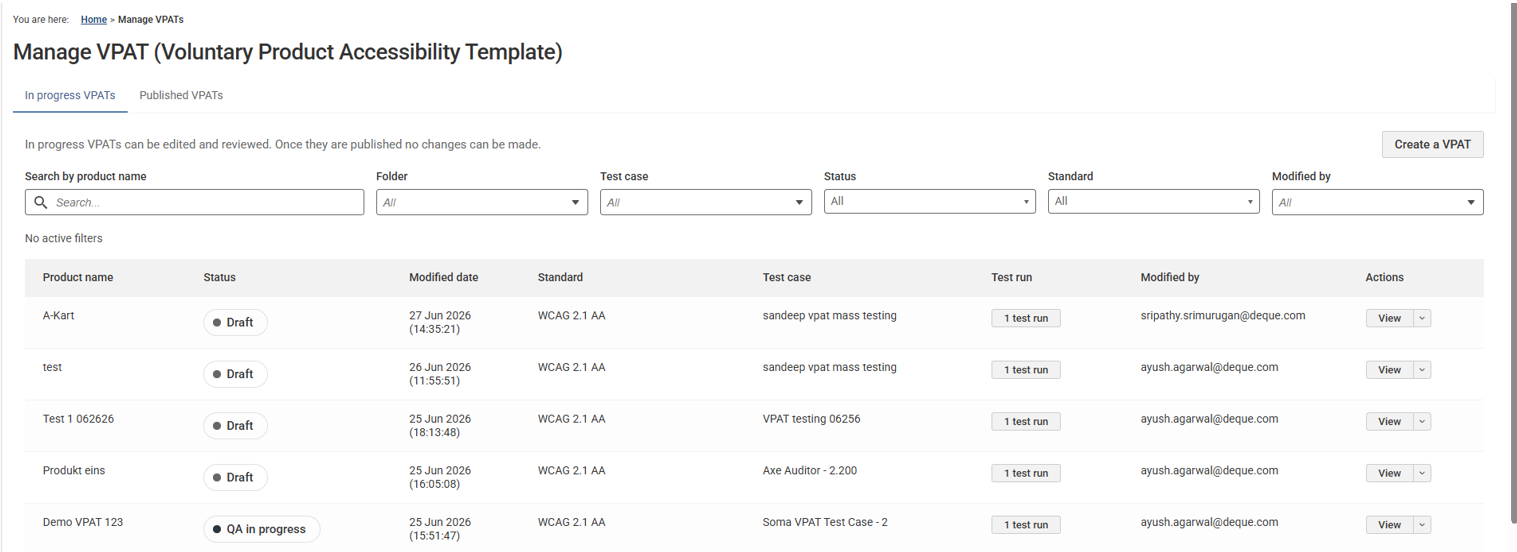
On the Axe Auditor homepage, click VPATs. The Manage VPATs page appears.
-
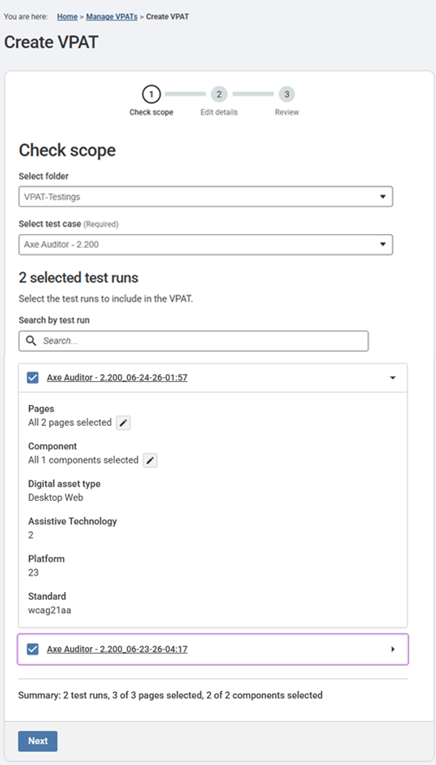
Click Create a VPAT. The Create VPAT creation page appears.
-
Select the appropriate folder from the Select folder drop-down.
-
Select the relevant test case from the Select test case drop-down.
-
If you know the exact test run name, enter it in the Search by test run search field.
-
Select the checkbox for each test run that you want to include in the VPAT.
-
Expand a test run (via the drop-down arrow) to review the following details:
- Pages – number of pages selected
- Component – components included
- Digital asset type – e.g., Desktop Web
- Assistive Technology – count
- Platform – platform ID/count
- Standard – e.g., wcag21aa
-
If you want to review and edit the existing details on Pages or Component, click the appropriate pencil icon.
Note: All selected test runs must use the same digital asset type. You cannot create a VPAT using test runs with different digital asset types under the same test case.
For Page(s):
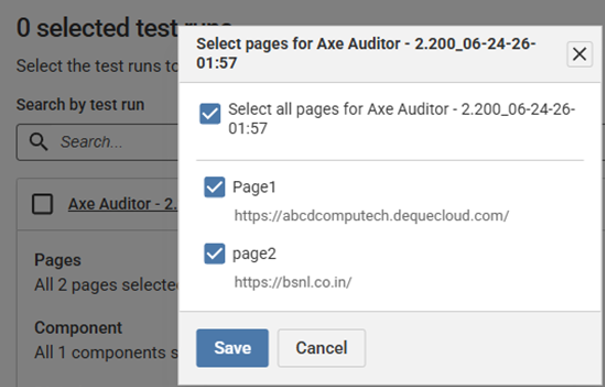
- You can uncheck the selected pages based on the requirement and click Save.
For Component(s):
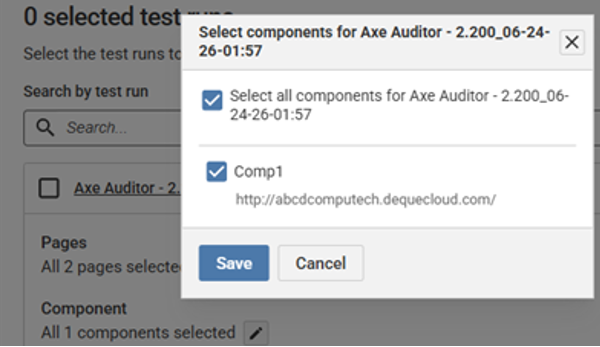
- You can uncheck the selected component(s) based on the requirement and click Save.
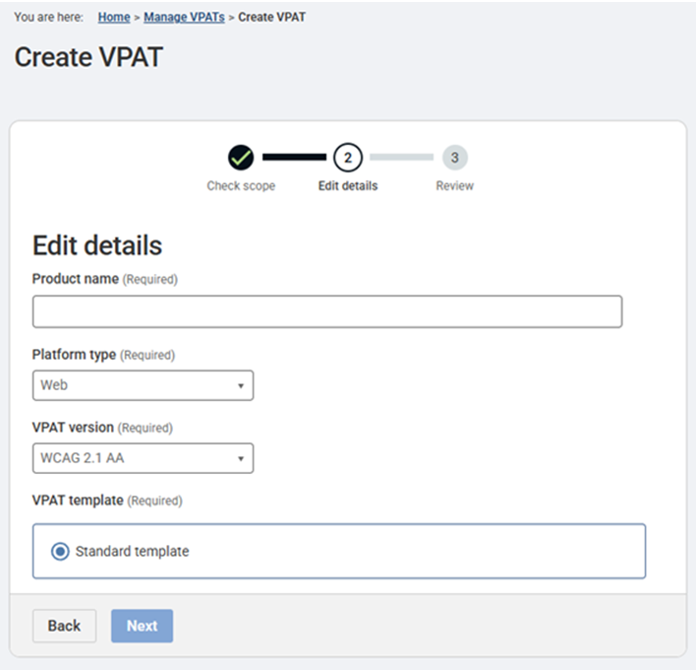
- After you provide all the required information, click Next. The Edit details page appears.
-
Enter the product name in the Product name field that will appear in the Accessibility Conformance report.
-
Select a platform from the Platform type list. Available options are Web, Software, and Hybrid.
For non-web digital asset types, the system automatically selects the platform type based on the digital asset type associated with the selected test runs.
-
Select the accessibility standards from the VPAT version drop-down to include in the VPAT. When multiple standards are selected, the system uses the highest applicable WCAG version as the baseline for the report.
For example, if you select WCAG 2.2 and an international standard that maps to WCAG requirements, the VPAT is generated using WCAG 2.2 as the governing version.
-
Select a template from the VPAT template list and click Next. The Review page appears.
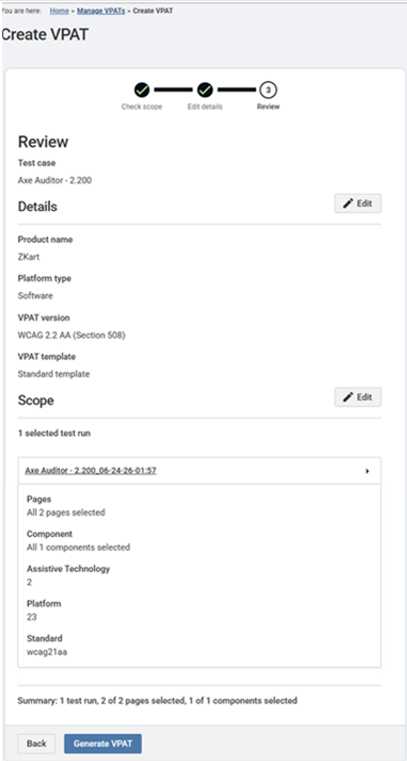
The Review page displays a summary of the information entered on the Check Scope and Edit Details pages. Review all details before finalizing and creating the VPAT. To make changes, click the Edit (pencil) icon next to the relevant section, or click Back to return to a previous page and update the necessary information.
-
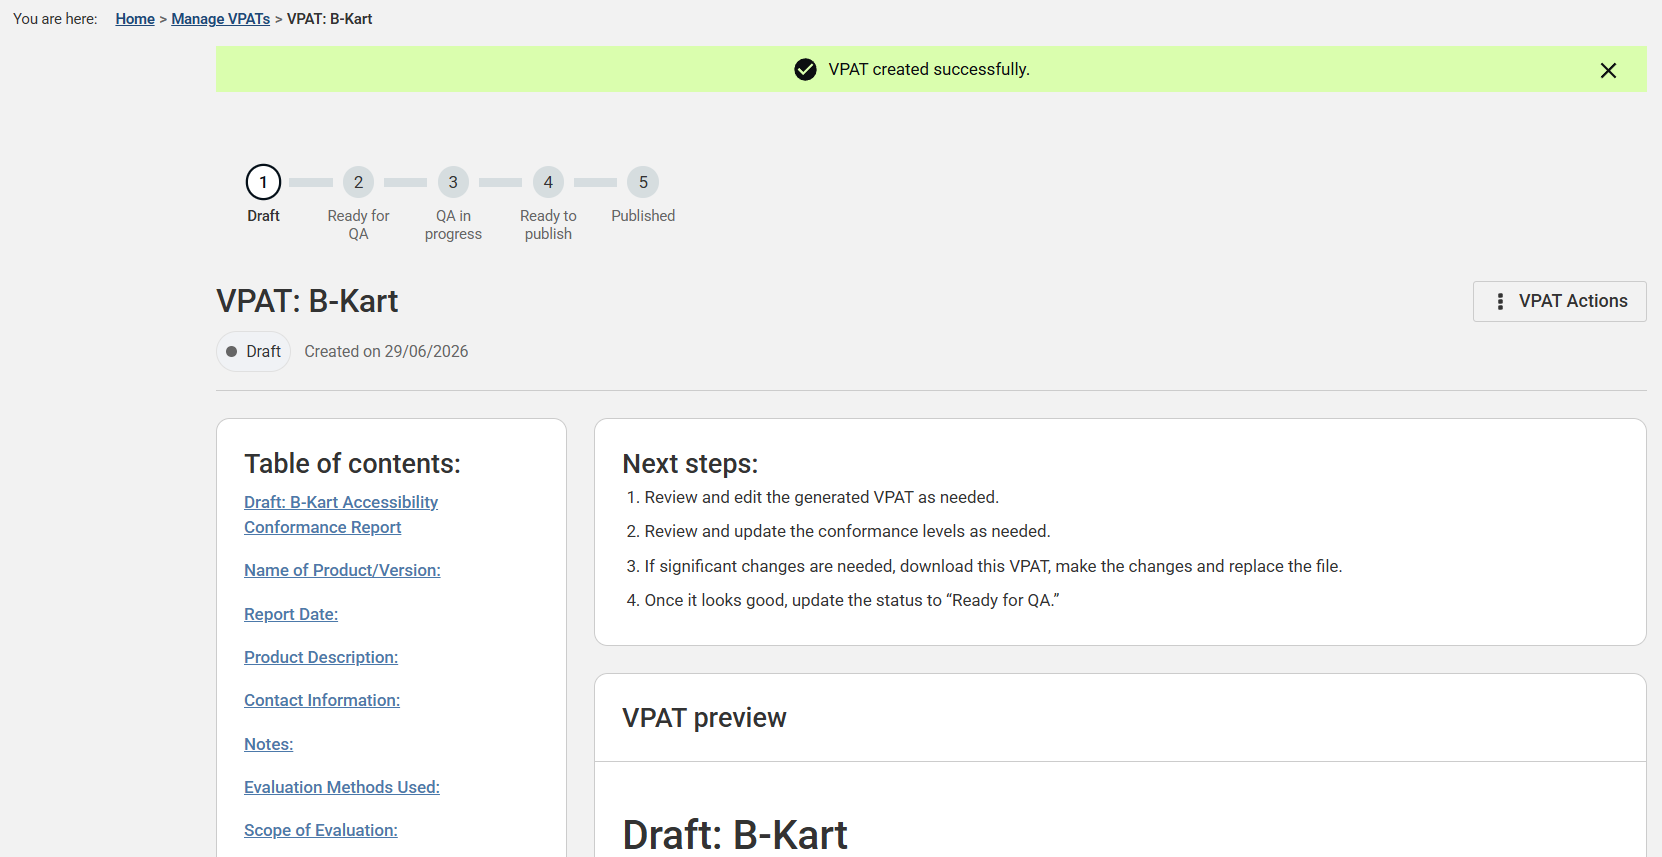
Click Generate VPAT. The VPAT created successfully (draft mode) page appears.