
Users
Users option allows customer administrators to view and manage users who have access to their client. You can search for users, view their audit access and status, and manage their access.
The Users tab under Access Management allows you to view, add, and manage the users who have access to your organization's test cases.
View Users
To view all users associated with your client, perform the following steps:
-
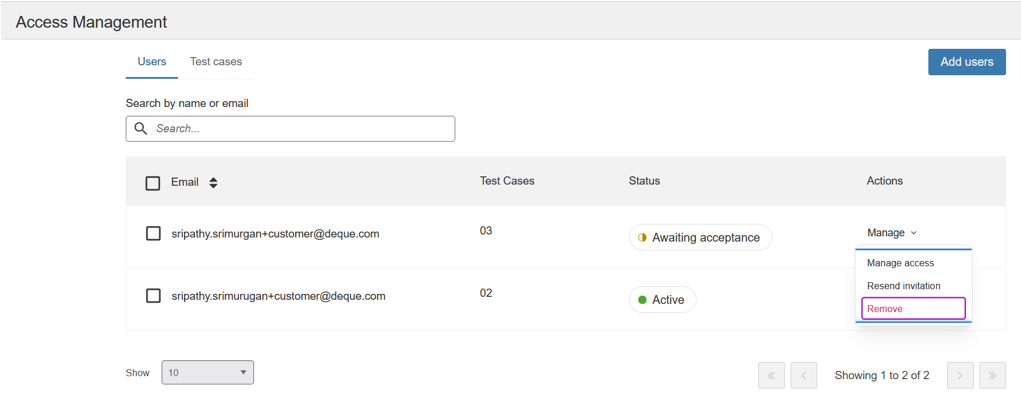
On the Axe Auditor homepage, click Access Management. The Access Management page appears with the Users tab selected by default.
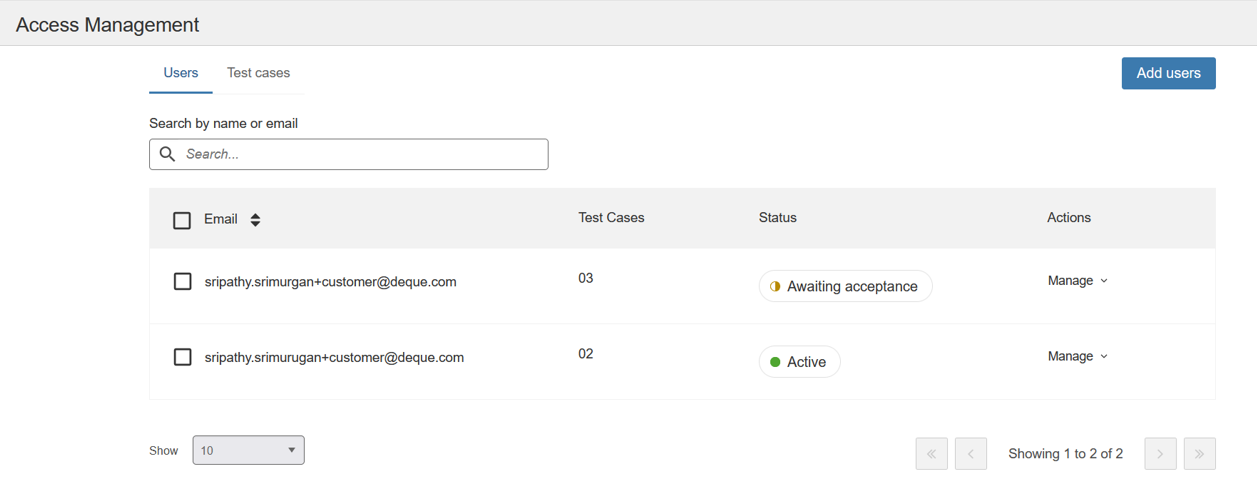
| Field | Description |
|---|---|
| Displays the email address of the user. | |
| Test Cases | Displays the number of test cases assigned to the user. |
| Status | Displays the current status of the user's access — Active (accepted access) or Awaiting acceptance (invite pending). |
| Actions | The Manage option allows you to perform Set access level to the available test cases, - Resend invitation to the user if they did not accept the invitation and to Remove the user and they will lose access to the assigned test cases. |
To set the test case access level, perform the following steps:
-
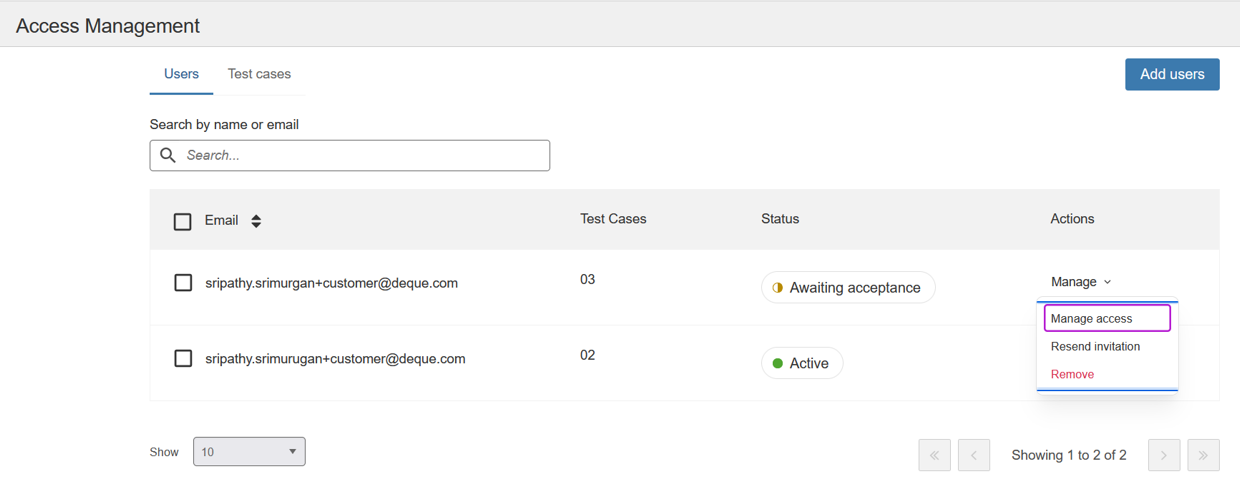
From the Access Management page, under Actions, click the Manage drop-down.
-
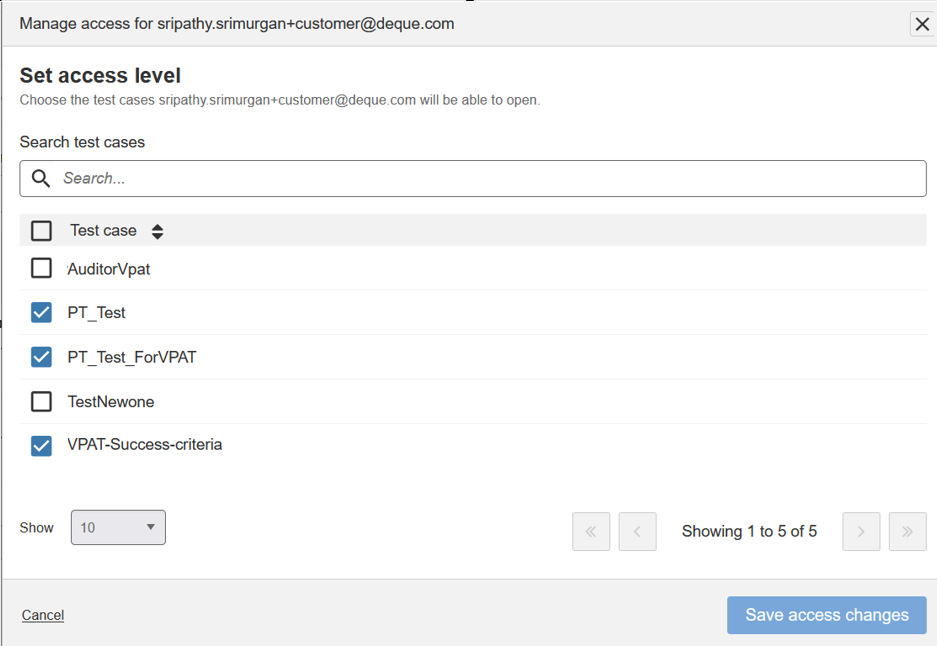
Click Manage access. The Set Access Level dialog appears.
-
Choose the test case(s) you want to add, or uncheck the test cases you want to remove, and click Save access changes. The Access updated successfully information page appears and displays the number of test cases assigned.

To Resend Invitation, perform the following steps:
-
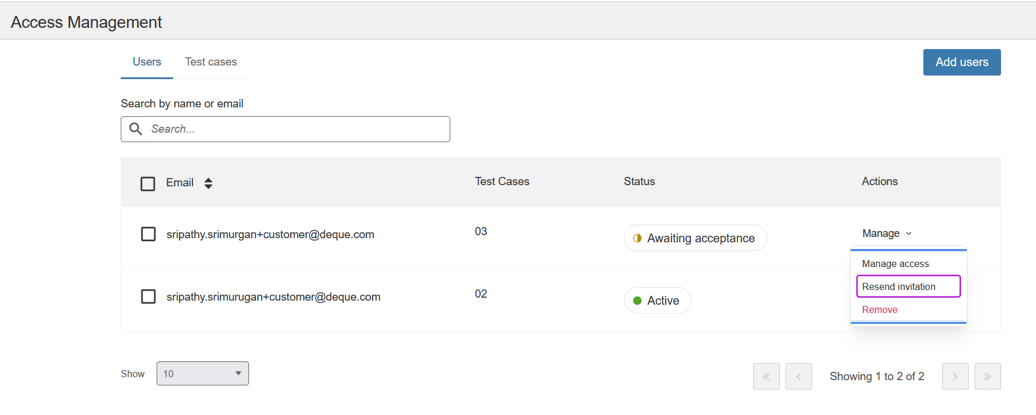
From the Access Management page, under Actions, click the Manage drop-down.
-
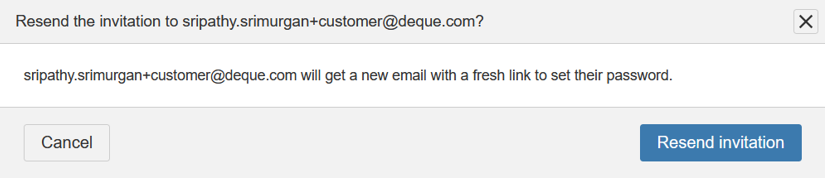
Click Remove Invitation. The Resend the invitation dialog appears.
-
Click Resend invitation. The Invitation resent to the user page appears.

To Remove user, perform the following steps:
-
From the Access Management page, under Actions, click the Manage drop-down.
-
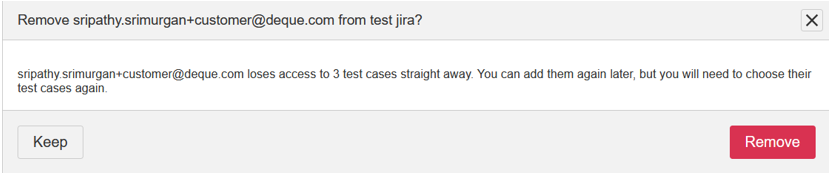
Click Remove. The Remove user dialog appears.
-
Click Remove. The user removed page appears.

You can also:
- Search for a user by name or email by using the Search by name or email box.
- Change the number of users displayed on each page by using the Show list.
- Navigate between pages by using the pagination controls.