
Getting Started with the Jira Integration
Setting up the Jira Integration is quick and easy. This document will guide you through the necessary setup and configuration that will enable your entire organization to make use of this powerful integration.
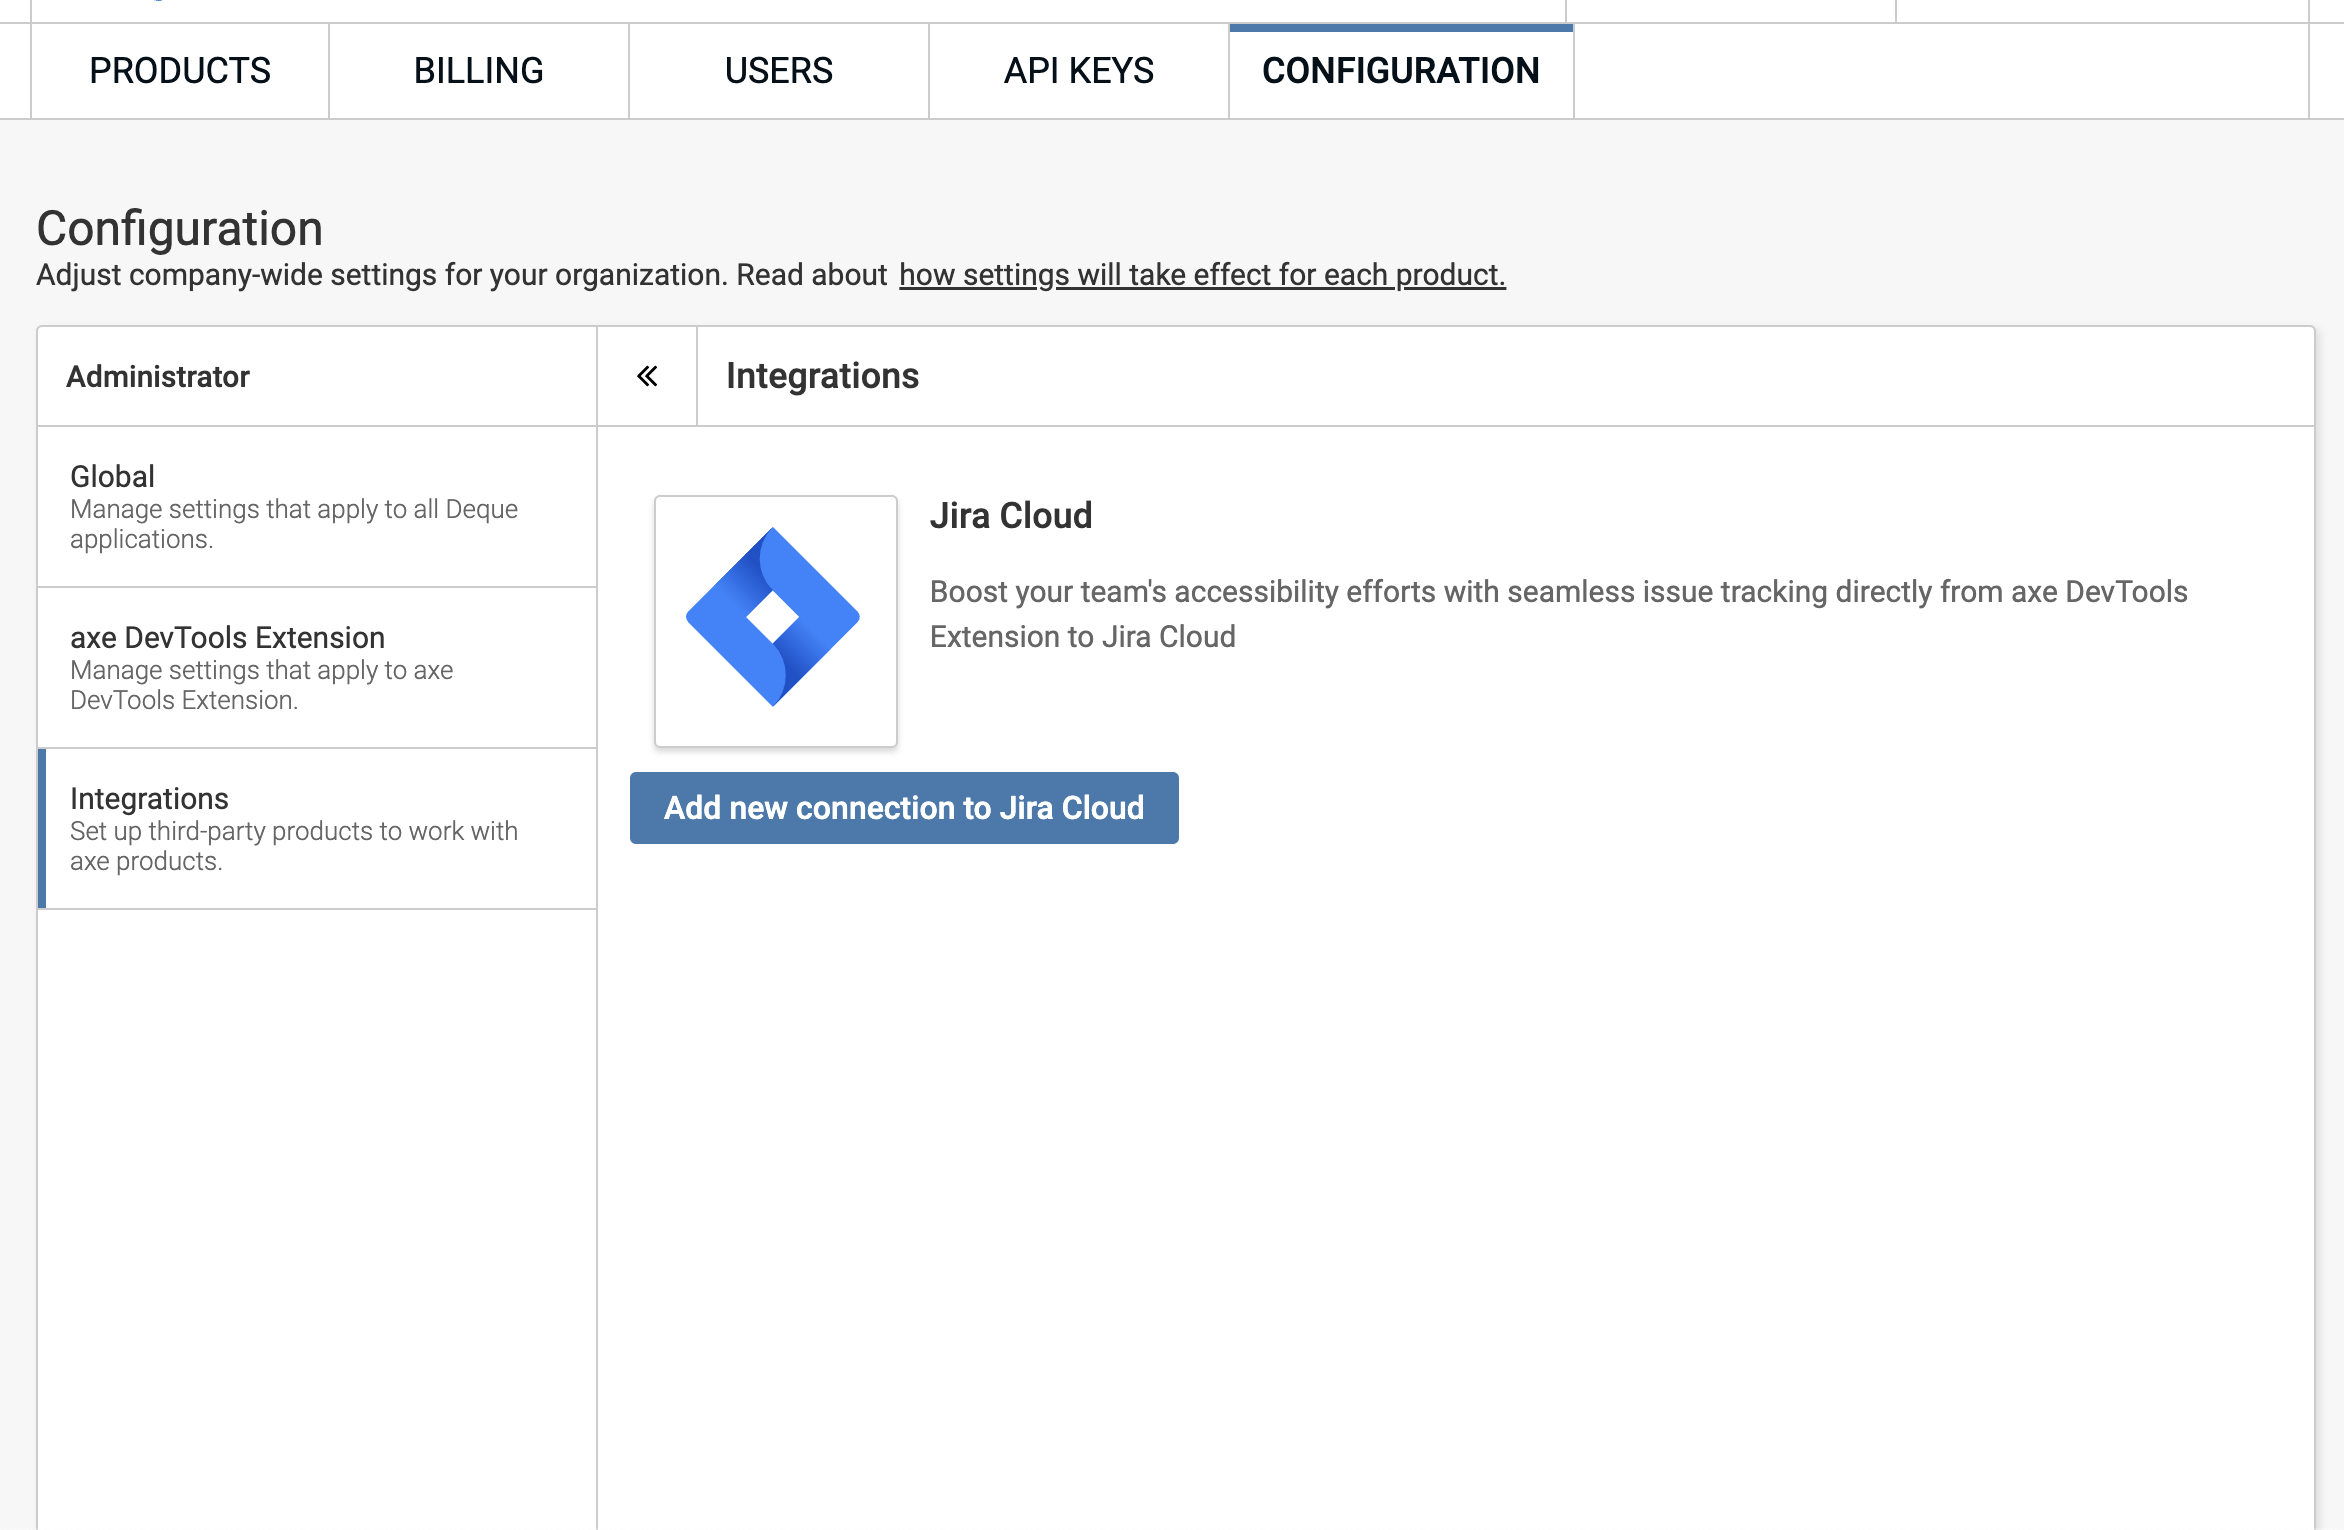
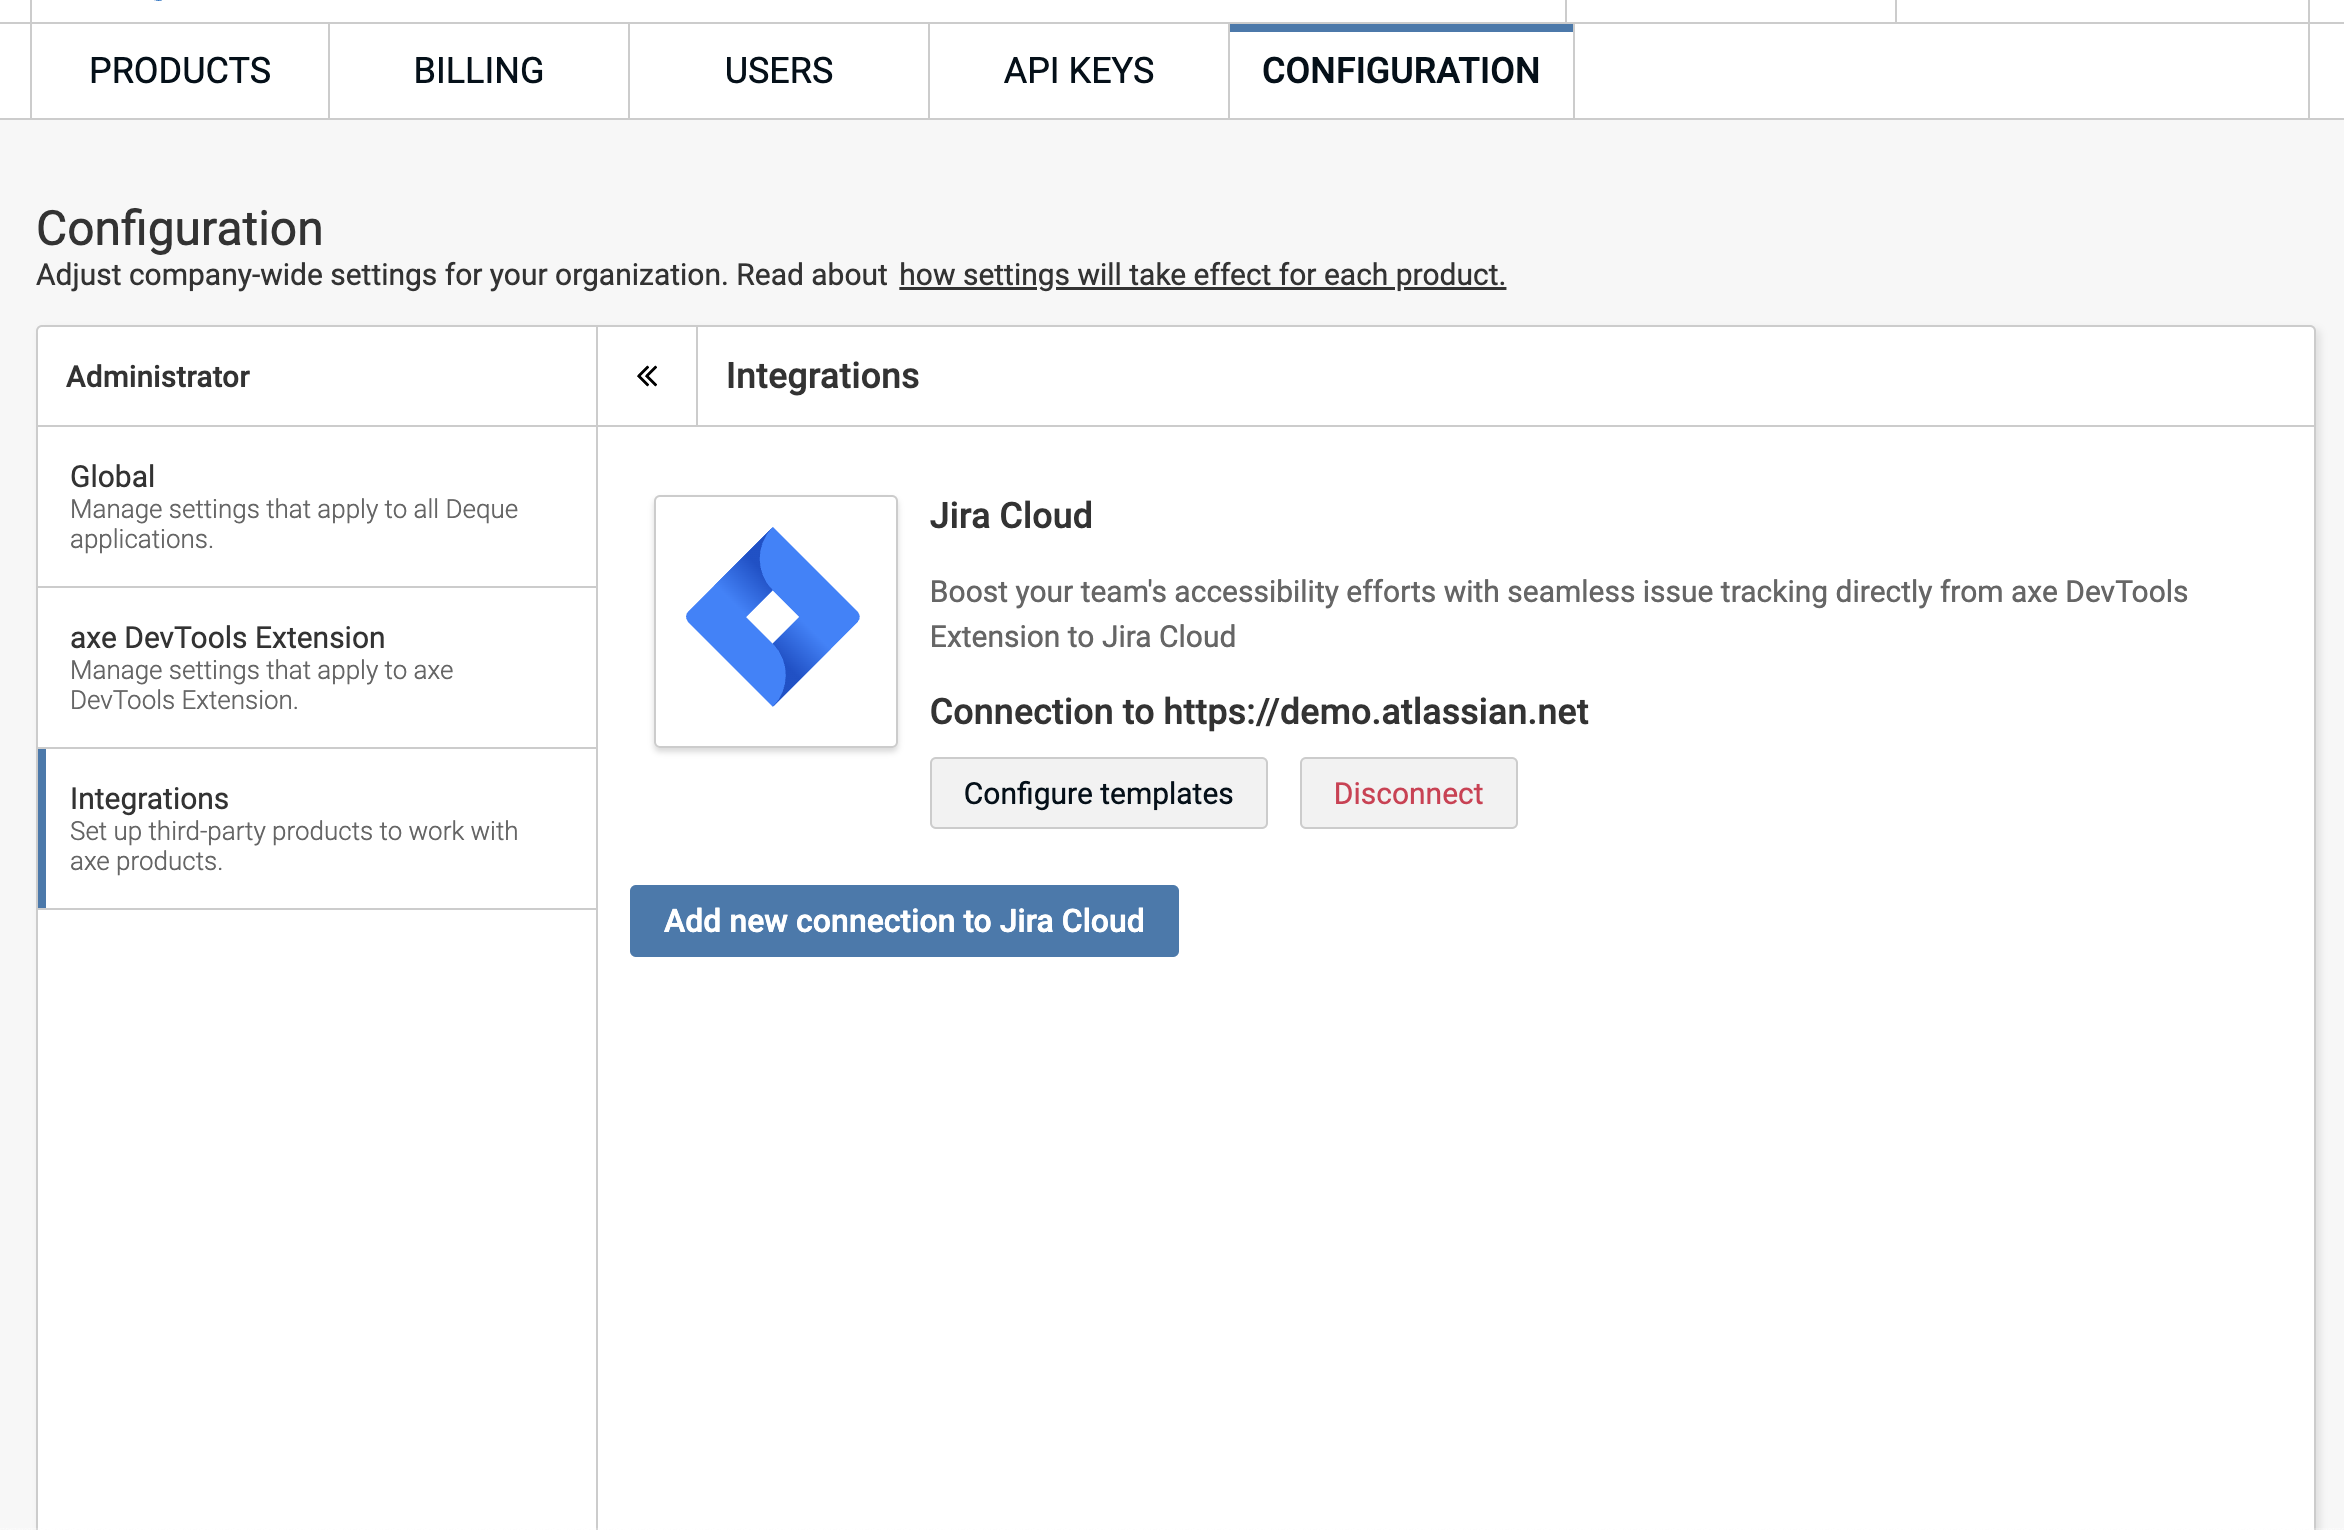
Connecting to Jira Cloud
To begin, an authenticated connection to your Jira instance must be established by an axe Account Portal Admin. This connection will be used across your whole organization so it is important that the user who establishes the connection has access to every project that you wish to have issues sent to.
- Navigate to the "CONFIGURATION" page within the axe Account Portal
- Click the "Integrations" link within the "Configuration" nav
- Click the "Add new connection to Jira Cloud" button
- A new popup window (OAuth consent) will be launched in which you will be asked to login (if you already have an active Jira session, this step will be skipped)
- Once authenticated with Jira, you will be asked to choose a Jira instance to connect to in the "Use app on" select list
- Click "Accept" once you've chosen a Jira instance
- The popup window will close and a confirmation dialog will be rendered
- Confirm the Jira instance you wish to connect to in the dropdown
- Click "Finish"
- A "Successfully connected to Jira" message will appear once connected
Connecting to Jira Data Center
- Navigate to the "CONFIGURATION" page within the axe Account Portal
- Click the "Integrations" link within the "Configuration" nav
- Click the "Add new connection to Jira Data Center" button
- Click the "Configure settings" button (under the "Not configured connection" text)
- Provide your Jira Data Center URL (e.g.
https://jira.mycompany.com)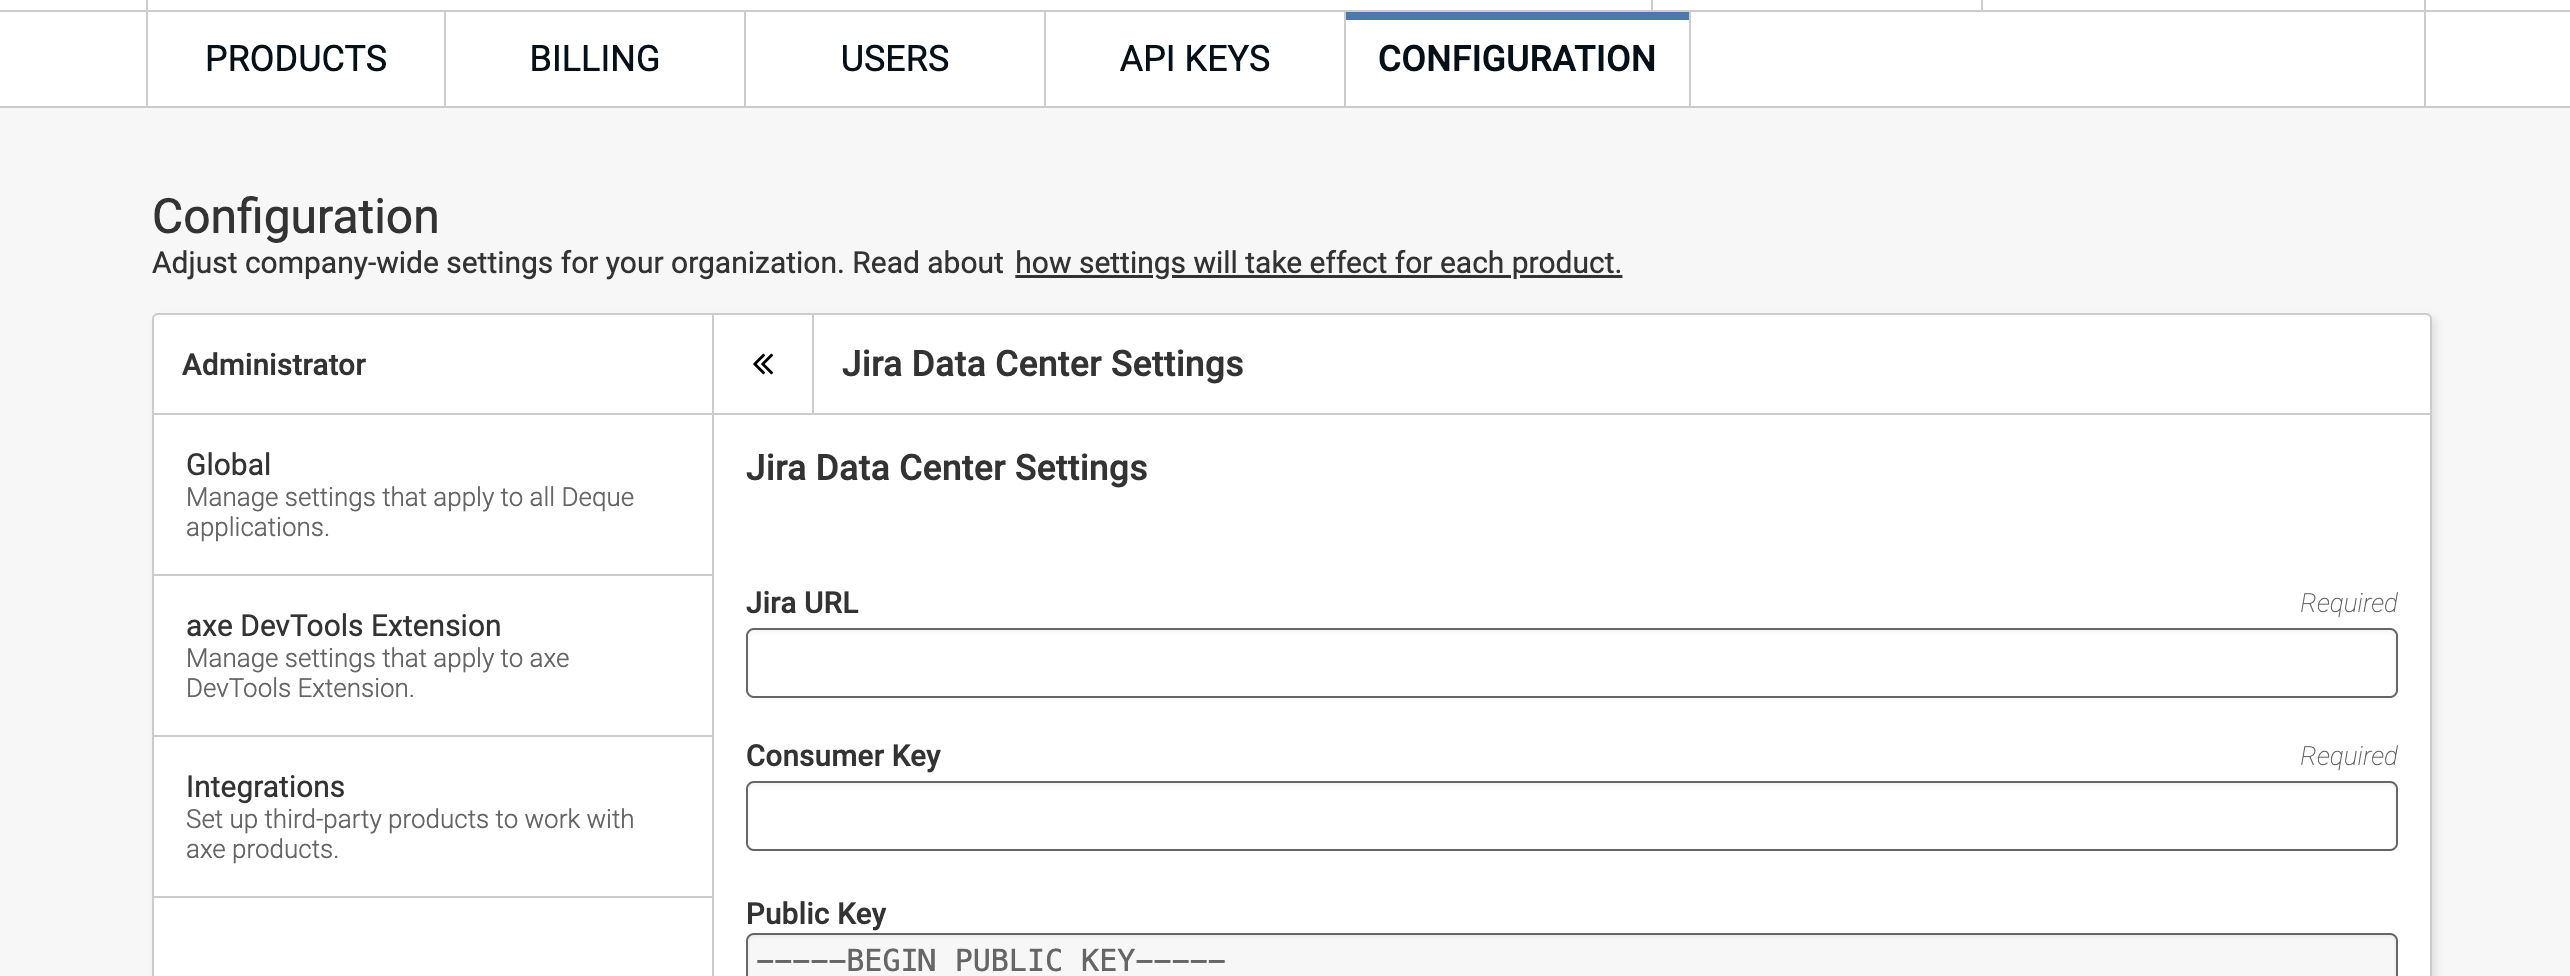
- Provide your Consumer Key (must match whatever you enter in Jira).
- In Jira Data Center...
- Click "Settings" button (gear icon in the top-right corner of the page)
- Click "Applications" link
- Click "Application Links" link
- Enter
https://www.deque.comas the URL in the text input - Click "Create New Link" button
- Click "Continue" button
- If you see a warning similar to "No response was received from the URL you entered" or regarding redirects, you can safely ignore it. The URL itself is not used for any kind of validation; it is simply a required field to get the connection set up properly
- Provide an Application Name (e.g. "Deque Jira Integration"; you will have to provide this same value in the Jira Data Center Settings page)
- Check the "Create incoming link" checkbox
- Click "Continue" button
- Enter a value in the Consumer Key field (e.g. "DequeOAuthKey")
- Enter a value in the Consumer Name field (e.g. "Deque Jira Integration")
- Enter the public key displayed in the "Jira Data Center Settings" page in the Public Key field
- Back in the Jira Data Center Settings page in the axe Account Portal...
- enter the same Consumer Key that was entered in Jira Data Center
- Click "Save" button
- Click the "Connect to Integration" button
- In the popup window, log in to Data Center if you are not already
- Click "Allow"
- Close the window
Prerequisite for Jira Cloud Connection from Deque On-Premises Instance
Register the Jira Client App
- Navigate to https://developer.atlassian.com/console/myapps/
- Click on the "Create" button and choose "OAuth 2.0" integration
- Provide a name (e.g. "Acme Corp - axe on-prem - Jira Cloud Integration")
- Check I agree to be bound by Atlassian's developer terms checkbox and click the "Create" button
- In the "Distribution" tab, click on "Edit" and select "Sharing" for "Distribution Status"
- Set "Vendor name" to "Deque"
- Set "Privacy Policy" to "https://www.deque.com/privacy-policy/"
- Set "Does your app store personal data?" to "No"
- Save changes
- In the "Permissions" tab, click the "Add" button (next to "Jira API")
- Once it is ready for configuration (allow some time), the "Add" button will be swapped with a new "Configure" button
- If the "Configure" button does not appear, try reloading the page
- Click "Configure"
- Click "Edit Scopes"
- check the following checkboxes: "read:jira-work", "read:jira-user", "write:jira-work" and "manage:jira-webhook"
- In the "Authorization" tab, click the "Add" button
- Set "Callback URL" to "https://axe.deque.com/jira-direct/connected"
- Click the "Save Changes" button
- Download this image (right click > save image as):

- In the "Settings" tab, click "Change avatar" and select the axe logo you just saved
- In the "Authentication details" section, save the "Client ID" and "Secret" as they are used as part of you on-prem installation
- Once your Deque on-prem installation is complete, follow the above steps to establish the connection to Jira cloud
Disconnecting an Active Connection
Clicking "Disconnect from Jira" will invalidate the active authentication session previously established with Jira. In addition, users will no longer be able to send issues to the Jira instance which was disconnected.
To reconnect a disconnected connection, click on the "Connect to Jira" button which will take you through the steps of connecting once again.
Creating multiple active connections to the same Jira instance should be avoided. Instead, a user with all the required access in Jira (permissions, projects, etc.) should establish the connection.
Deleting a Connection
Once a connection has been disconnected, you may delete it by clicking "Delete Jira Connection".
You may still connect to an instance that has previously been disconnected and deleted. Simply follow the steps to establish a new connection.
Templates
Once a connection has been established, templates can be created to standardize how axe issues are mapped to Jira fields. Templates help ensure consistent issue creation across your organization.
For detailed information about creating, managing, and using templates, see our Templates documentation.
Sending Issues to Jira
Once you have established a Jira connection and created templates, you can start sending axe issues to Jira. The process allows you to send individual issues or groups of issues to create Jira tickets.