
Sending Issues from Axe Auditor to Jira
Axe Auditor's Jira integration allows you to push accessibility issues that you encounter during testing directly to Jira as a single issue or multiple issues in your Jira instance. This helps you track remediation progress, collaborate across teams, and resolve accessibility issues more efficiently.
Before you begin
To push issues to Jira from Axe Auditor, you need:
- At least one Jira connection configured for your organization.
- At least one issue template that maps Axe Auditor fields to Jira fields.
Once your axe Account admin sets up a Jira connection and template, you can start sending issues from Axe Auditor to Jira.
Send Single Issue to Jira
To send single issue to Jira, perform the following steps:
-
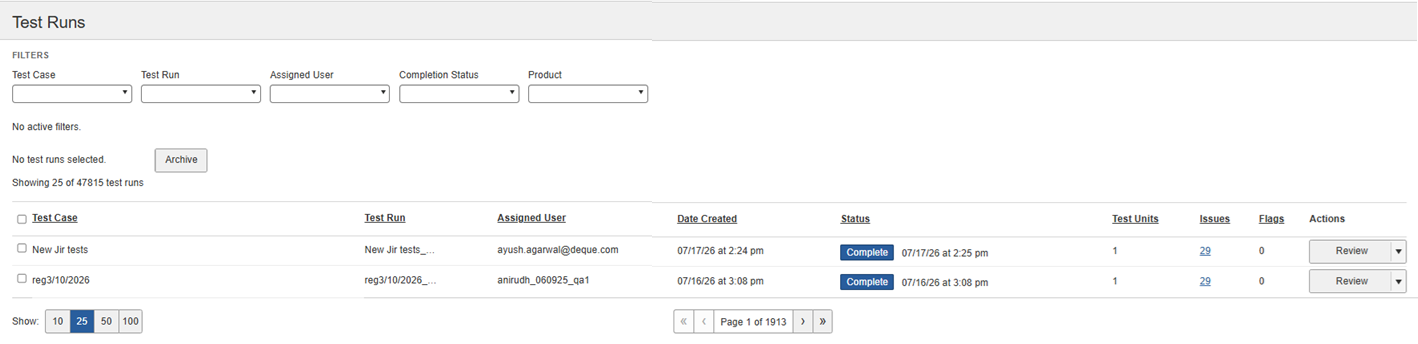
On the Axe Auditor homepage, click Test runs. The Test Runs page appears.
-
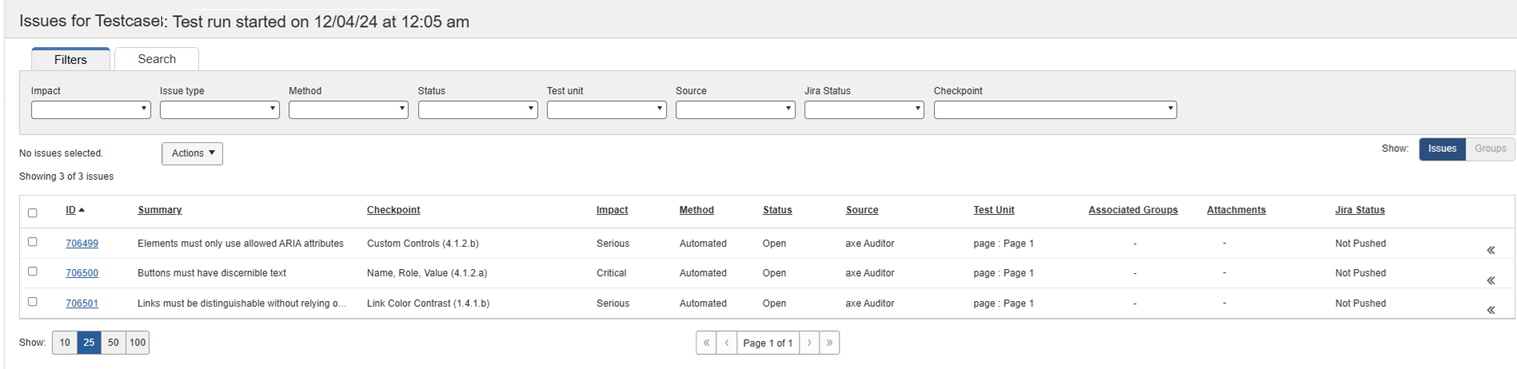
From the available test case list, choose a test case and click the issue link under the Issues column. The Issues page appears.
-
Select an issue under the ID column and click the issue ID link. The View Issue page appears.
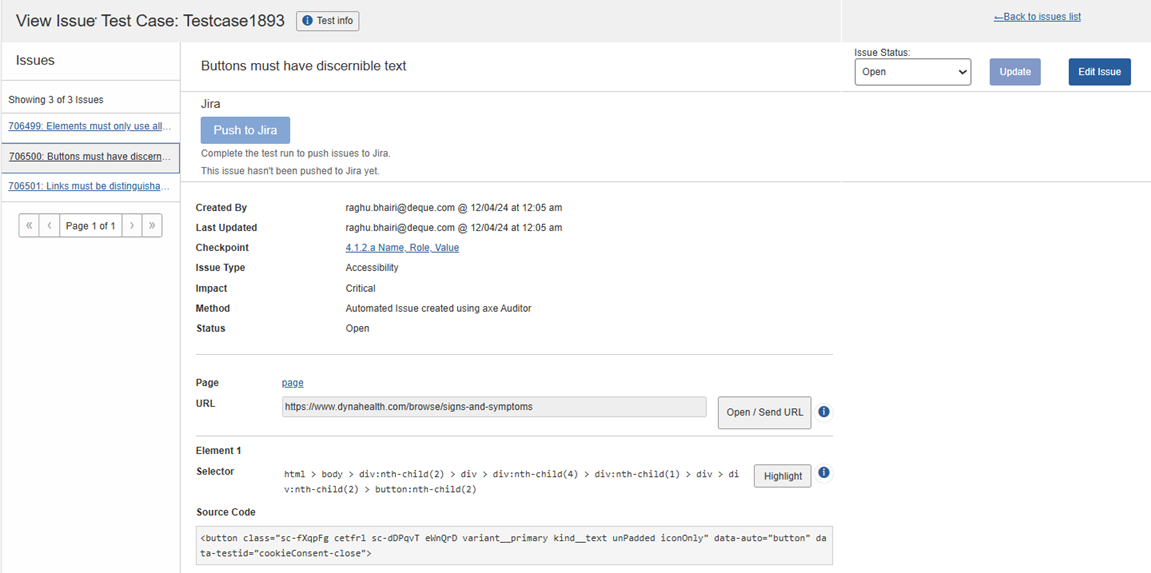
The Push to Jira option will be available only for completed test runs.
-
Click the Push to Jira option. The Push issue to Jira dialog appears.
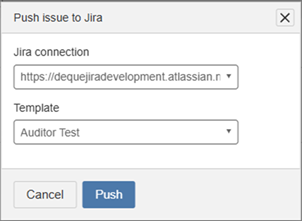
Note: You can push an issue to Jira only if the test belongs to a client with a configured Jira connection else the Move this test to a client that has a Jira connection to push this issue warning message will appear.
-
Select the appropriate connection from the Jira connection drop-down.
-
Select the required template from the Template drop-down.
-
Click Push. The Pushed to Jira page appears.
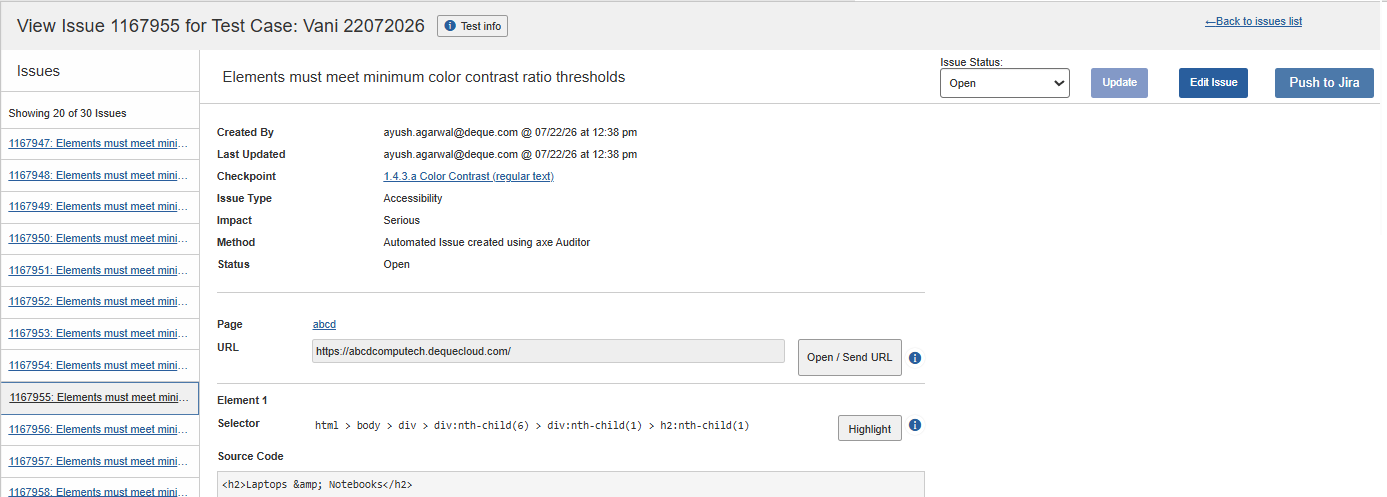
Field Description Push to Jira Pushes the issue to the configured Jira project. After the issue is successfully pushed, this button is disabled to prevent duplicate pushes. Status Displays the current Jira status of the pushed issue. View in Jira Opens the pushed issue in Jira. Push history S the Jira issue key, the user who pushed the issue, and the date the issue was pushed to Jira.
Send Multiple Issues to a Jira
To send multiple issues to Jira, perform the following steps:
-
On the Axe Auditor homepage, click Test runs. The Test Runs page appears.
-
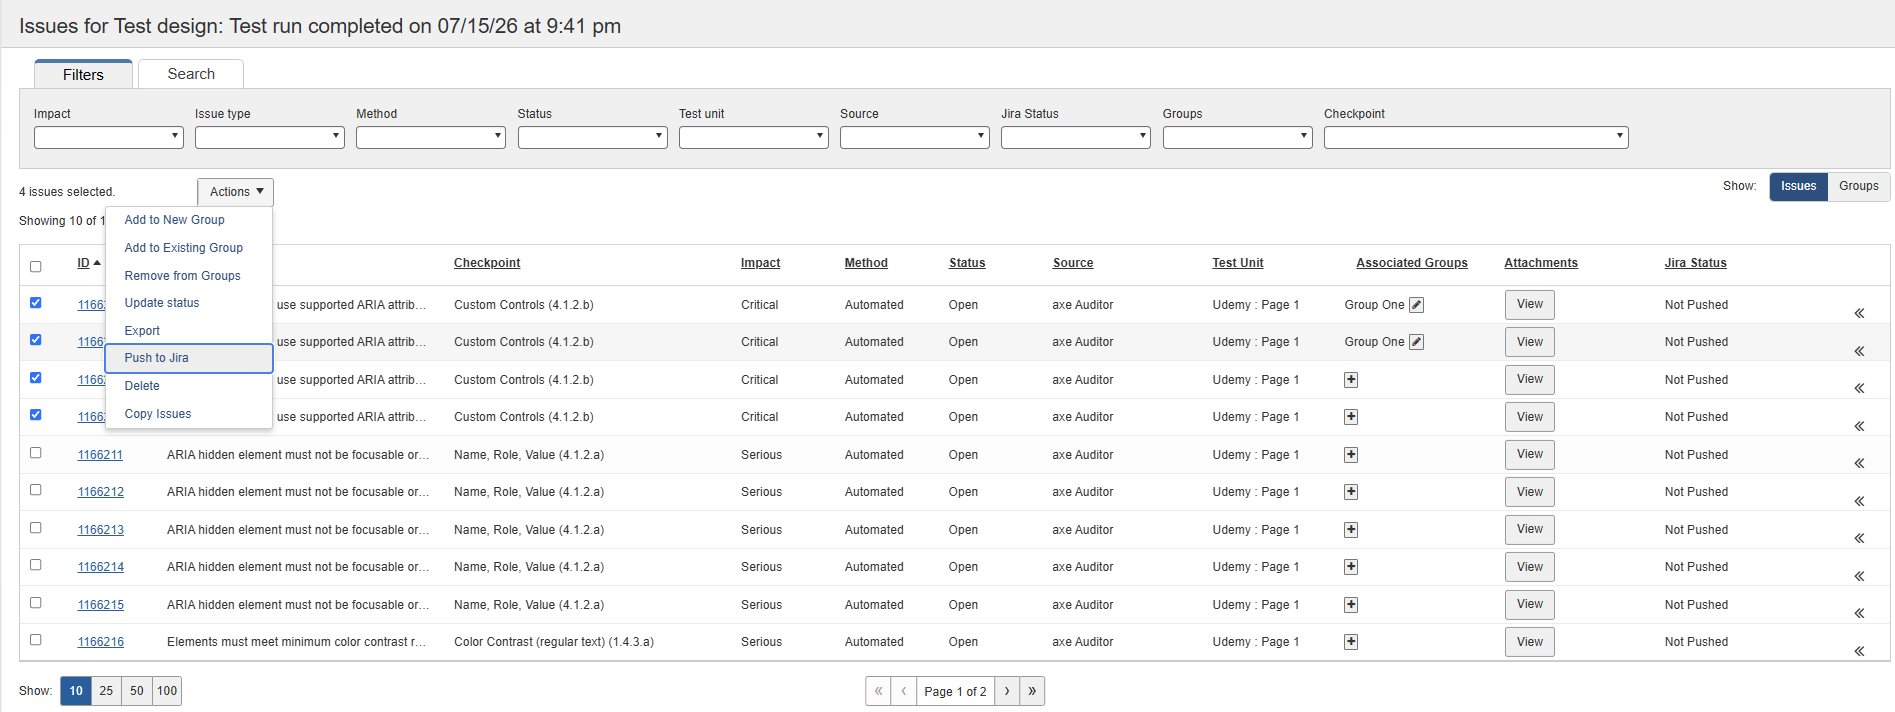
From the available test case list, choose a test case and click the issue ID link under the Issues column. The Issues page appears.
-
Select multiple issues under ID column, click the Actions drop-down, and then click Push to Jira. The Push issue to Jira dialog appears.
-
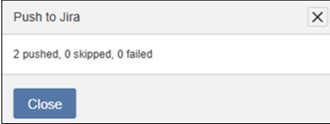
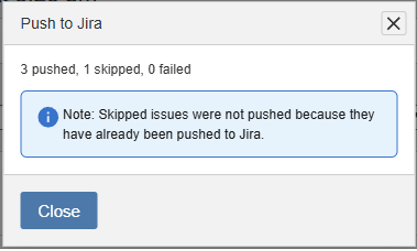
Click Push. The Push to Jira dialog appears. The first dialog is a successful push and the second dialog provides details on the number of issues that were pushed, skipped with the appropriate note, and failed during the push operation.
Note: Auditor creates multiple Jira tickets (one Jira ticket of each Auditor issue) for multiple Auditor issues for bulk operations.