
Sending Issues to Jira
Not for use with personal data
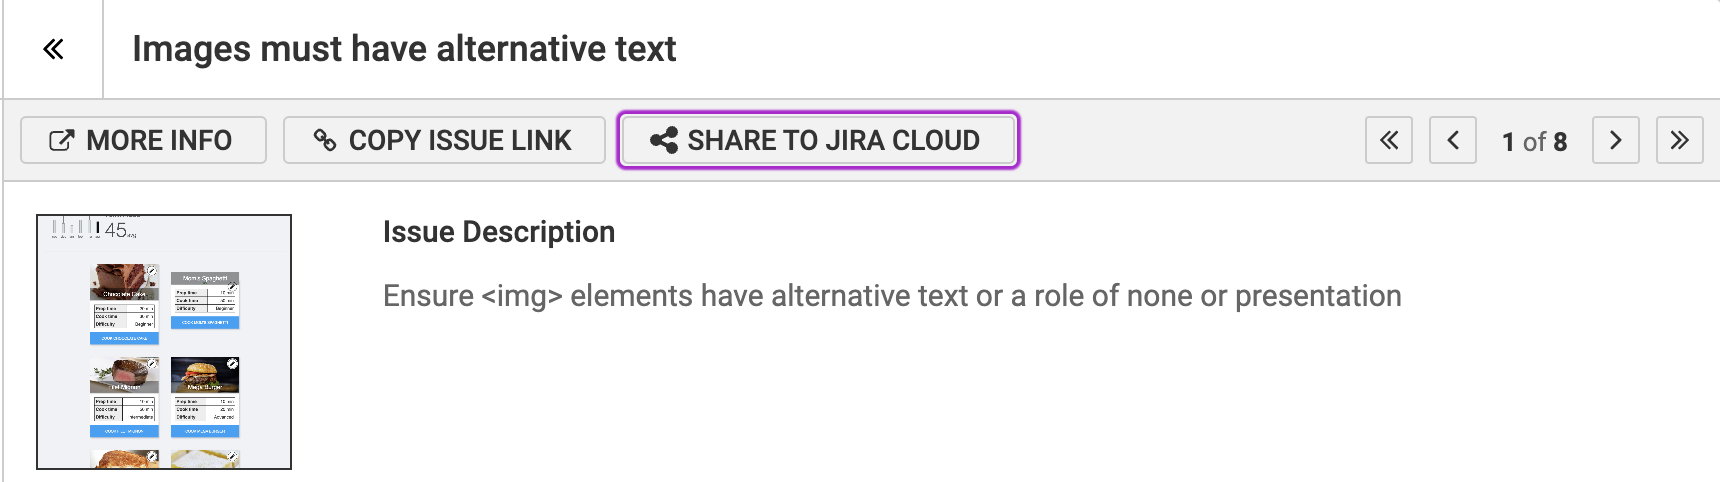
Sending issues to Jira can be done from an axe DevTools Extension issues report. On this report you can activate either the "SHARE TO JIRA" button, which will send the currently viewed issue to Jira, or the "SHARE ALL TO JIRA" button, which will send the entire group of issues into 1 single Jira ticket.
Sending a Single Issue to Jira
- In the issues report, navigate to the issue you would like to send to Jira
- Click the "SHARE TO JIRA" button
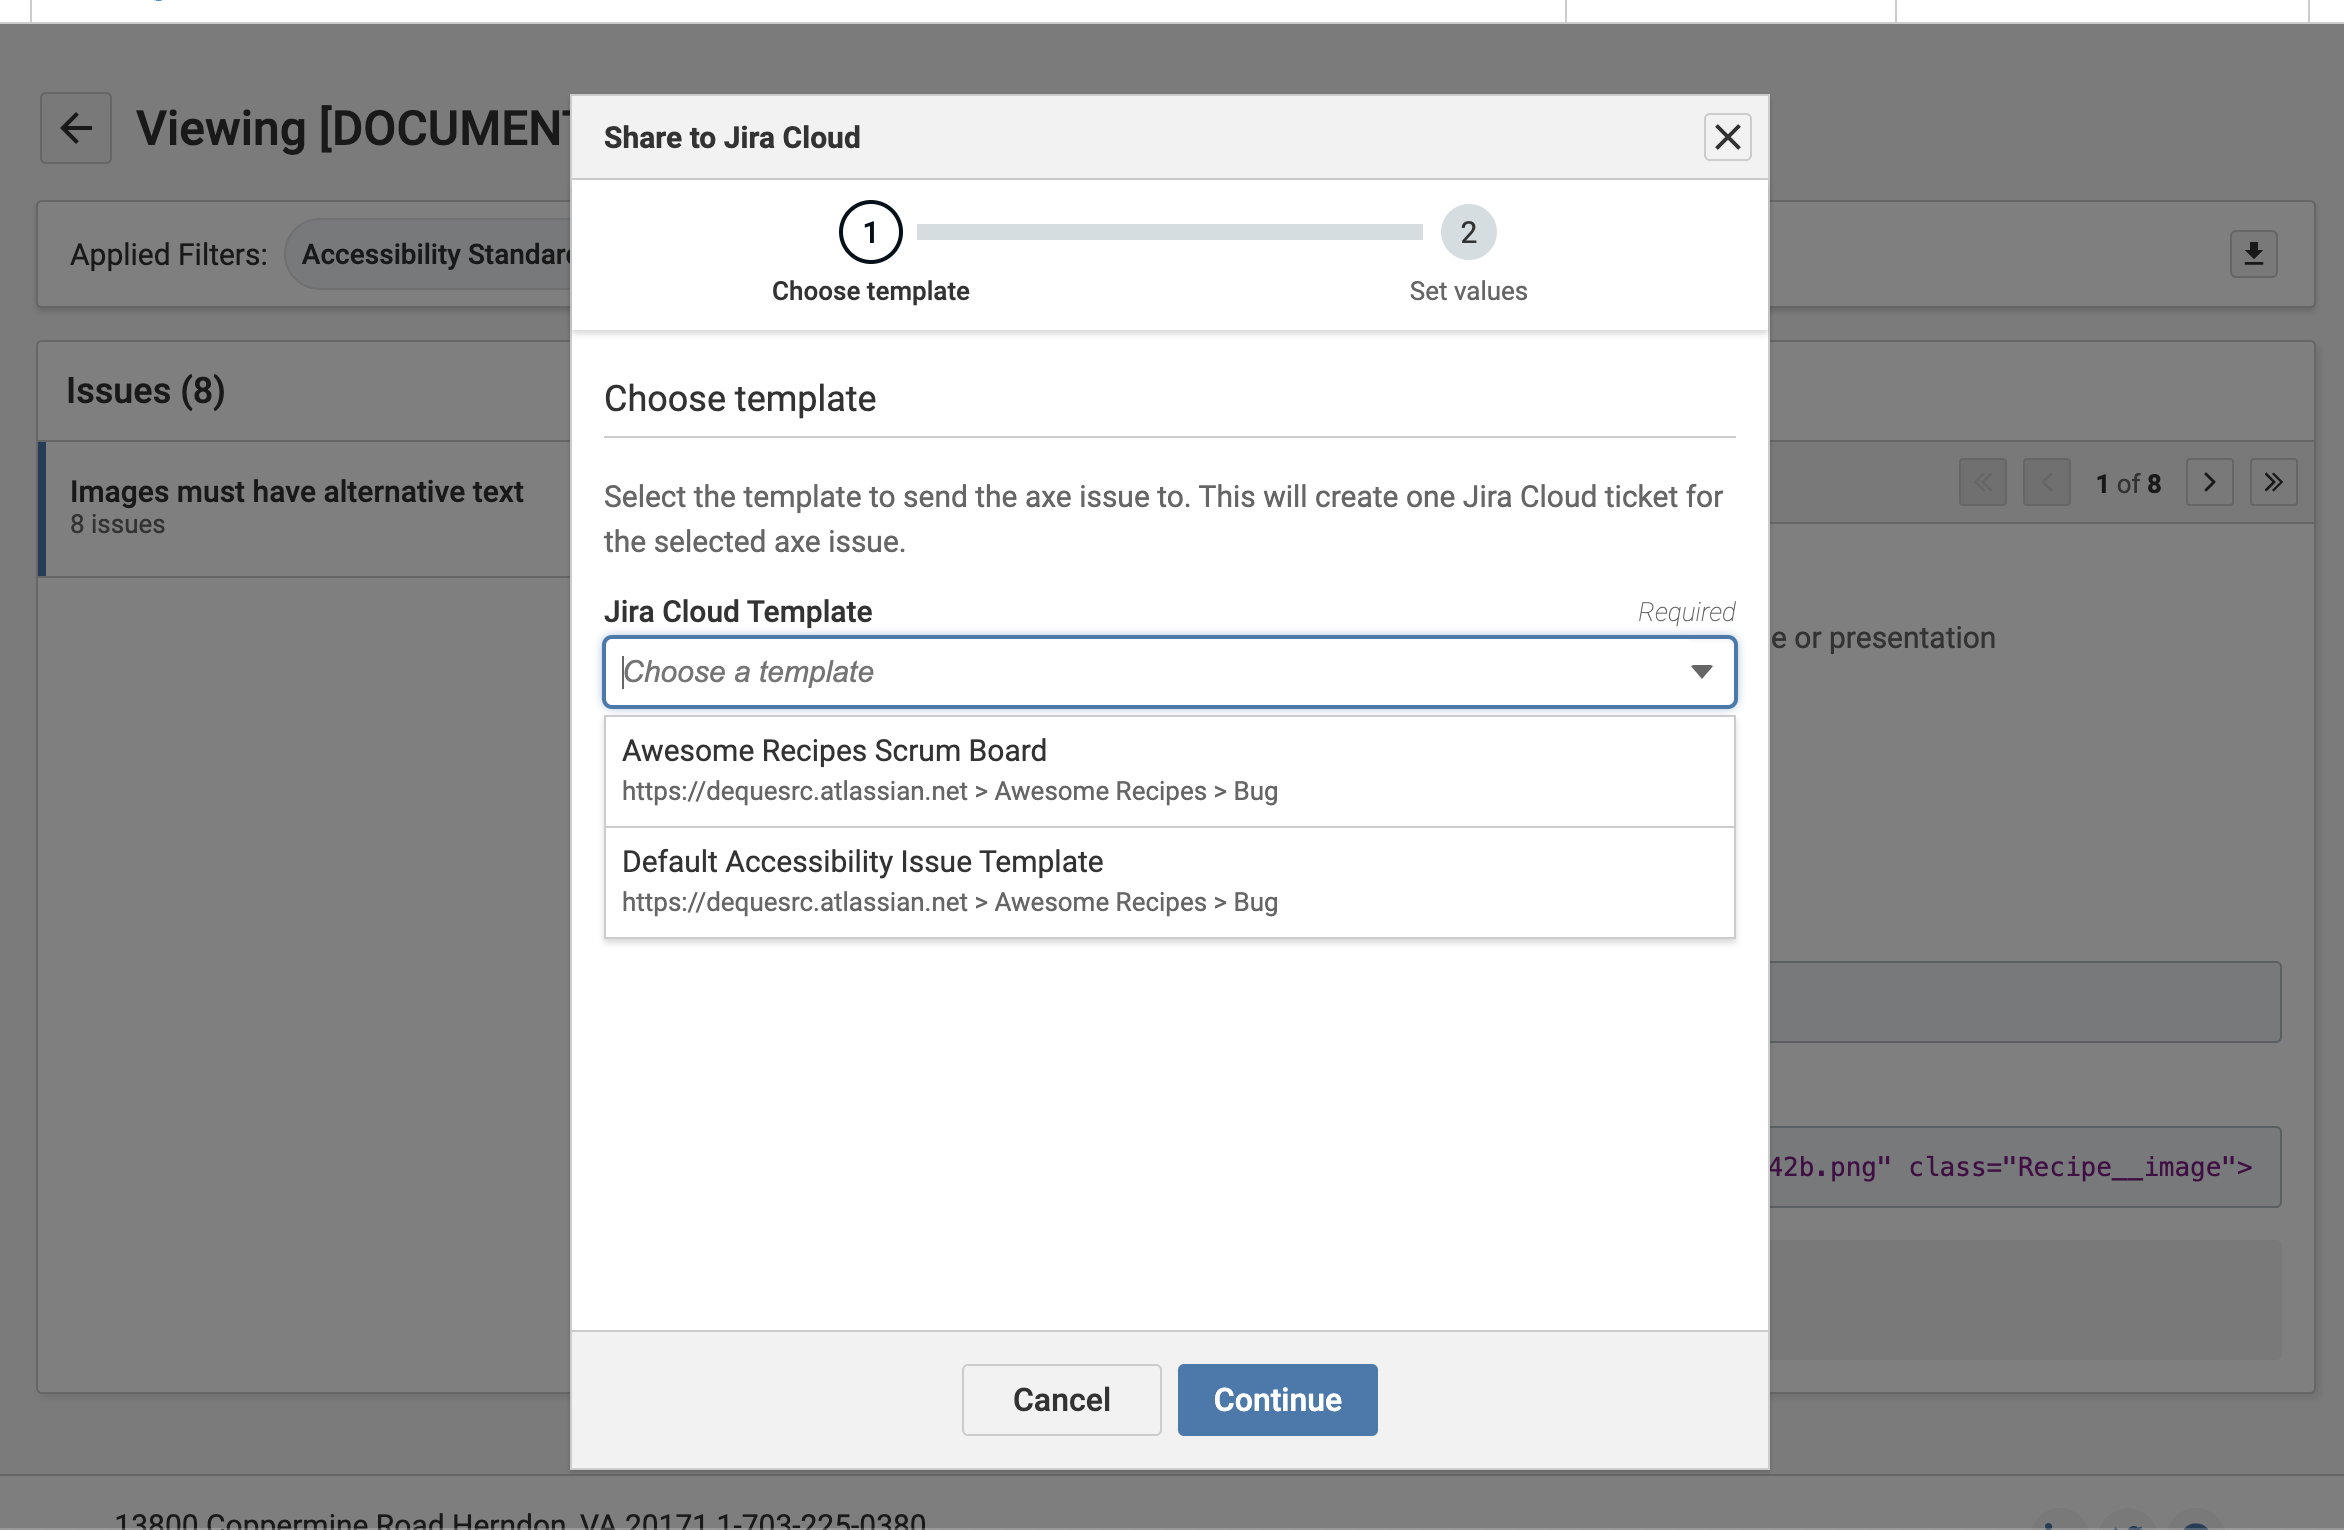
- Select the Project, Issue Type and Template you'd like to use
- Review the data that will be sent off to Jira, ensuring that all required fields have a valid value
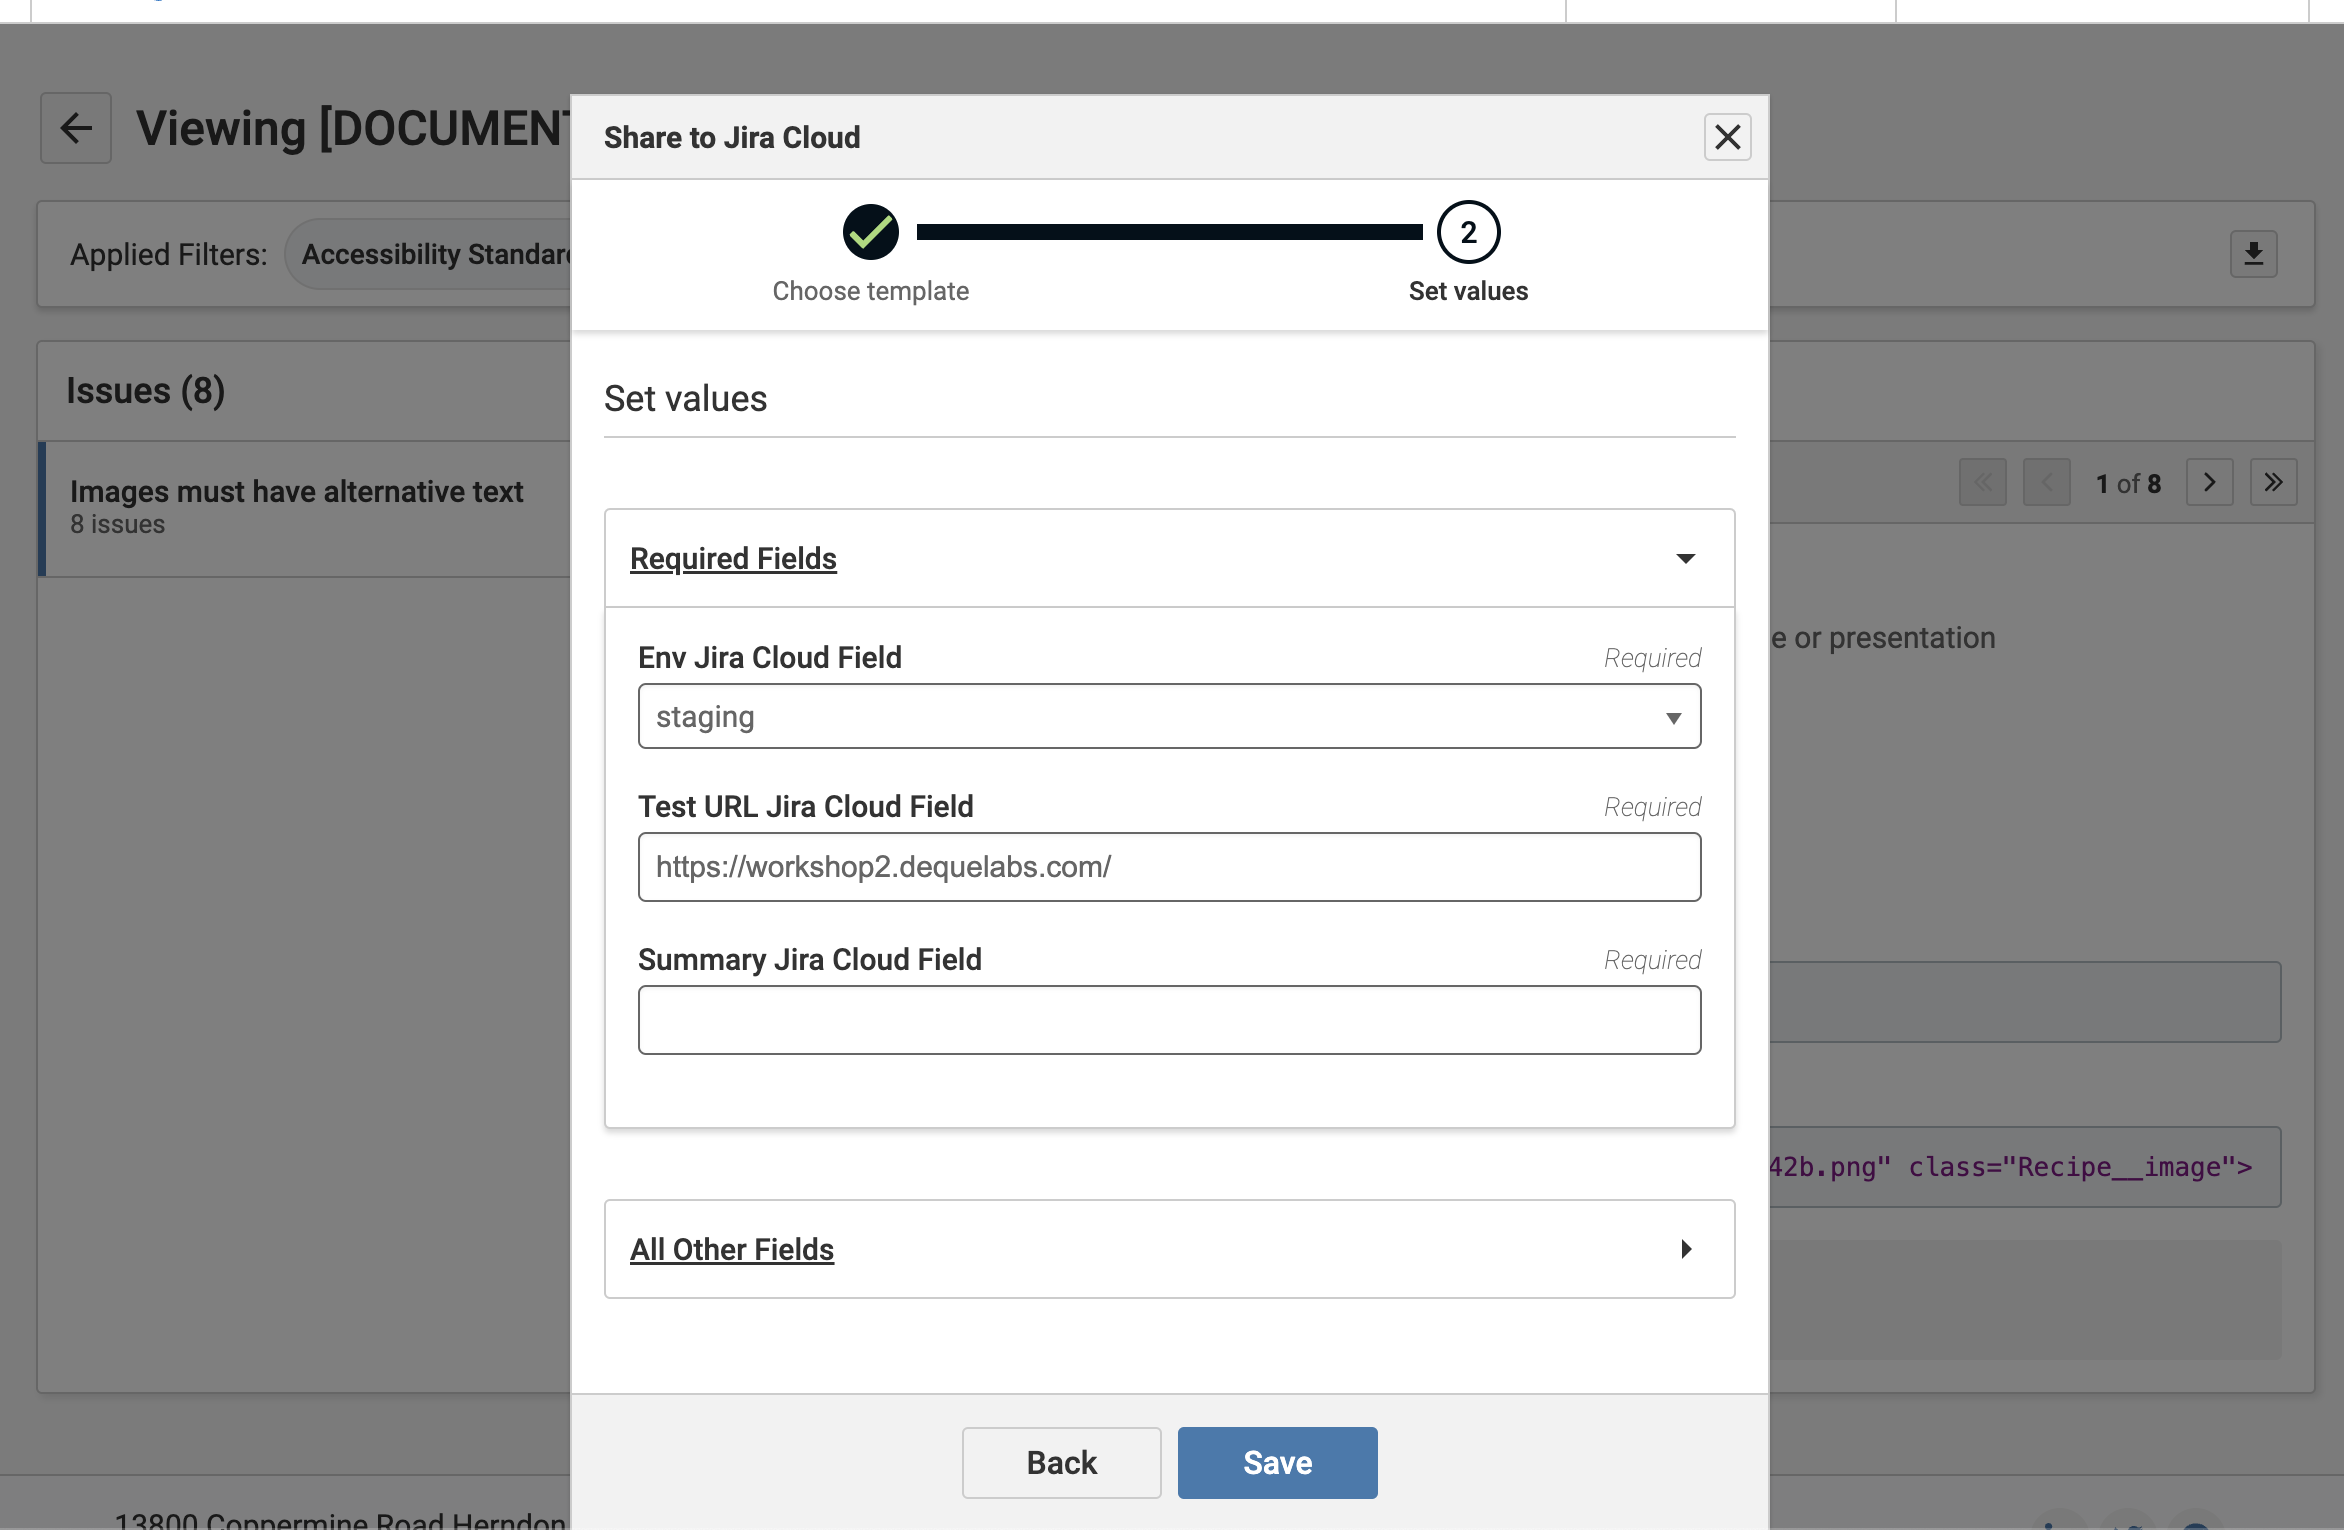
- Click "Send"
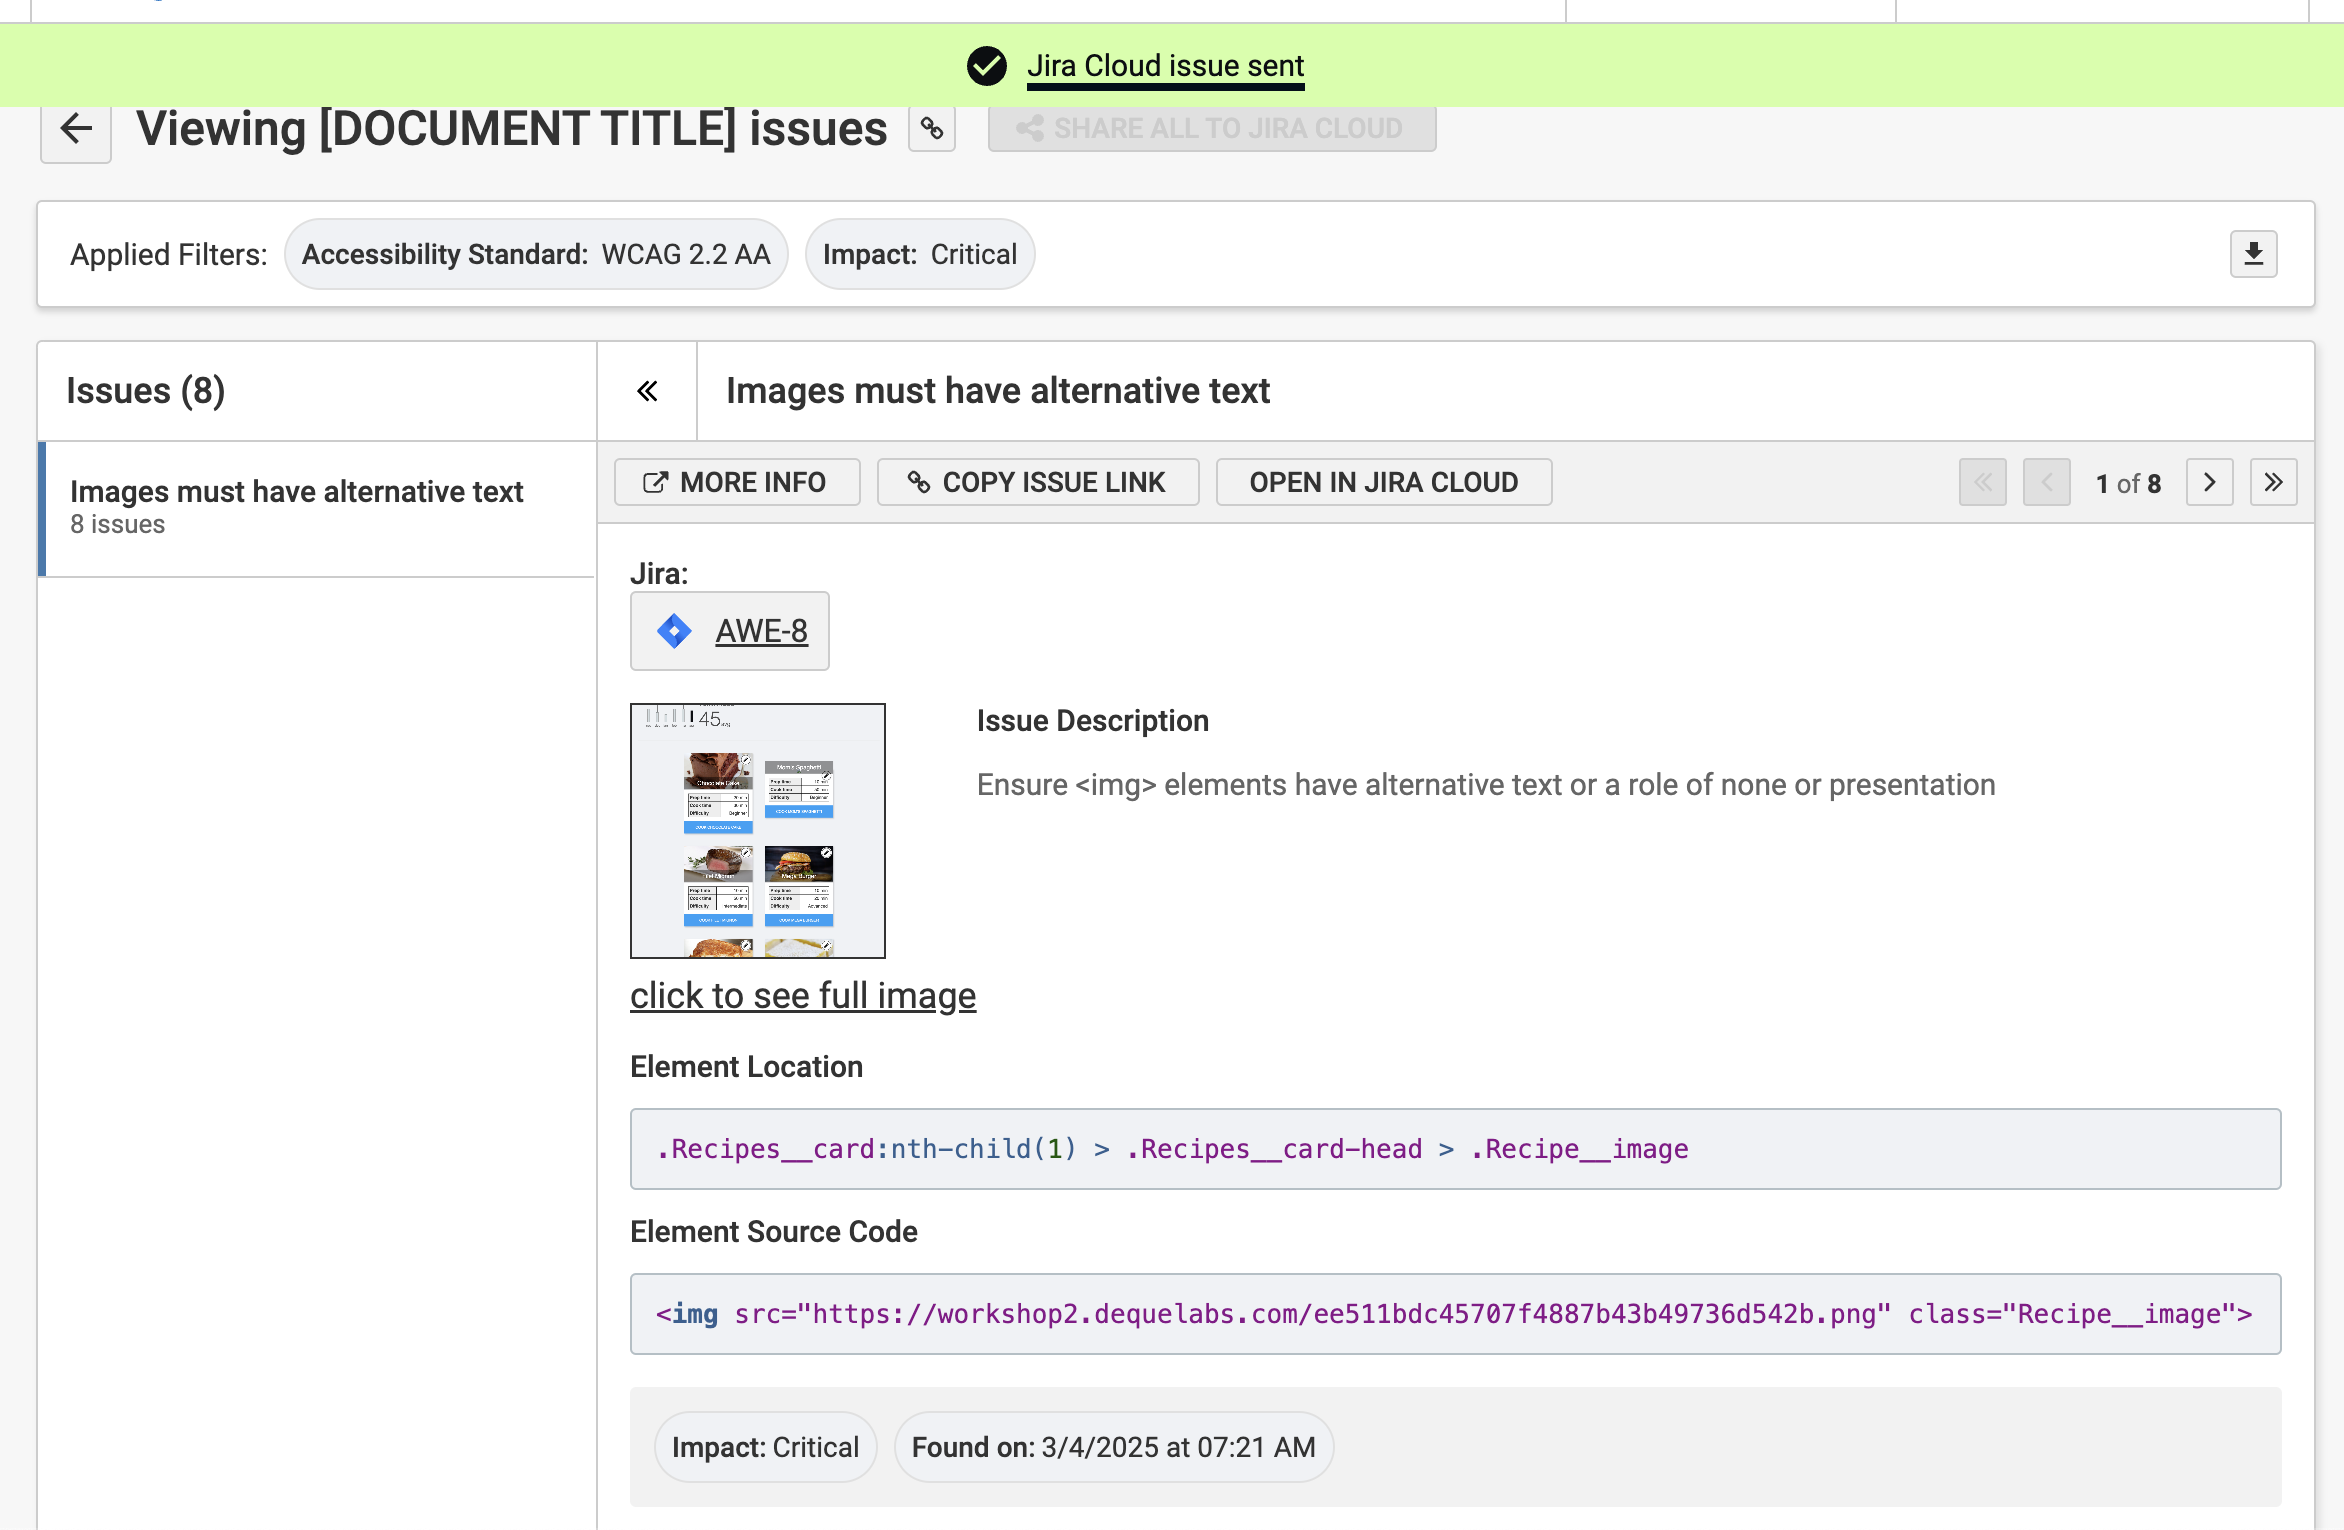
- Once issue is sent, a "Jira issue sent" success notification will be rendered along with an "Open in Jira" link as well as a Jira issue key link within the issue details
Sending Multiple Issues to Jira
- In the issues report, navigate to the group of issues you would like to send to Jira
- Click the "SHARE ALL TO JIRA" button
- Select the Template, Project and Issue Type you'd like to use
- Click "Send"
- Once issues are sent, a success notification will be rendered along with "Open in Jira" links for each issue as well as a link within each issue's details
Prerequisites
Before sending issues to Jira, ensure you have:
- Jira connection established: A Jira instance must be connected through the axe Account Portal
- Template configured: At least one template must be created for the target project and issue type
- Proper permissions: The Jira connection user must have permission to create issues in the target project
- Required fields mapped: All required Jira fields must be mapped in the template
Using Templates
When sending issues to Jira, you'll need to select a template that matches your target project and issue type. Templates help ensure consistent issue creation by mapping axe issue fields to Jira fields.
For detailed information about creating and managing templates, see our Templates documentation.