Updating axe® Reports
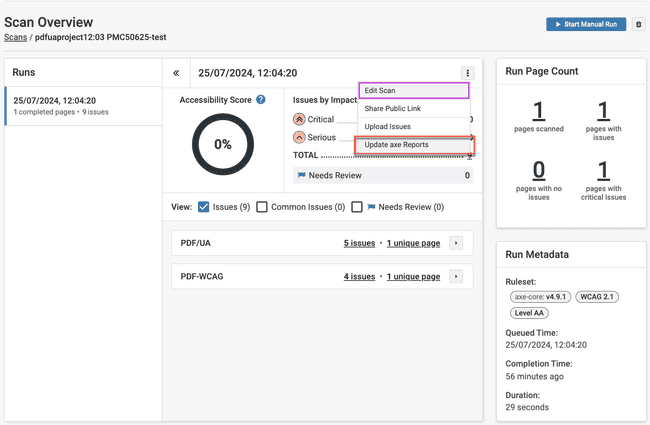
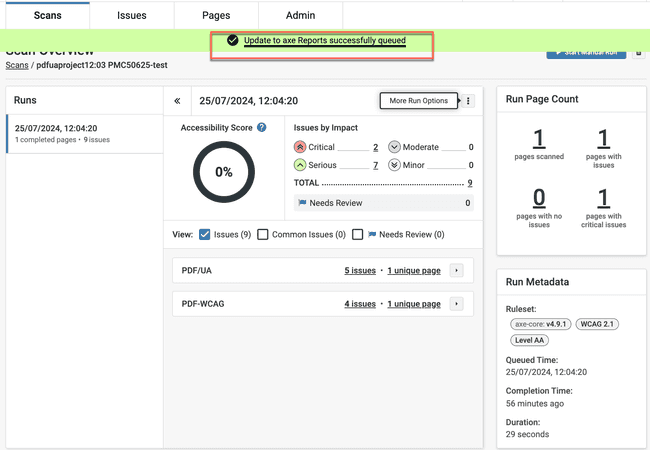
Use the Update axe® Reports option to update axe® Reports with the latest scan details of the project. To do this, select the More Run Options ellipses icon button and then the Update axe® Reports option.
The scan run is queued and successfully updated to axe® Reports. The scan data will appear in axe® Reports with the scan name from axe Monitor.
This option is visible to the user only after the option, "Do you want this scan to appear in axe® Reports?" is selected as Yes for the scan while it is being created. This option appears in the Advanced Settings section of the Scan creation wizard. To know more about this, read the topic, Fine Tuning the Scan Settings.
Updating Scan Groups as Dimensions in axe® Reports
If sub-dimensions are set up in axe® Reports, and you have assigned scans to scan groups in axe Monitor and configured the scan to update axe® Reports, you can update the assigned scan groups as Dimensions. This process involves three scenarios:
Scenario 1: First Update with Sub-Dimensions Set Up
When the scan is updated to axe® Reports for the first time, the assigned scan groups are added as Dimensions.
Scenario 2: Subsequent Updates with Sub-Dimensions Set Up
If dimensions were configured in axe® Reports during the first update, any subsequent updates will ignore the scan groups and keep the existing sub-dimensions unchanged.
Scenario 3: First Update Without Sub-Dimensions Set Up
If sub-dimensions are not set up in axe® Reports, the scan results are updated as usual, but any missing sub-dimensions are ignored.


