Install with Visual Studio
Leverage the integration options that exist within Visual Studio
Prerequisites
There are several prerequisites for a successful installation of axe DevTools. The page highlighting your installation options lists them.
Add a new Package Source to NuGet Sources
Installing and axe DevTools in Visual Studio requires you to extend NuGet to include Deque's Agora artifact repository.
Step 1: Open your project in Visual Studio
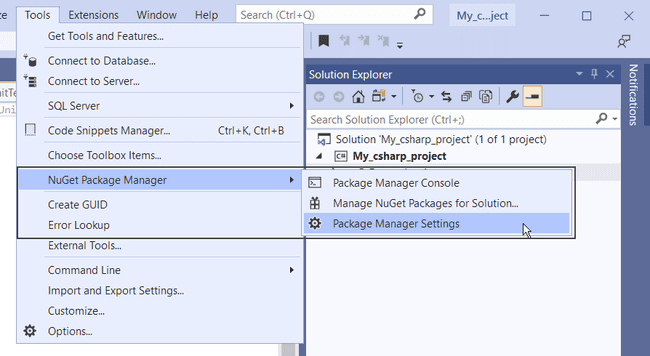
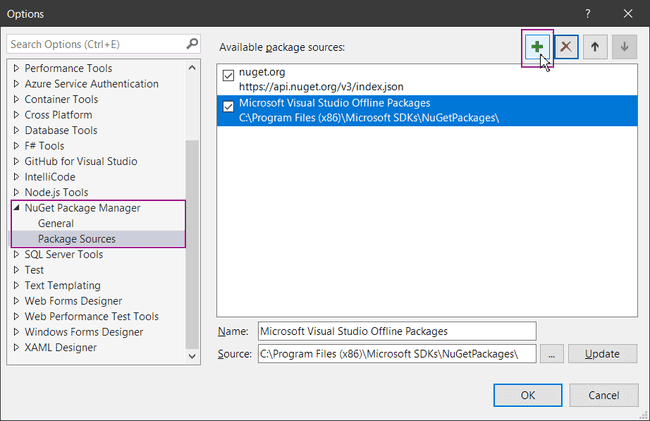
Step 2: Open the package source options via: Tools → Options → NuGet Package Manager → Package Sources and select + to add a new Package source:
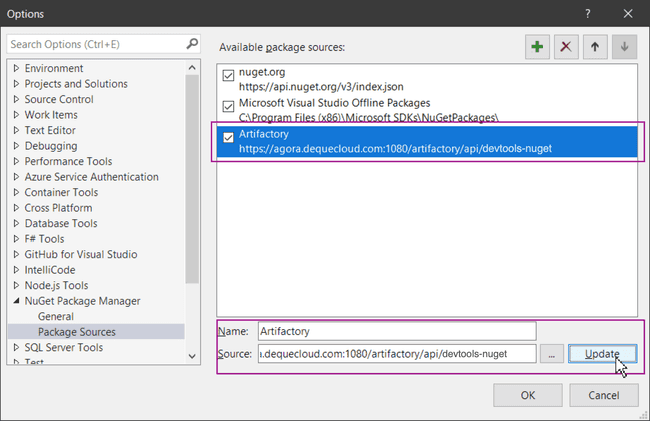
Step 3: Select the new Package Source in the Available package sources: list and then use the ... button to populate the new Package source fields:
Name: Artifactory
Source:
https://agora.dequecloud.com/artifactory/api/nuget/devtools-nuget
Step 4: Select Update to save the new package source details. Select OK to dismiss the options dialog.
Add your Agora credentials to access the package source
Your Deque representative will provide you with Agora login credentials. You'll need to create an Identity Token by logging into Agora and click on the welcome banner in the top right corner. Choose Edit Profile and click the Generate an Identity Token button. Follow the steps to create an Identity Token. From there, you'll be able to copy your Identity Token.
Remember to copy your Identity Token's value when creating it, as this will be your only opportunity. Otherwise, you'll have to create a new token.
Identity Tokens expire (usually after a year), so you'll need to recreate your token periodically.
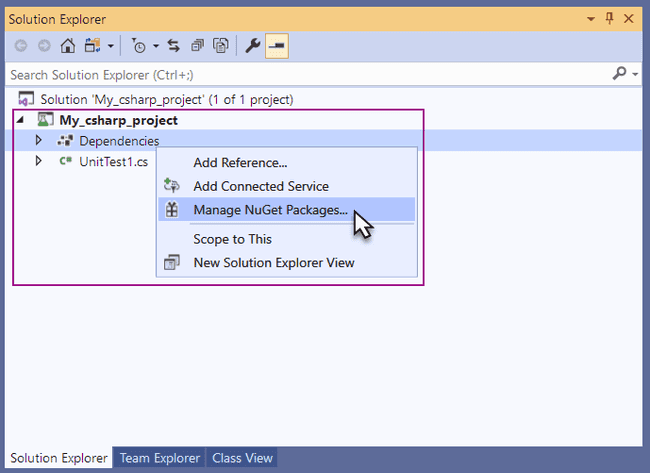
Step 5: Right click on Dependencies in the solution explorer to display the context menu and select Manage NuGet Packages:
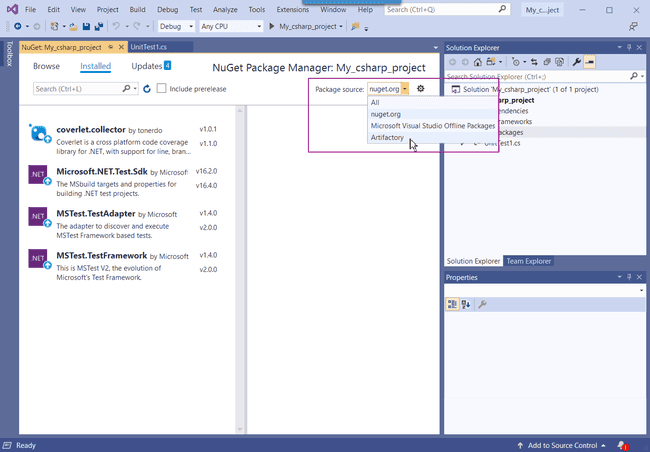
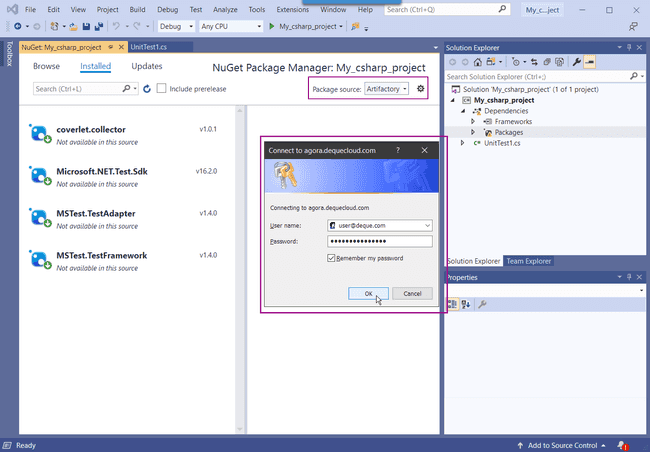
Step 6: Select Artifactory from the package source drop-down list. The Connect to agora.dequecloud.com login modal displays. Populate the username field with the email address you used to log in to Agora and the Identity Token you copied as the password. Check the remember my password box and select ok to complete the login process:
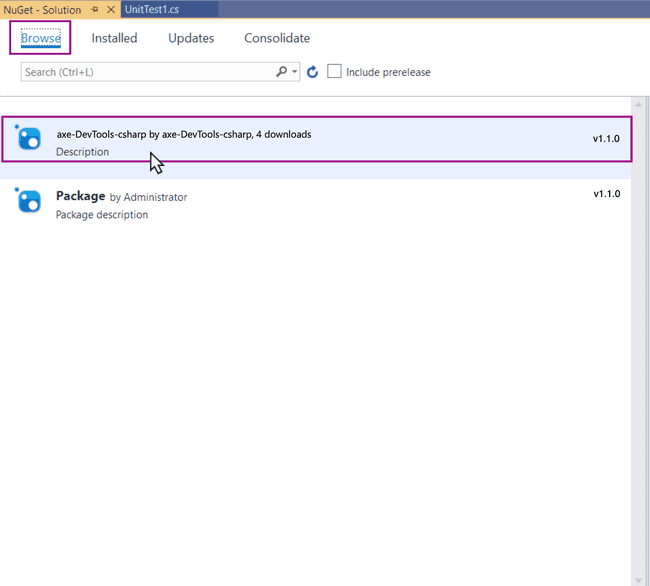
Step 7: Switch to the browse tab when you are logged in to Artifactory. Select the axe-devtools-selenium package
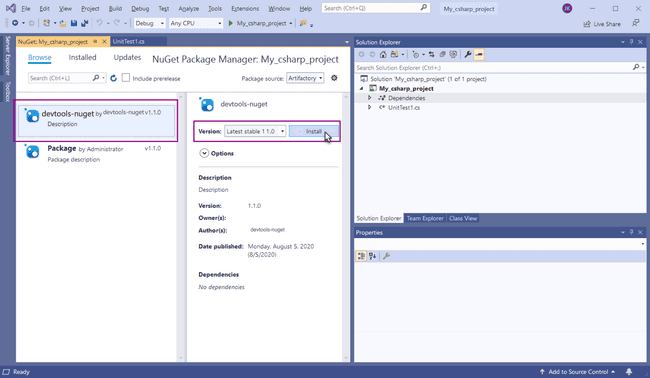
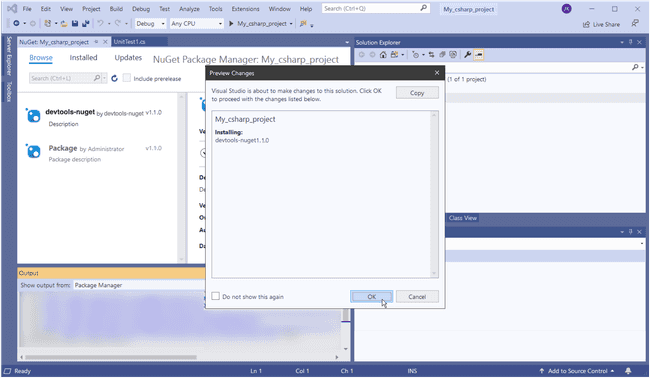
Step 8: Select Install and then select OK to accept the preview changes listed in the modal that displays.
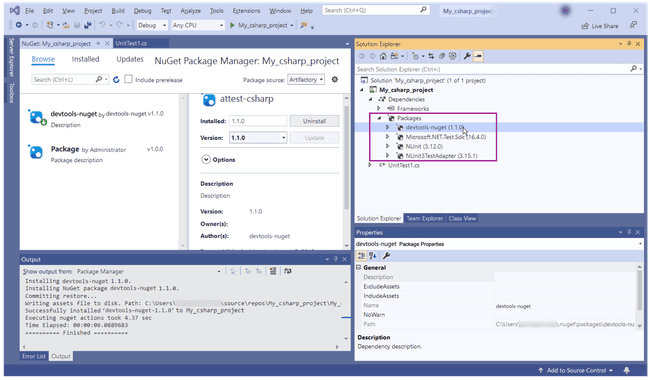
The NuGet output panel displays the installation status of the package. Expand the packages folder in the solution explorer to verify successful installation of the axe-devtools-selenium package:
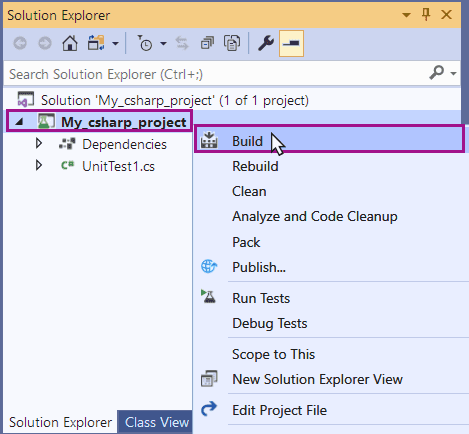
Step 7: Close the NugGet panel. Select your project in the solution explorer and access the context menu and select Build:
Step 8: Select your project in the solution explorer, open the context menu, and select run tests to run all the tests in your project:
About Visual Studio generated project files
Visual Studio generates a number of files specific to the current user upon building a project. These files are visible in the windows file explorer where the project and solution are saved. Generated files include bin and obj folders in the project folder, and a \Users\username\AppData\Roaming\NuGet\NuGet.config file. There is no need to store the generated files in source repository, especially if the new project is intended for use by multiple users to test your project.
Running Tests
Run the tests in your Visual Studio project by selecting the project name in the solution explorer and accessing the context menu to select run tests.

